
How to Sew a Drawstring Bag
Drawstring bags are a fun way to practice some fundamental bag making skills on a beginner-friendly project. They’re perfect for toting a knitting project, some handsewing, or even a book and a snack while you’re on the go. Let’s make one together!
(This post may contain affiliate links)
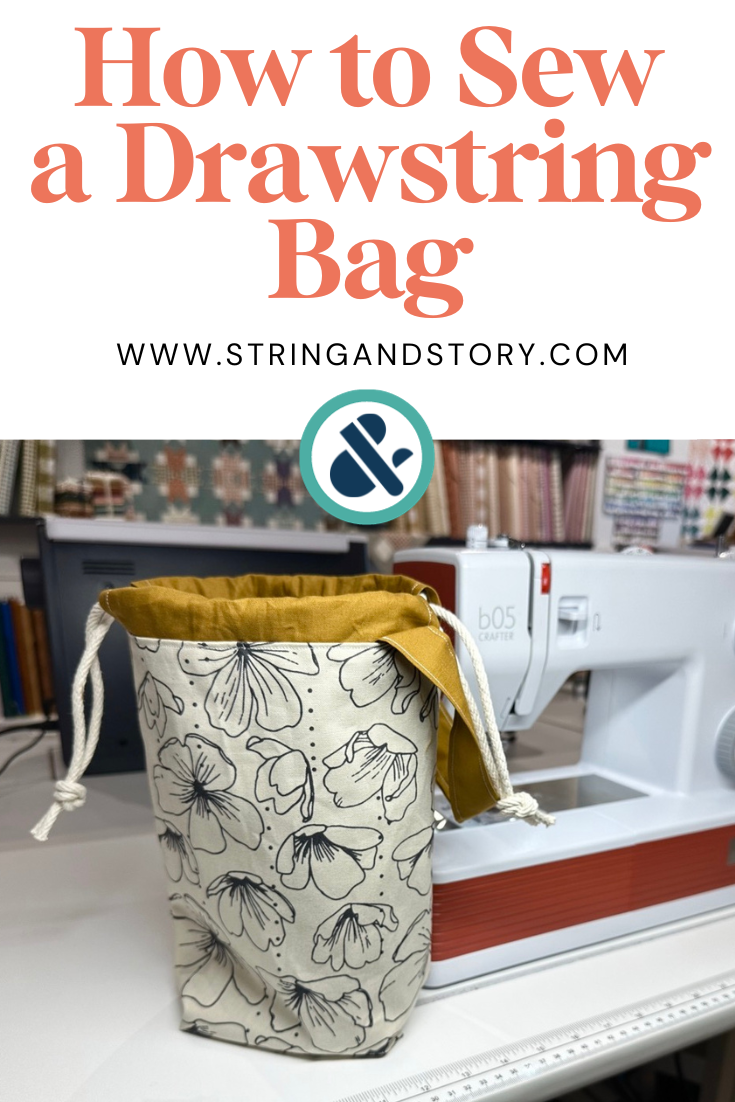
Whether you are brand new to sewing, new to bag making, or just looking for a quick, fun project, this tutorial is for you! These drawstring bags are perfect for carrying small projects, a book, as a wristlet purse, or even as a gift bag. You can totally customize the size for your exact needs, too.
Supplies & Cutting
Supplies
1 fat quarter (18 x 21 inches) for the exterior of the bag
1 fat quarter for the lining and accents
2 pieces of cotton rope, cord, or ribbon, 30” long each
OPTIONAL: medium weight fusible interfacing (approximately a fat quarter sized piece)
Sewing machine, fresh needle, thread, scissors, ruler, marking tool, iron and ironing board
Cutting
From exterior: Two (2) pieces 9.5 x 12 inches
From lining: Two (2) pieces 9 x 12 inches, two (2) pieces 9 x 4 inches, one (1) piece 4 x 12 inches
From interfacing (optional): Two (2) pieces 9.5 x 12 inches
Note: If you are new to sewing, these pieces can be cut by marking the fabric and using scissors or by using a rotary cutting. If you are new to rotary cutting, please check out this tutorial for safety and best practices
Video
Directions
All seam allowances are 1/4”
Take the two rope sleeve pieces (9 x 4”). Press each short end in by 1/2 inch and sew in place to finish (repeat a total of four times). Press each rope sleeve in half lengthwise
Take the bag handle (4 x 12”). Press in half lengthwise, then open back up. Take each long edge and press in to the center crease. Press lengthwise again (now both long raw edges are folded to the inside. Top stitch down each long side 1/8” from the edge
Take the two exterior bag pieces (9.5 x 12”) and place right sides together. Sew down one long side, across the bottom, and up the other long side. Back stitch at the beginning and end
Take the two interior bag pieces (9 x 12”) and place right sides together. Sew down one long side and across the bottom for 3”. Back stitch at the beginning and end. Repeat starting on other long side. This leaves a 3” opening at the bottom of the bag lining
On all four BOTTOM corners of the bag exterior and bag interior, mark a 1 x 2” rectangle. Cut out the rectangle. “Kiss” the side seam and bottom seam together to box the corners, and sew 1/4” across the “kissed” edge. Repeat for all four bottom corners. Turn the EXTERIOR of the bag right side out
Take the completed bag exterior, the handle, and the two rope sleeve pieces. Pin the bag handle to the outside of the bag exterior, aligning the raw edges of the handle with the raw edge of the top of the bag. Then, center the rope sleeve pieces on each side of the bag exterior, aligning the raw edges. Pin in place, then baste by sewing all the way around the top edge of the bag exterior at 1/8”
Insert the bag exterior (with handle and rope sleeves attached) into the bag lining. The right sides of the interior and exterior should be touching. Align the top raw edges and pin in place. Sew at 1/4”; back stitch at the beginning and end
Turn bag through the bottom slit of the bag lining. Then, sew lining slit shut with a 1/8” seam allowance. Push bag lining down into the exterior.
Press the lining and bag exterior away from the rope sleeves to form a crisp edge, and top stitch all the way around at 1/8”; back stitch at the beginning and end
Finally, insert rope. Take the first piece, and using a safety pin to guide it through the sleeve, insert down one side and back up the other so both ends are on one side of the bag. Tie the ends together in a knot. Repeat from the other side with the second piece of rope
Huzzah! Give that bag its first cinch! You did it!

Resources
BLOGS: Easy Make & Take Projects
BLOGS: Quilting & Sewing Basics
Classes & more: Quilting Rockstar Library
bernette b05 Crafter: Shop here