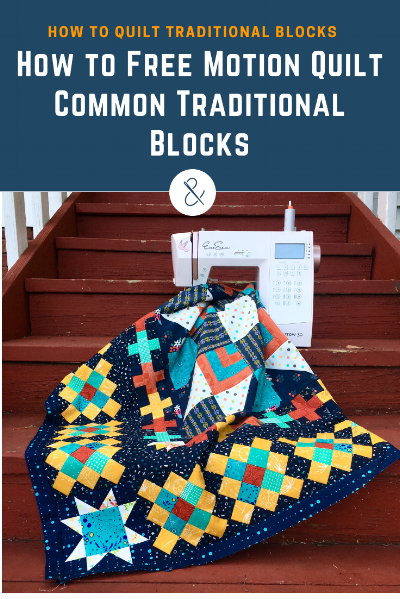
How to Quilt Granny Squares, Sawtooth Stars, and Funky Pinwheels
I love getting creative with emphasis when I’m quilting by quilting very densely or even not at all. I also love looking for secondary designs to create or emphasize with creative quilting. Join me for a look at three more classic quilt blocks and see what you find inspiring!
PS This post is part of Quilt Your Own Adventure, where I am quilting my Camp Oda May Moda Bakeshop QAL quilt to inspire you with a variety of quilting ideas for common traditional blocks. Be sure to check out the original post to see the full lineup of content here.
(This post contains affiliate links)

Sometimes we get too hung up on seam lines with our quilting. Either we act like they are the lines in a coloring book and think we must quilt each section in order to do it “right,” or we get so paralyzed by the whole thing that we throw up our hands and choose an all over motif or pantograph (this is not a knock against all over quilting— just a knock against choosing it out of frustration or self-doubt). If you’ve been reading along with this Quilt Your Own Adventure Series from the beginning, you may notice that I’m drawing fewer plans than on the first post or two and that they seem a little “weirder.” That’s because I’ve shown you some of the “normal” stuff to do in squares and triangles already, and I’m really wanting to push you (and me) into out of the ordinary thinking. Remember, everything interesting happens right outside our comfort zones. Because of that, I like to do at least one thing per quilt (or per section in the case of our medallion quilt) that feels a bit out of the box.
Video
Quilting Plans
Practice your quilting on paper before you ever put a needle to your beautiful quilt top. By drawing your plan in advance, you can stitch with confidence! I've arranged the plans by "level," so you can choose ideas that best fit your skill and comfort. When I draw a quilting plan, I'm deciding what parts of the quilt I want to emphasize and how I want to show off the piecing of the quilt. These plans are meant to inspire you-- feel free to use them, mix them up, or design your own plans using some of the ideas you see here!
To read more about How to Make a Quilting Plan, check out this post.
By the way, I looooove lots of quilting! I use 100% cotton Aurifil thread and either cotton or wool batting by Hobbs. All natural fibers stay soft and drapey, even with heavy quilting. If you prefer less dense quilting, you can enlarge, omit, or adapt motifs as you prefer. And don't forget to make use of the weekly live videos during this series to ask any questions you may have about adapting designs.

One last thought on thread: when choosing a color, don’t just plop the spool down on your quilt top. Instead, unwind several inches of thread and lay it across the block. The color that matches best or creates the best effect just might surprise you!
Intro
The Intro level quilting plans uses the four most basic FMQ motifs: meanders, loopy meanders, swirls, and switchbacks. If you are totally new to free motion quilting or if you aren't sure how to grow and develop your skills, I'd love to share my Top Three Tips for Successful Free Motion Quilting! Click here, and I’ll pop it straight over to your inbox!

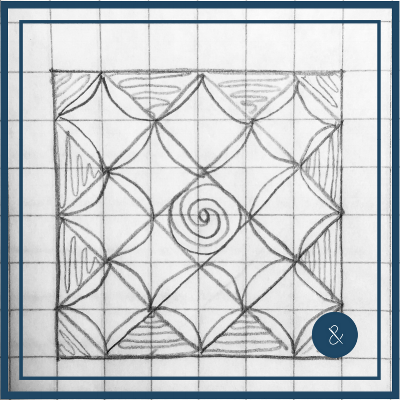
Granny squares are simply squares set on point, and I think continuous curves make them oh-so-elegant. Dorie Hruska is, in my mind at least, the queen of continuous curve quilting, and I love her book Making Connections to learn how to connect the curves and take your curves to the next level.

My inclination with the sawtooth star is to leave the star points unquilted to allow them to POP, but you could also choose to quilt them to change up the effect.

The last round on this picture of Kristin Esser’s quilt-in-progress are the funky pinwheels I’m discussing today


This block presents at least two ways to think about it: as a center diamond with background triangles or as a spinning “pinwheel.” Choose quilting motifs that emphasize whichever view you like better
Moderate
The Moderate level uses the 10 motifs from the first two modules of FMQ Academy, plus walking foot lines. If you have been dabbling in FMQ for a little while and need an exciting push to take your skills to the next level, this is it!


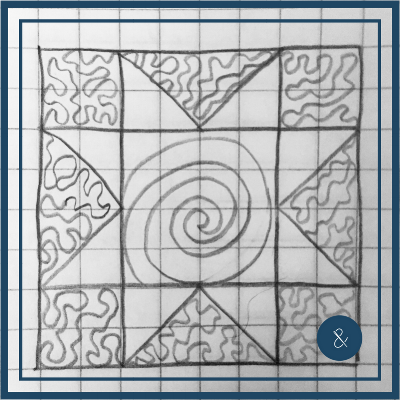
You can choose to treat each block as its own square, or you can look beyond the seams to create some new designs. For the motif on the right, I would stitch in the ditch along the center cross to really make that shape POP.


The quilting plan on the left breaks my habit of leaving star points unquilted and demonstrates how new shapes can be created by ignoring seam lines. Notice the contrast that is created, too, between a very tight, curvy motif (pebbles) and a more linear design (switchbacks). On the right, use a walking foot to add a whole new shape and very modern feel to the center of this traditional block.

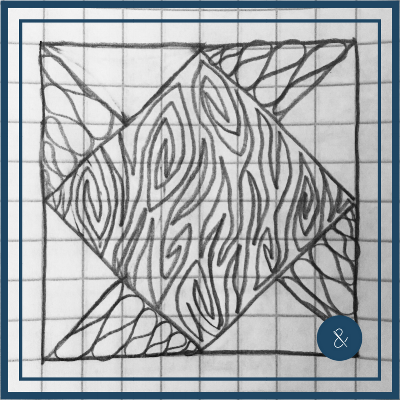
For some reason, wood grain quilting is always an afterthought for me. But the texture is so perfect!
Rockstar
In the Rockstar level, all bets are off-- I'm pulling all kinds of tricks out of my hat, so this level is designed for a confident, more experienced free motion quilter

Both of these motifs are better suited to larger granny squares but not necessarily impossible in smaller. The design on the left isn’t complicated— it could be mostly done with a walking foot


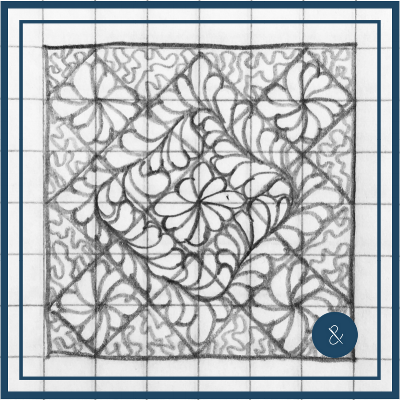
When in doubt on a large center square, add a feather swirl or a continuous curve flower! Create an entirely new effect by using a “border motif” like wishbones inside the block.


These motifs would also work well for a square in a square block— shapes on shapes and texture on texture!
Remember, draw your quilting plan several times of paper before you get started, then quilt one section, one motif at a time. Even the largest quilts get quilted a piece at a time.
Share your quilting progress in the Quilting Rockstars Facebook Group!
PS Don't forget to pin this post so you can find it later!
#quiltyourownadventure