
Quilting Basics: How to Sew a Quarter Inch Seam
When people think of quilting, they think of pretty patchwork, but what is hidden from view is the precise quarter inch seam behind every masterpiece of patchwork. Learn what that means, why it matters, and how to sew one in today’s post.
(This post contains affiliate links)

I make no claims whatsoever to be a perfect quilter. In fact, I love to remind folks that I am not a show quilter. I make quilts to be enjoyed, and if you make a quilt, it is darn well worthy of being shown to everyone you know. Thus, you may even be surprised that i’m writing a post about something as “rule based” as a quarter inch seam (I’m not exactly known for my skill in following rules). And yet, here we are. I’m going to tell you all about the rules of the quarter inch seam, and then I’m going to tell you what I really think, so hang on for the ride!

I just typed, “Who decided a quarter inch seam allowance is best for quilting” into Google. Unfortunately, It didn’t yield any clear results— just a lot of articles like this telling you how to stitch one. Let me tell you, though, from my experience, why a quarter inch seam is so fabulous.
Why Do We Use a Quarter Inch Seam?
Mainly, a quarter inch seam allowance creates stability in your quilt top without creating bulk. If you only stitch a 1/8” seam (though, let’s be honest, we’ve all done it if our pieces are coming in just a little small…), it doesn’t take much fraying for that seam to give way creating a hole in the quilt. On the other hand, a 3/8, 1/2, or 5/8 inch seam adds a lot of extra fabric to the quilt. That’s more fabric to buy, but it’s also a lot of extra fabric to stitch through an a lot more extra weight in the quilt than you might expect. While other high-use, high-wear items like garments require larger seam allowances because the seams are constantly moving up against the wearer’s body, etc, quilting seams, in the end, are safely nestled in the batting of the quilt and quilted down, minimizing movement and wear on the seams over time. Thus, a quarter inch is a bit of a “sweet spot.”

What is a Quarter Inch Seam?
When I say “quarter inch seam,” I’m referring to the measurement from the edge of the fabric, to the furthest side of the stitching thread. Notice that this means the actual fabric from stitching to edge is LESS THAN a quarter inch by a few threads. This is also called a “scant” quarter inch seam.
Why this very specific description? Think about a 3 1/2 inch square. If that square is being pieced into a quilt, we want it to FINISH at 3 inches. That means that when the quilt is totally done, if we laid a ruler across this particular patch of fabric, it would measure 3 inches side to side, both directions. If we are piecing this particular patch into the quilt and measure our quarter inch seam from the edge of the fabric TO the stitching (as opposed to the far side of the stitching), that means that, once the fabric is unfolded, pressed flat, then pieced into the quilt entirely, it will actually be several threads short of 3 inches, maybe even an eighth of an inch. That doesn’t sound like much, but an eighth of an inch is 1/24th or just over 8% of 3 inches. That can really add up patch to patch, especially over a bedside quilt, resulting in a finished quilt several inches smaller than expected. YIKES!
A quarter inch seam matters not only for the finished size of the quilt but also in creating the geometry of patchwork. Traditional quilt patterns are mostly made of squares and triangles, and different effects and shapes are made with color placement. Quilt geometry relies on crisp lines for a beautiful outcome. Thus, “messing with the math" can cut off the points of triangles, etc, leading to a less crisp design.

Video
How to Sew a Quarter Inch Seam
At the most basic level, you can kind of eyeball that sucker, then check it with a ruler or seam gauge (seriously, such a nifty tool. And if mine looks weird in the pictures it’s because Monte’s parting gift to me was chewing on it. Darn cat). The obvious drawback here is that it is wildly unreliable and will likely result in ripping wayyyy to many seams (ain’t nobody got time for that). Thus, let’s look at a couple of tools you can use to quickly, easily, and reliably create a lovely quarter inch seam.
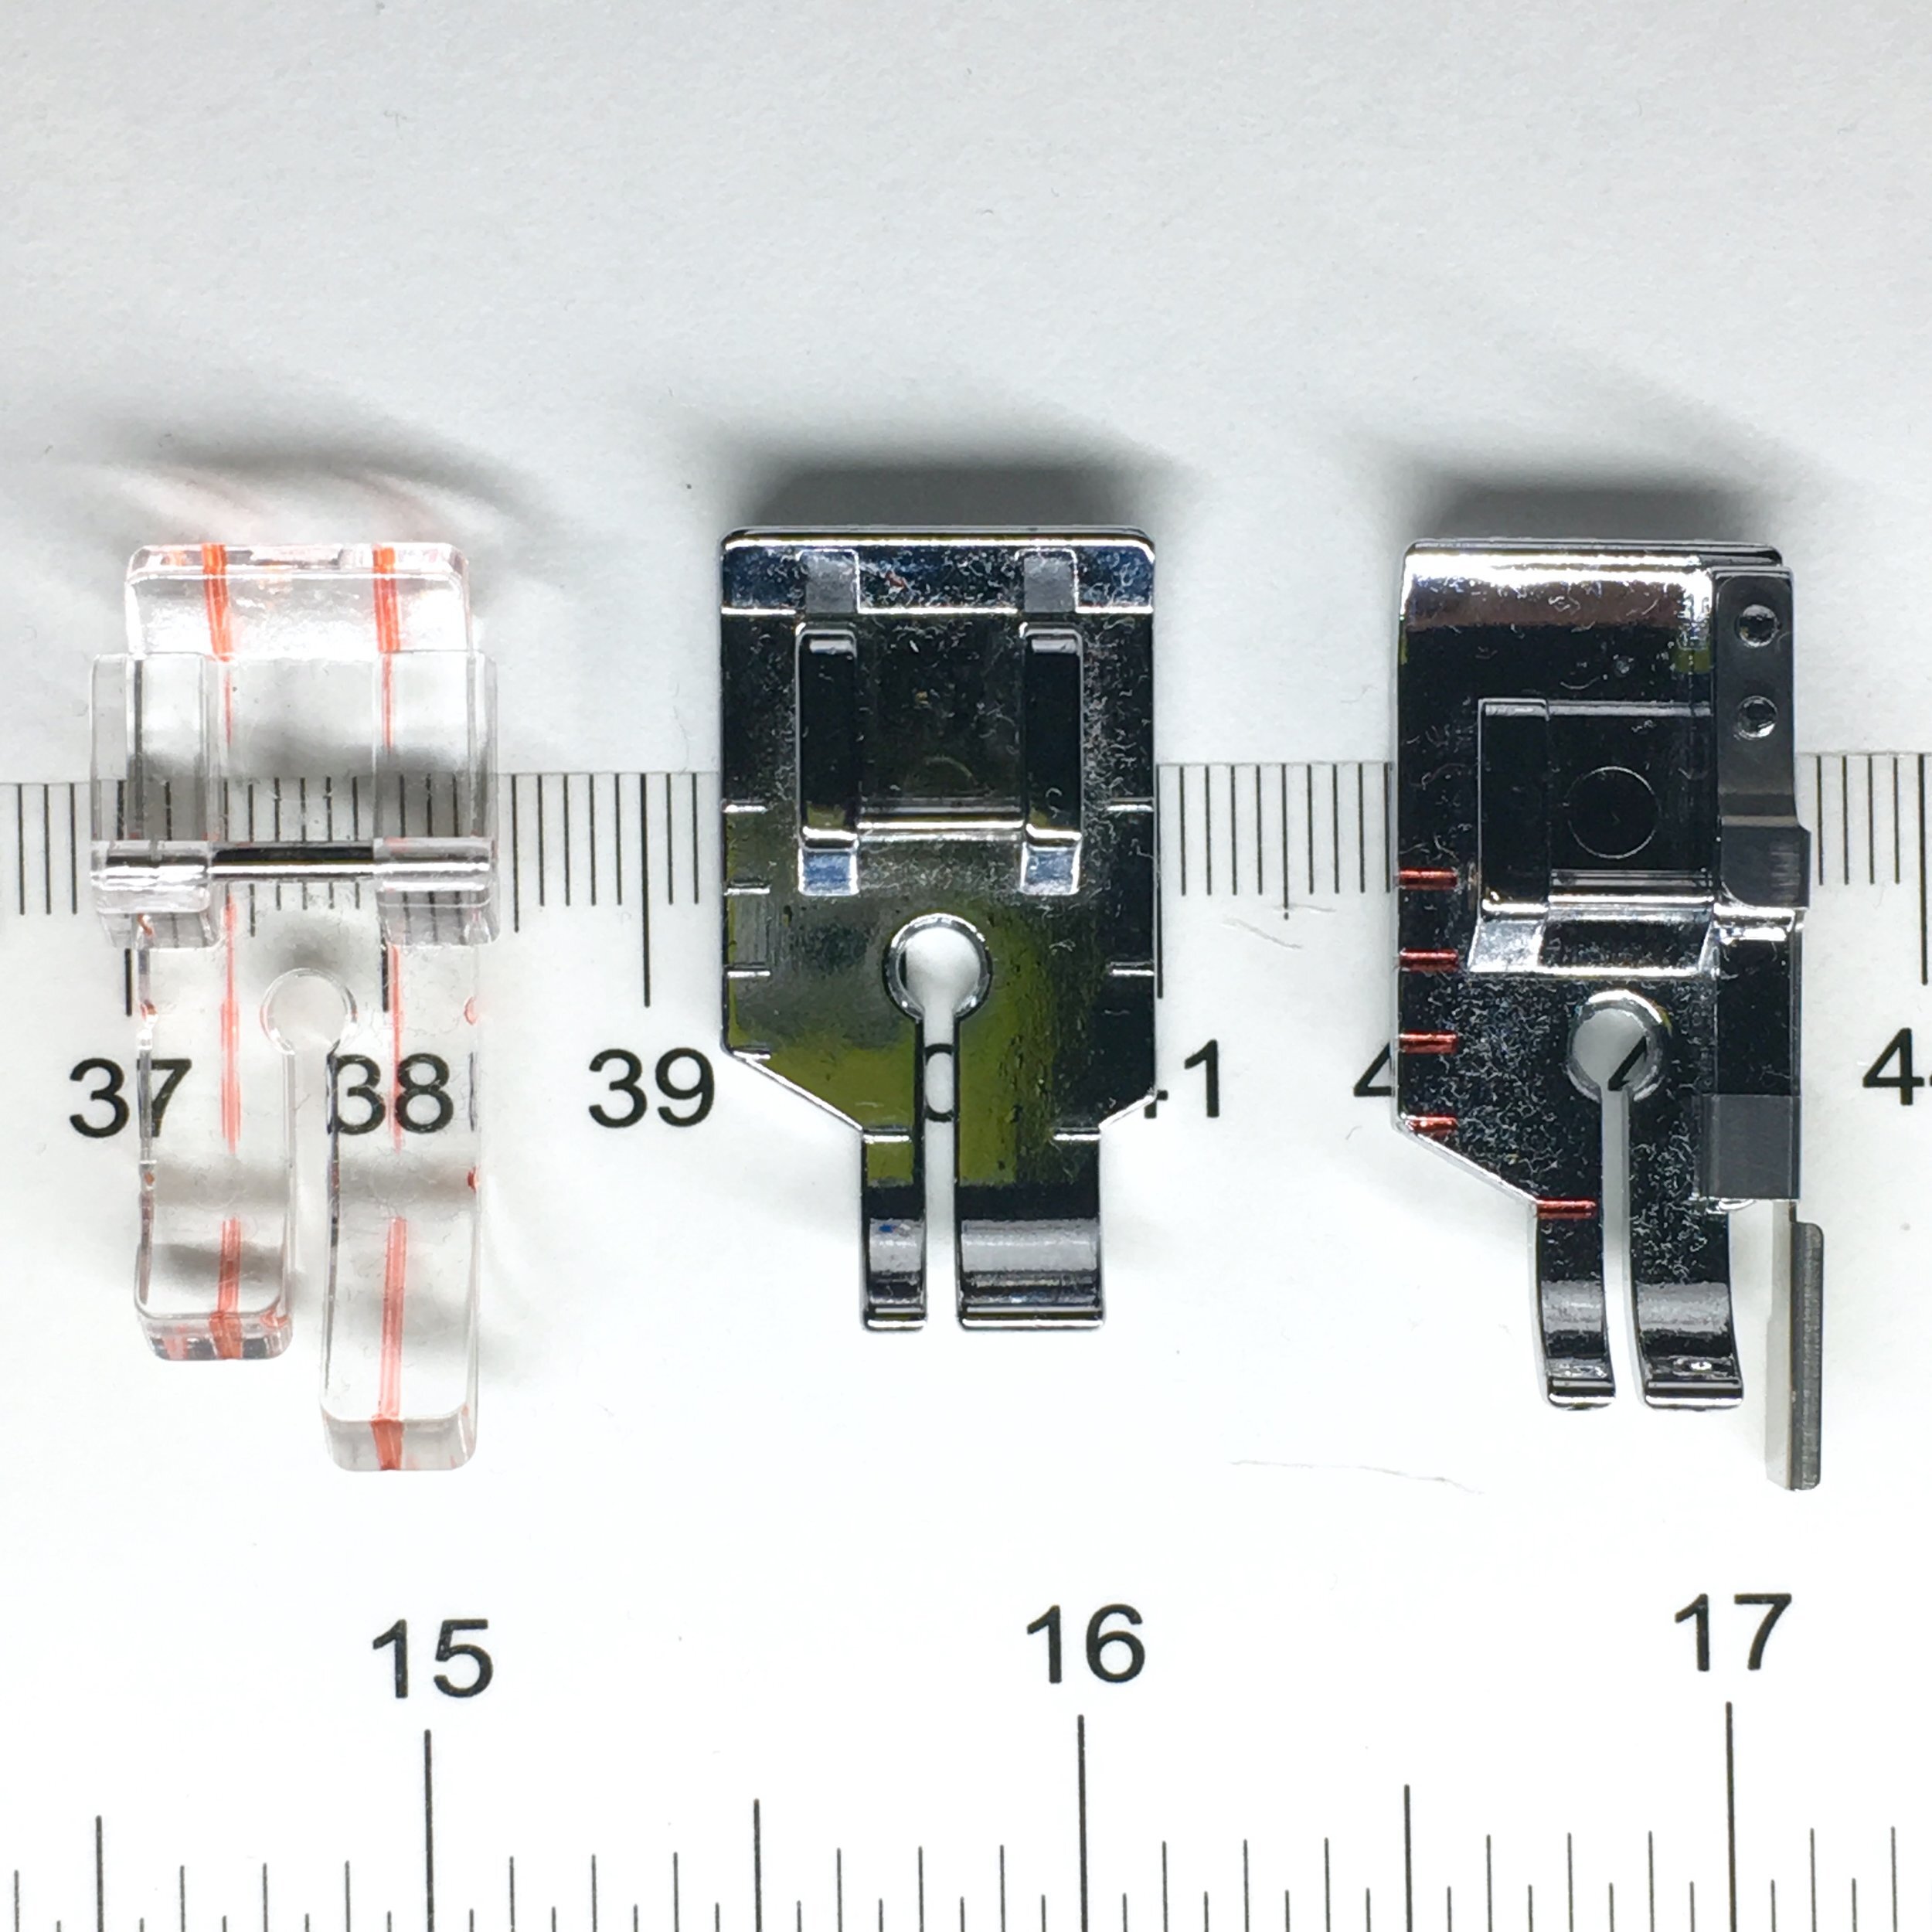
A Quarter Inch Foot
Many quilters, myself included, use a “quarter inch foot” to guide their seam allowance. There are three common feet: a clear plastic foot, a metal foot, and a metal foot with a guide. All three of these feet have a common risk. They operate on the principle that from your needle to the outside edge of the foot is a quarter of an inch. However, that may not be true. My experience is that it tends to be just a tiny bit too wide. That means that in order to achieve a quarter inch seam like we discussed (also called a scant quarter inch seam), you’ll need to either adjust your needle position or not run the edge of your fabric all the way to the edge of the foot. Not all machines allow you to adjust the needle position, and the metal feet make it difficult to see where exactly the edge of the fabric is under to foot, therefore, of the quarter inch feet, the clear plastic one is usually my favorite (though I have and sometimes use the others too).

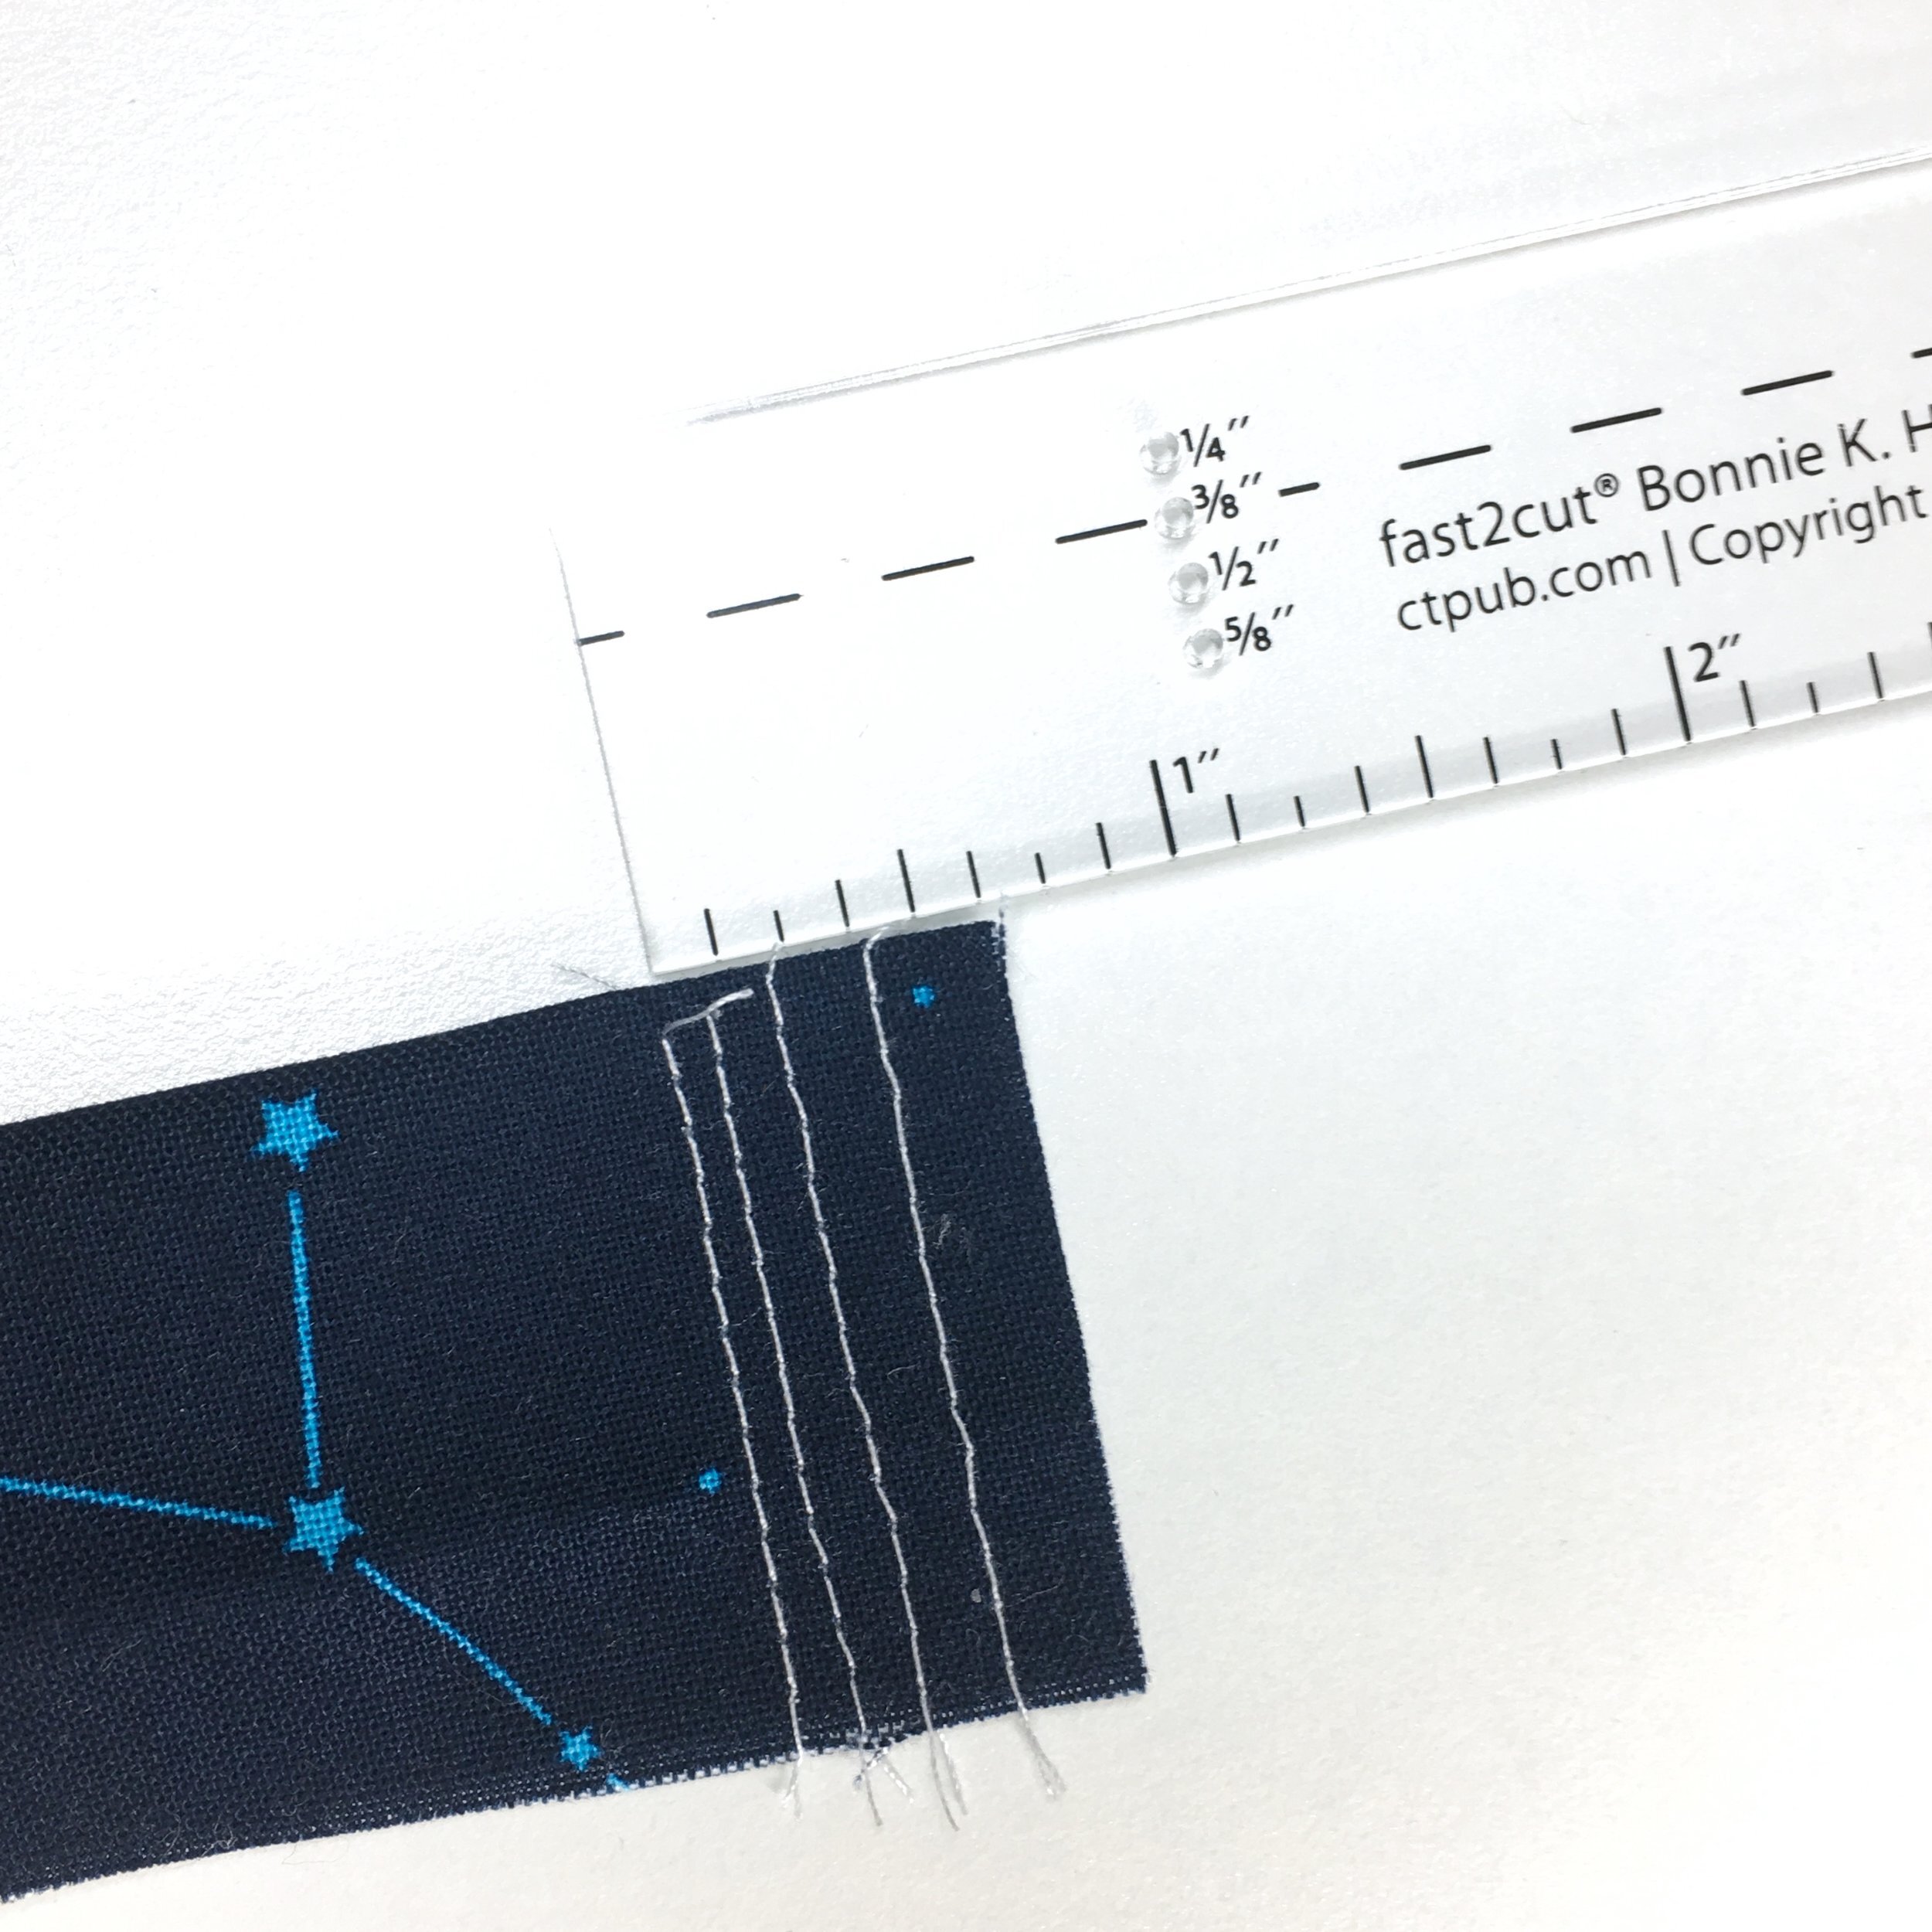
Washi Tape
Sometimes used on its own and sometimes used with a quarter inch foot, a great way to know where to line up your fabric is by putting a piece of washi or painter’s tape on the bed of your machine to mark where the edge of your fabric should line up when feeding pieces under the needle. Using a ruler, do your best to measure a quarter inch away from the needle (I measure toward the right since I like to feed pieces through with my left hand). Place tape. Sew a test piece then measure the seam allowance. Adjust the tape and retest the seam allowance until the seam allowance is precise.
Closing Thoughts
I think quarter inch seam allowances are super important. In fact, other than safety rules, the quarter inch “rule” is one of the few quilting “rules” I follow pretty carefully. Well, as carefully as one might expect given that I’m, uh, ME. What I mean by that is this:
The keys to precise piecing are: 1) Precise cutting and 2) Precise seams. But, true to form, if I’m a thread or two off on either of those, I’m not recutting or ripping seams. I quilt for joy units, so I’m aiming for pretty darn good, not perfect. If something is very awry, I’m going to fix it. But I mostly just try to do a pretty good job the first time.
Something else to keep in mind is the size of your piecing. Remember how I said that one eighth of an inch is about 8% of a three inch square? Eight percent adds up pretty fast if a quilt made of three inch squares is going to be any size at all. But, that same one eighth of an inch (the difference between a scant quarter inch seam and a slightly more generous quarter inch seam), is only 4% of a six inch square, 3% of an 8 inch square, and 2% of a 12 inch square. What I’m saying is that precision matters and shows a lot more when you’re working with smaller pieces (At least when it comes to the size of the finished quilt. Points can get lost in a generous seam at any size unit).
I want you to care about your quarter inch seam. I want you to pay attention and build a habit of being both precise and consistent. However, I do NOT want you to become neurotic about it. Perfection should never be more important than fun when you’re quilting.
Pay attention to your seam. Learn to sew an excellent quarter inch seam. But never let it disrupt your joy!
Resources
BLOG: Quilting Basics series- beginner blocks and projects to practice your skills