
How to Quilt Wavy Borders
The ideal, of course, is that your quilt will lie perfectly flat and smooth for you to quilt, but sometimes, borders are just a bit wonky. And worse, sometimes it’s not obvious that a border is wavy until the very end of the quilting. Then what?? Keep reading for my best border wrangling tips!
(This post contains affiliate links)

Let’s be honest: sometimes, borders are hard. It’s difficult, especially on a large quilt, to get an accurate measurement of the side of the quilt top. Sometimes, if a quilt has a lot of piecing, it’s hard to keep it from stretching as you stitch the border on. And sometimes, it’s hard to know which part is stretching and how to remedy the border attaching process. The end result? “Friendly” borders, sporting waves, wrinkles, and wonkiness galore. ACK.
So what happens if 1) you just can’t seem to get the darn thing smooth to begin with or 2) you’re happily quilting along and realize at the end that one or more sections of your borders has some “personality”?

Try to fix the piecing
If you haven’t basted or quilted your top yet, you may be able to fix the piecing before carrying on. First, remove the border from the quilt (carefully!). Second, press both the quilt and border, using plenty of starch to give them some structure. Next, lay the quilt and border out side by side (on the design wall, on a floor or bed, wherever you can) and determine if the border is too long or two short, and fix accordingly. Finally, when sewing the border back to the top, use pins to secure the border to the top in an evenly distributed way and sew together without pulling or stretching. Voila!

Rescuing the Border
But what if you’ve already basted or quilted the rest of the quilt?? Fear not, my dear! (but you may want a glass of wine to calm down before you keep going). First, spritz the offending border with starch and smooth as best as you can. Let dry (this is a good time to drink that wine). Letting the starch dry allows it to shrink the fabric a little bit and will take in some of excess fabric as well as the stretch.
Next, quilting design matters. This is not the time for feathers. because, while feathers are effective at “shrinking” fabric by quilting it densely, they also create a lot of movement, and the excess fabric will pucker and pleat unpredictably. Instead, choose a design like switchbacks or ruler work straight lines.
With your hands, smooth the border again and find where the worst waves are. If they are very bad, then you’re probably going to end up with some pleats, so let’s just go ahead and get strategic about that. Where the worst waves are, neatly pleat the fabric so the excess folds under, matching the print as best you can if applicable, and pinning into place. The most important thing here is that the pleat is squared off— meaning the bottom edge is even with the rest of the bottom, and the fold itself is perpendicular to the bottom. This allows the pleat to “vanish” when you quilt it.
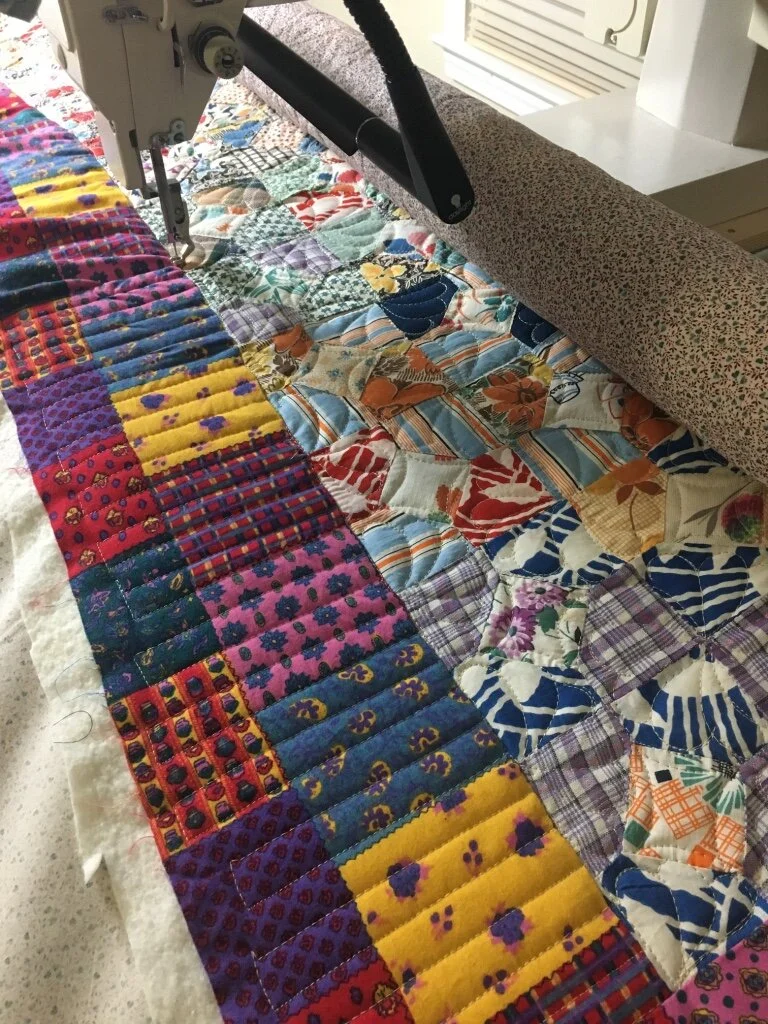
To quilt your now pinned flat border, start with your switchbacks or ruler work at one end and carefully work toward the other. make sure that any time you have a fold, your stitching lands right at the very edge of the pleat. When your quilt is complete, and especially once it is washed, this pleat will look like nothing more than a seam in a pieced border.
Talk about a ROCKSTAR move!
