
Range Backpack Pattern Review
The Range Backpack, designed by Anna Graham of Noodlehead Designs, is an easy to make, versatile backpack, perfect for the beginning bag seamstress. Plus, with a little extra piecing, you can add your own little touches to the design!
(This post contains affiliate links)
To be honest, I’d been eyeing the Range Backpack Pattern for a hot minute by the time I finally bought it at QuiltCon 2020. In fact, it had made its way onto a Pinterest board of mine almost a year previous as what seemed like the perfect “classy mom” bag. I love leaning into my identity as a business owner, but the reality is that I also have two little kids, and if I’m going to make a bag it needs to be 1) pretty easy so I’m not devastated if it gets wrecked 2) durable, so that it doesn’t get wrecked.
Nonetheless, I hemmed and hawed about actually taking the plunge with the Range because I was sure it would be too hard to be worth it. BOY, WAS I WRONG!
I’m on my fourth Range and counting, so I think it’s safe to say that I figured it out and got a bit addicted. The best thing, is that you can, too!
Supplies
(Click each item to link to a supplier)
Waxed Canvas (you can also use quilting cotton from your stash with a bit of interfacing. This is perfect if you want to show off some special fabric or if you’re a little nervous and want to start by using what you have on hand. For what it’s worth, I can get 2+ backpacks out of two 1 yard cuts of waxed canvas, and I’ve found it lovely to work with. However, I know it’s pricey and is a lot of layers to sew through)
Interfacing (see pattern for details)
What I love about the Range
This is a simple bag: a zippered front, a big open inside with foldover closure, and the option of one inside pocket (which I have yet to make because I prefer to use zipper pouches). It’s perfect to use as a purse one day and a “water, snacks, and sunscreen” for the splash pad the next day.
The construction is simple, too and a thoughtful reading of the instructions was all I needed to sail through my first attempt— even with the zipper!
But, and this is maybe my favorite thing, it LOOKS like a really nice bag, even though I’m far from a pro-bag maker. When I first carried it (the morning after sewing it, obviously) my mom actually thought I’d purchased it— that’s how sleek and professional it is! When she found out I made it, she promptly asked for her own for Mother’s Day (“Of course! Here, pick out your colors while the kids are playing!”)

Changes I Made
As mentioned above, I omitted the pocket inside the main body of the bag. I tend to toss my bags about a bit, and I knew anything I put in the pocket would just fall out anyway.
The pattern gives instructions for a simple closure by looping a strap through two D rings. Because of the aforementioned habit of tossing bags about, I bought a Redwood Tote hardware kit along with my Range hardware and used the snappy clip to fashion the closure of my bags. I’ve also seen folks use the plastics snap closures (what is the proper name of that thing??) to great effect
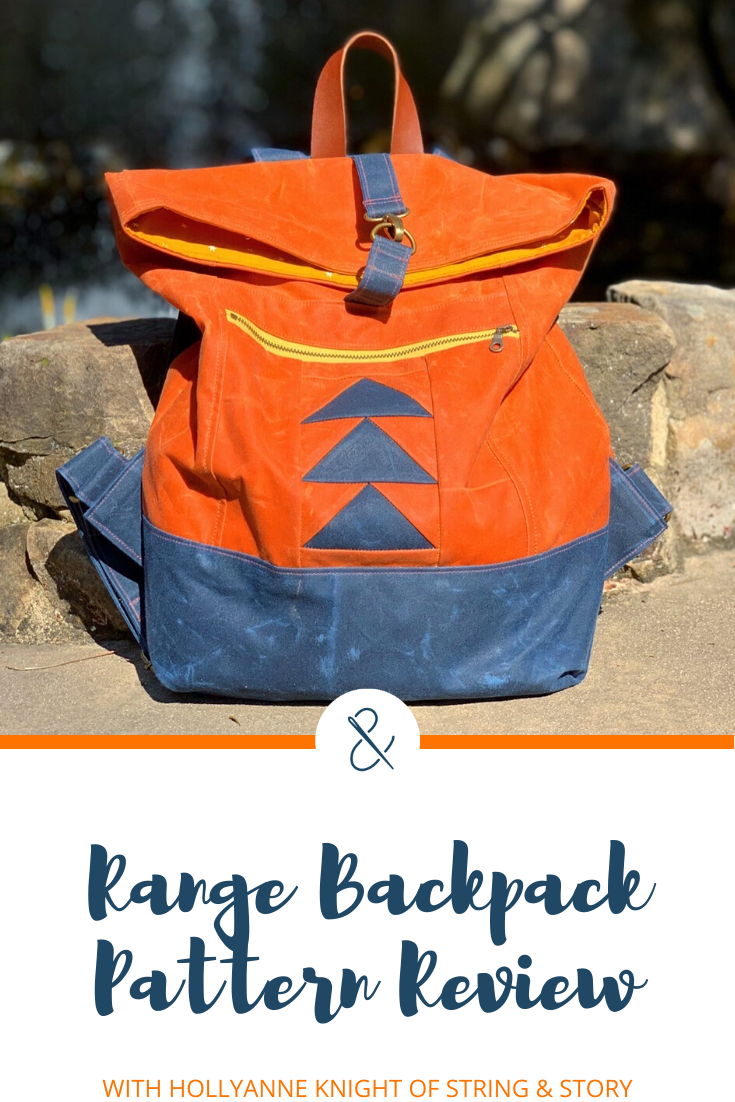
Finally, I spotted on Instagram that a few folks were piecing/ paper piecing the front zipper panel instead of using a folded piece of fabric, and I LOVED how it looked. I’ve done this on all the bags I’ve pieced so far.

Surprise!
I turned the foundation paper pieced panels I jerry rigged into actual FPP templates so you can piece your own much more easily! There are two designs: flying geese and “seven summits.” Both designs are reminders to get out and have an adventure! Simply enter your email below, and I’ll send them straight to your inbox!
New to FPP? Check out the video below or this proper tutorial.