
Project Color Cards
For many quilters, curating the colors and fabrics of a new project can be the hardest or most time consuming part of the project, especially for quilts that require a lot of fabrics, specific color matching, or careful color placement. A custom made project color card is a great way to keep track of those fabrics during the curation and piecing process.
(This blog post may contain affiliate links)
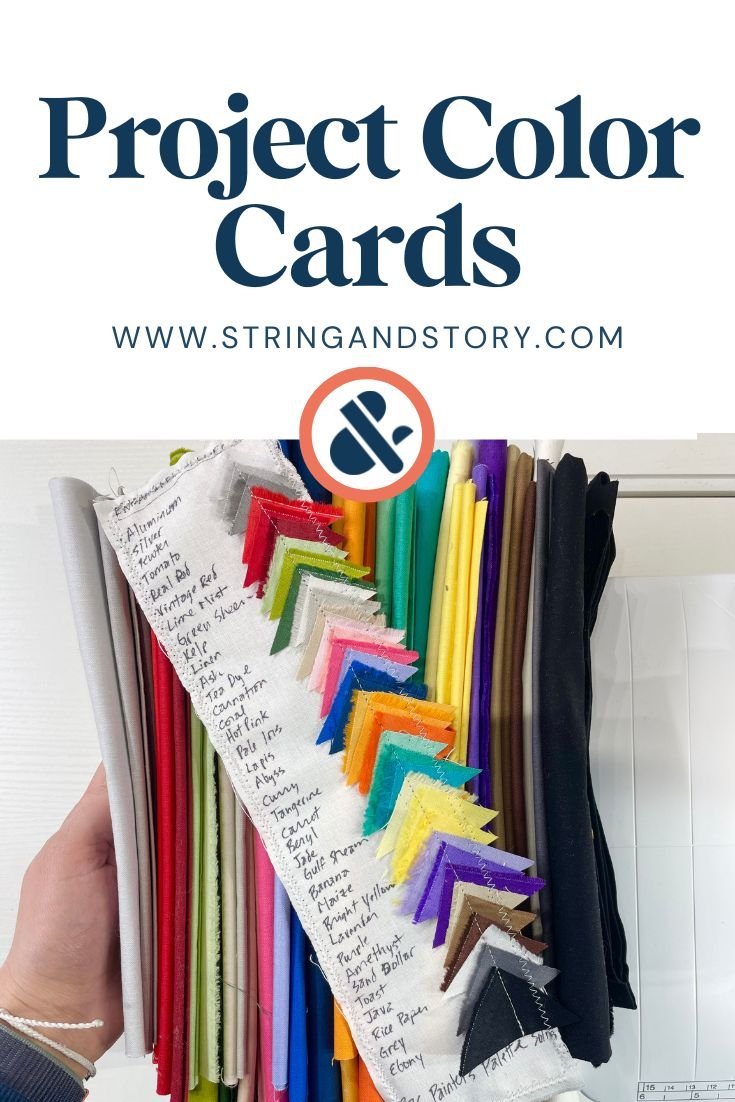
One day, Rockstar Joan walked into my shop. Approaching the cutting table, she pulled out a swatch of fabric and said, “I got this green last week, and I need more.” I started to head to the color wall then quickly turned back: “Wait, what is that?” I asked, looking at the bit of white fabric with small triangles of other fabrics sewn down it. “Oh, it’s all the fabrics I’m using for my quilt. I sew them to a background strip like this so I can color match easily and so I can throw it in the wash to make sure nothing is going to bleed when I wash the quilt later.” Pure. Genius. Ever since then, I’ve been wanting to share Joan’s genius with y’all.
A custom made Project Color Card, especially one with a fabric background, is perfect for:
Color matching solids to prints
Color matching new purchases to previous ones, such as if you need more yardage of the same fabric
Keeping track of which fabric is “Color 1, Color 2, etc” in a project
Checking to see if any of your chosen fabrics run the risk of bleeding when washed
Referencing for future projects to reuse favorite fabrics or colors
Ready to make your own? It’s super easy!
Supplies
Strip of cardstock and/ or fabric (a light color or your background fabric), approximately 4 x 11 inches
Fine tip permanent marker
sewing machine and thread
Bits of fabric from your chosen project fabrics
Video
Make the Color Card
One of the things I love about this project is that the genius is in the idea— executing it is easy-peasy!
Using the fine tip permanent marker, title your color card, write the fabric names/ color code down one side, and add any other relevant project information at the bottom (name of quilt/ pattern, brand of fabrics, date, etc). TIP: Put a piece of paper under your fabric to keep the marker from bleeding thru onto your sewing table
Snip a corner or square off each fabric you’re using and arrange them next to the appropriate labels
Using a simple straight stitch, attach the swatches to your color card. This is an awesome opportunity to test a potential thread color for quilting this project later and see how the thread looks against all your fabrics at a glance
If using fabric, zigzag around the outside edge of your “card” to prevent fraying, and give all the writing a quick press with an iron to heat-set the ink
Toss your color card in the wash for an easy wash test to see if any of your fabrics bleed or fade
Keep your card handy to match fabrics, follow along with your pattern, reference while shopping, etc!
Resources
Shop with us online for fabric bundles

Share this blog if you found it helpful: