
How to Make a Memory Quilt from Neckties
Memory quilts are a special way to preserve meaningful articles of clothing even after they have become too worn or dated for use or after their owner has passed away. While tshirt quilts are the most common type of memory quilt, quilts made from neckties have experienced a rise in popularity as quilters experiment with preserving these quickly fading and special collections. Neckties lend themselves to the dresden plate shape, so let’s make a dresden inspired necktie memory quilt together.
(This post contains affiliate links.)
Nearly ten years ago, String & Story began as a memory quilt company. I made dozens of tshirt quilts each year for folks all over the country. While I do very few commissions anymore, I occasionally take on a “that sounds like a fun challenge” project. This tie quilt was such a project– my neighbor’s brother was retiring from a long career as an ophthalmologist, and he had a truly incredible tie collection that they wanted to preserve as a quilt. I was tasked with taking 180 ties (mostly Disney themed) and turning them into something creative, cohesive, and delightful.
I’ve documented my process and am going to share it with you below. This isn’t a step by step tutorial, and it’s definitely not a pattern, but if you or someone you know has some cool ties, it will give you a starting place for creating a tie quilt of your own.
Video
Planning
As soon as I was asked to consider this (huge) project, I began thinking about what kind of quilt block would make the most sense with ties. Of course, dresden plates came to mind, so I began researching patterns and templates. I found some darling layouts with dresden blocks and sashings, and I thought I had a solid plan… until I got the ties.
The largest template I could find was for a 20” dresden (where each “blade” would be about 10” long). However, many of the ties I was using had huge designs (15+” long). While my research suggested that most folks deconstructed the ties, I quickly arrived at the realization that to do so would be excruciatingly time consuming. I also realized I couldn’t reshape the ties without losing large portions of the designs. I could have removed the linings of the ties to reduce bulk, but I decided instead to appliqué the ties intact in a dresden-like shape. I would piece the dresdens in quarters to make them more managable, and settle on the exact quilt layout after I built some blocks.
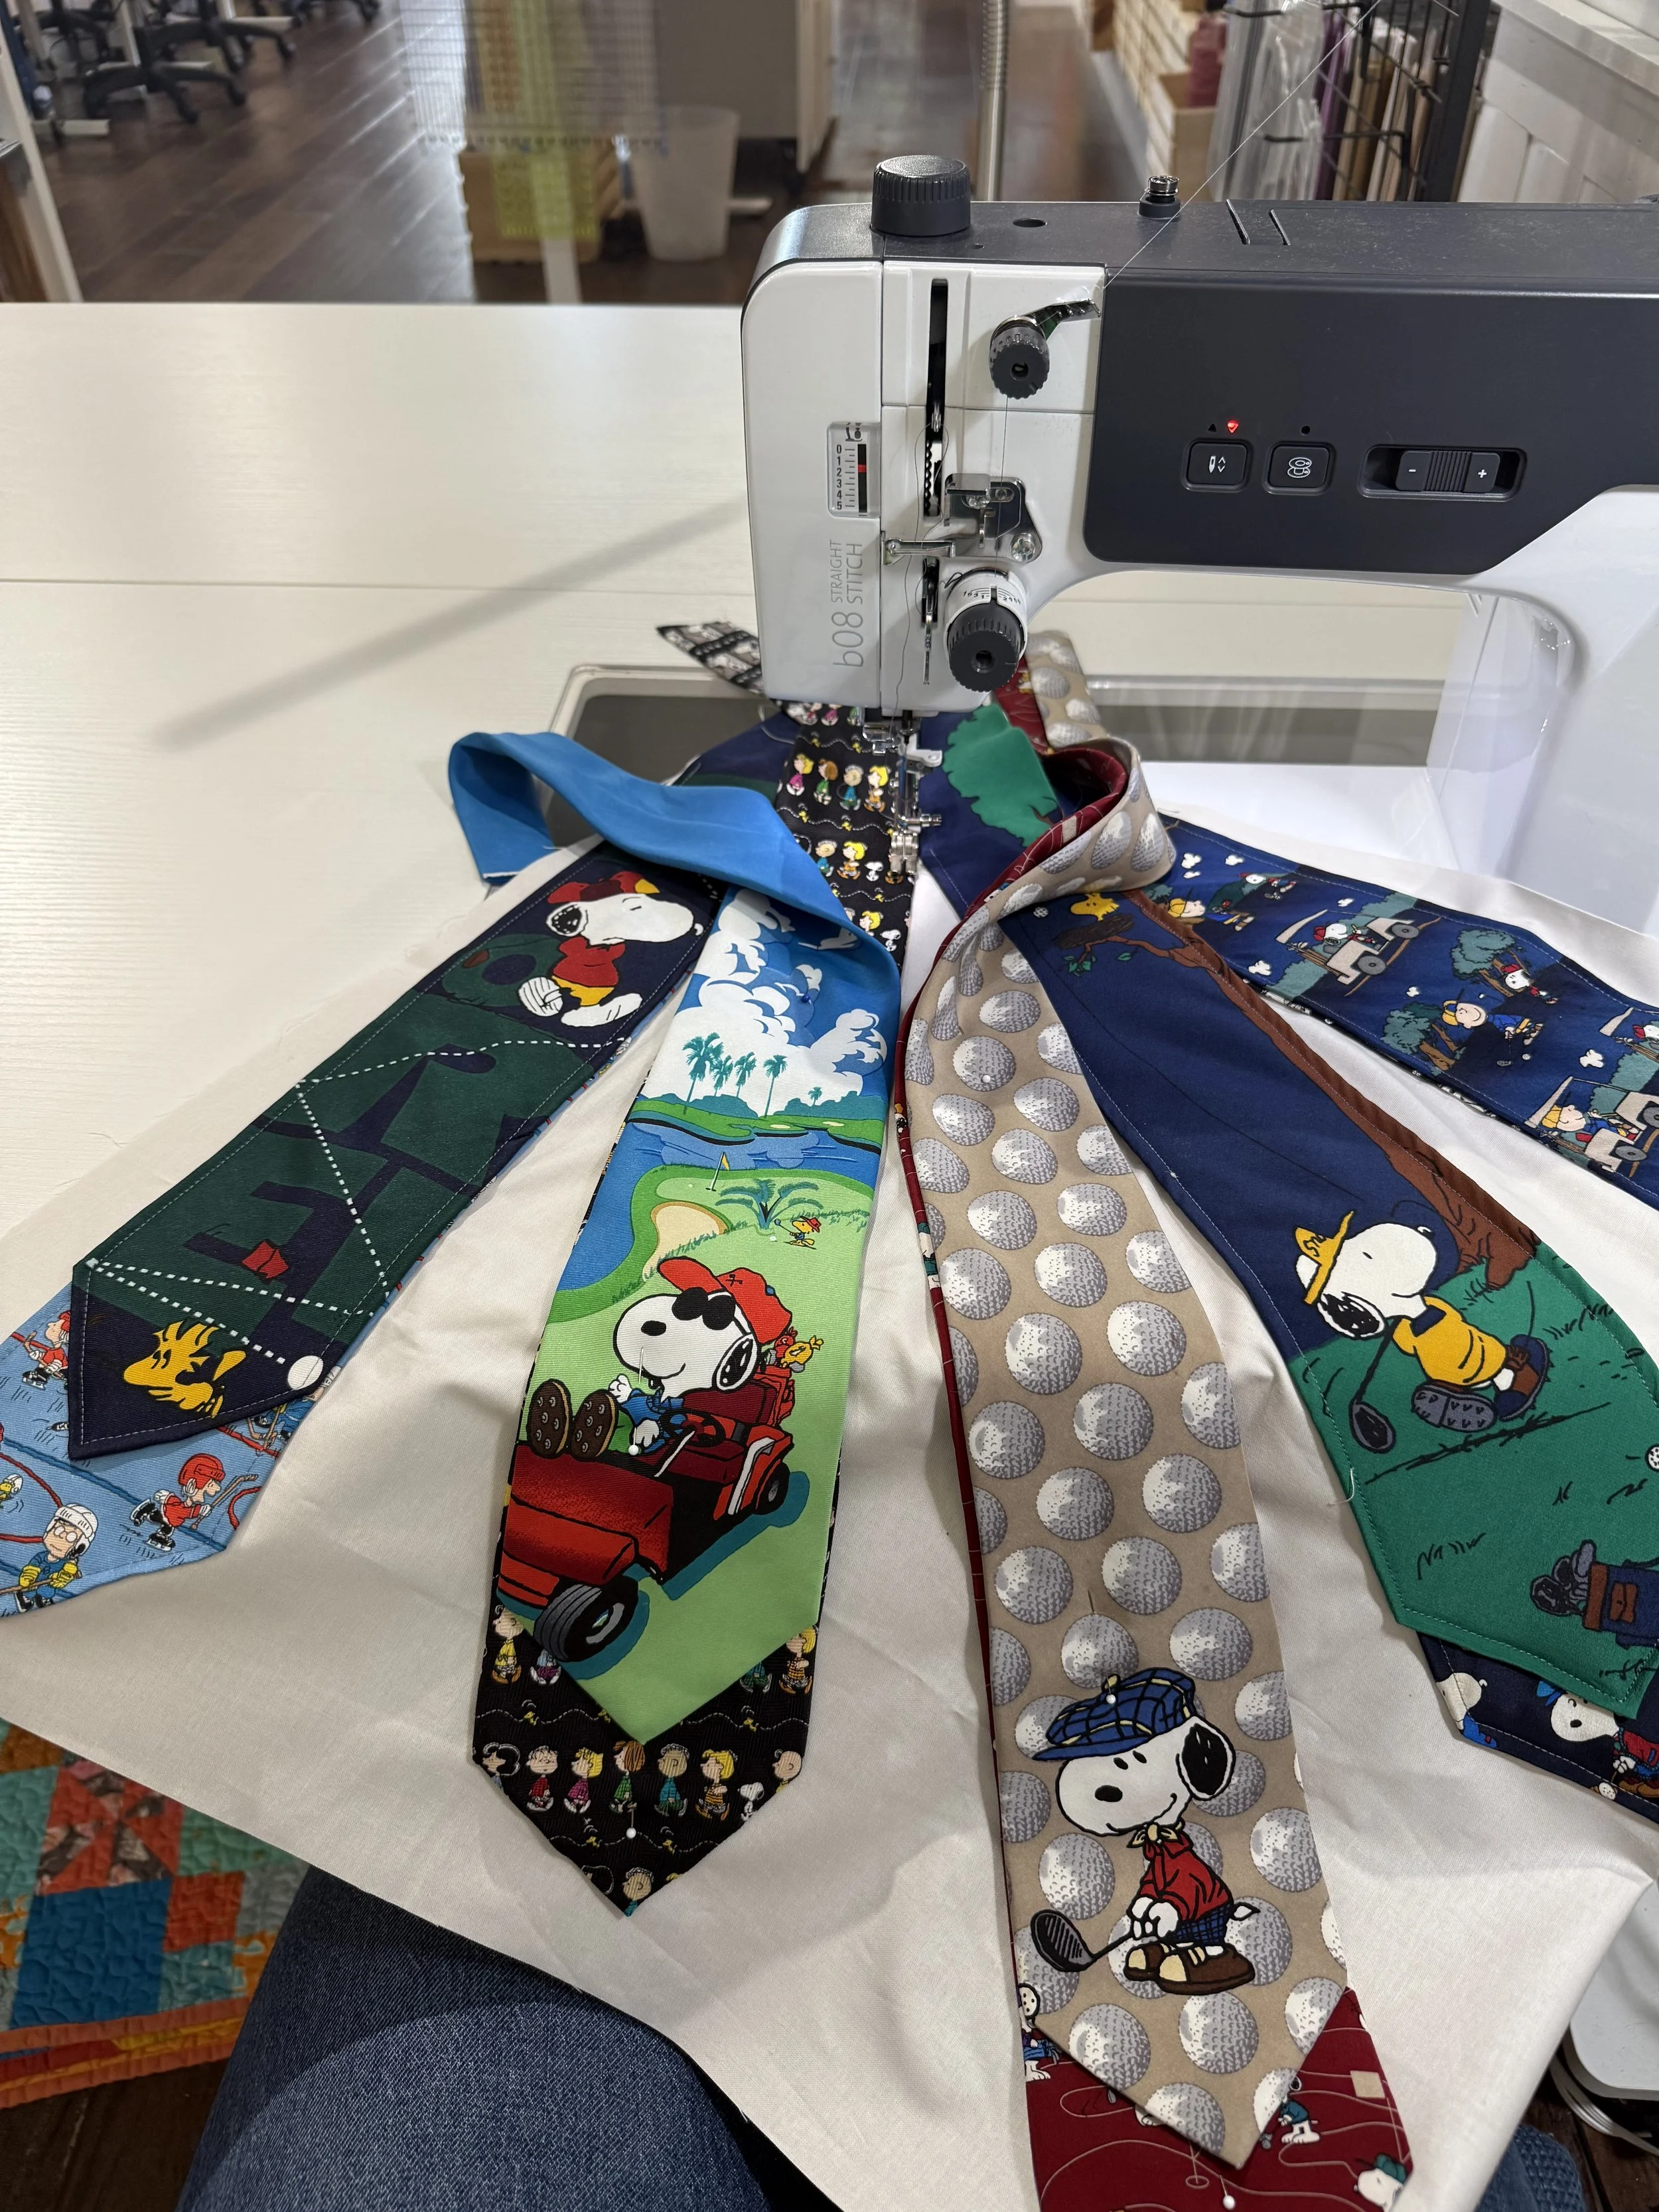
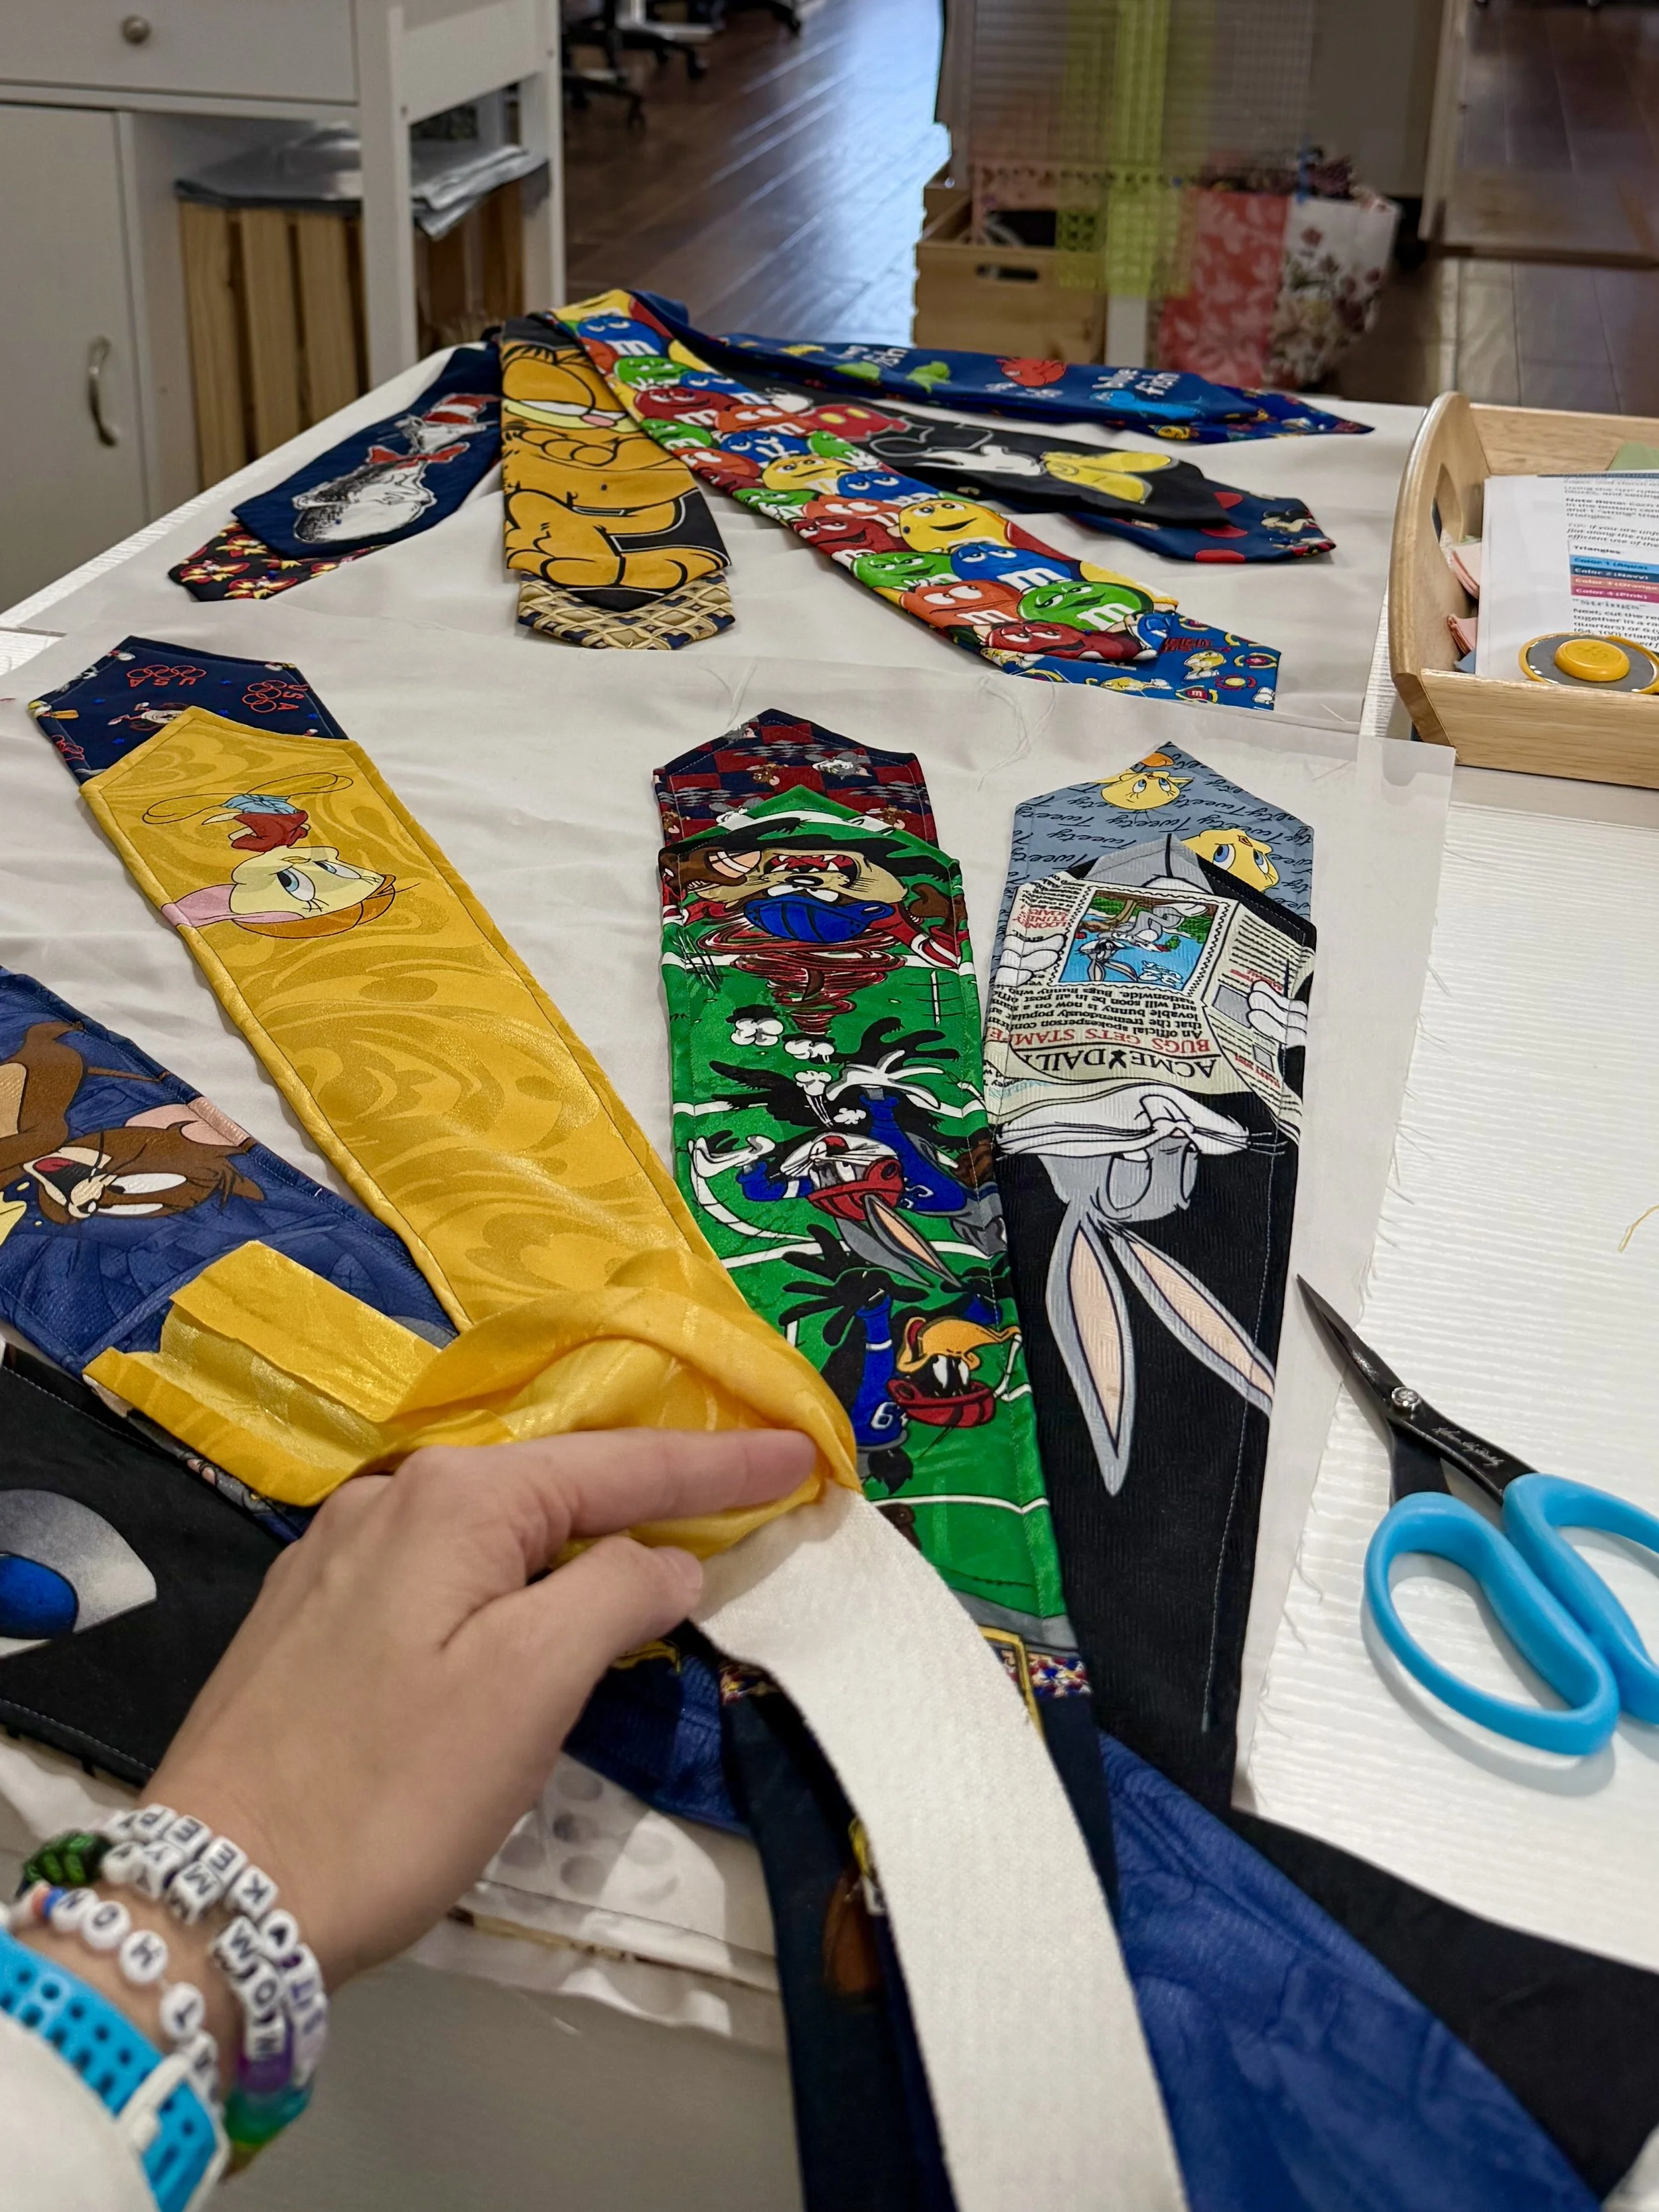
Piecing
Each of my “dresden plates” was composed of four blocks, each creating one quarter of the circle. I cut background fabric 211/2 ” square. Each quarter of the dresden was shaped by 5 ties, though I used 8-10 ties per quarter by layering some ties on top of each other. I machine appliquéd the ties down by stitching 1/4” in from the edge of the tie. I began my stitching 2-3 inches from the corner of the block. After all the ties were stitched down, I used my seam ripper and scissors to open the back of each tie near the corner and cut out several inches of the center layer. This reduced bulk toward the center of the dresden to make it easier to connect the blocks later and hand appliqué the center. After the center layer was removed, I completed the stitching on the ties to the center of the block and trimmed each block to 21” square.
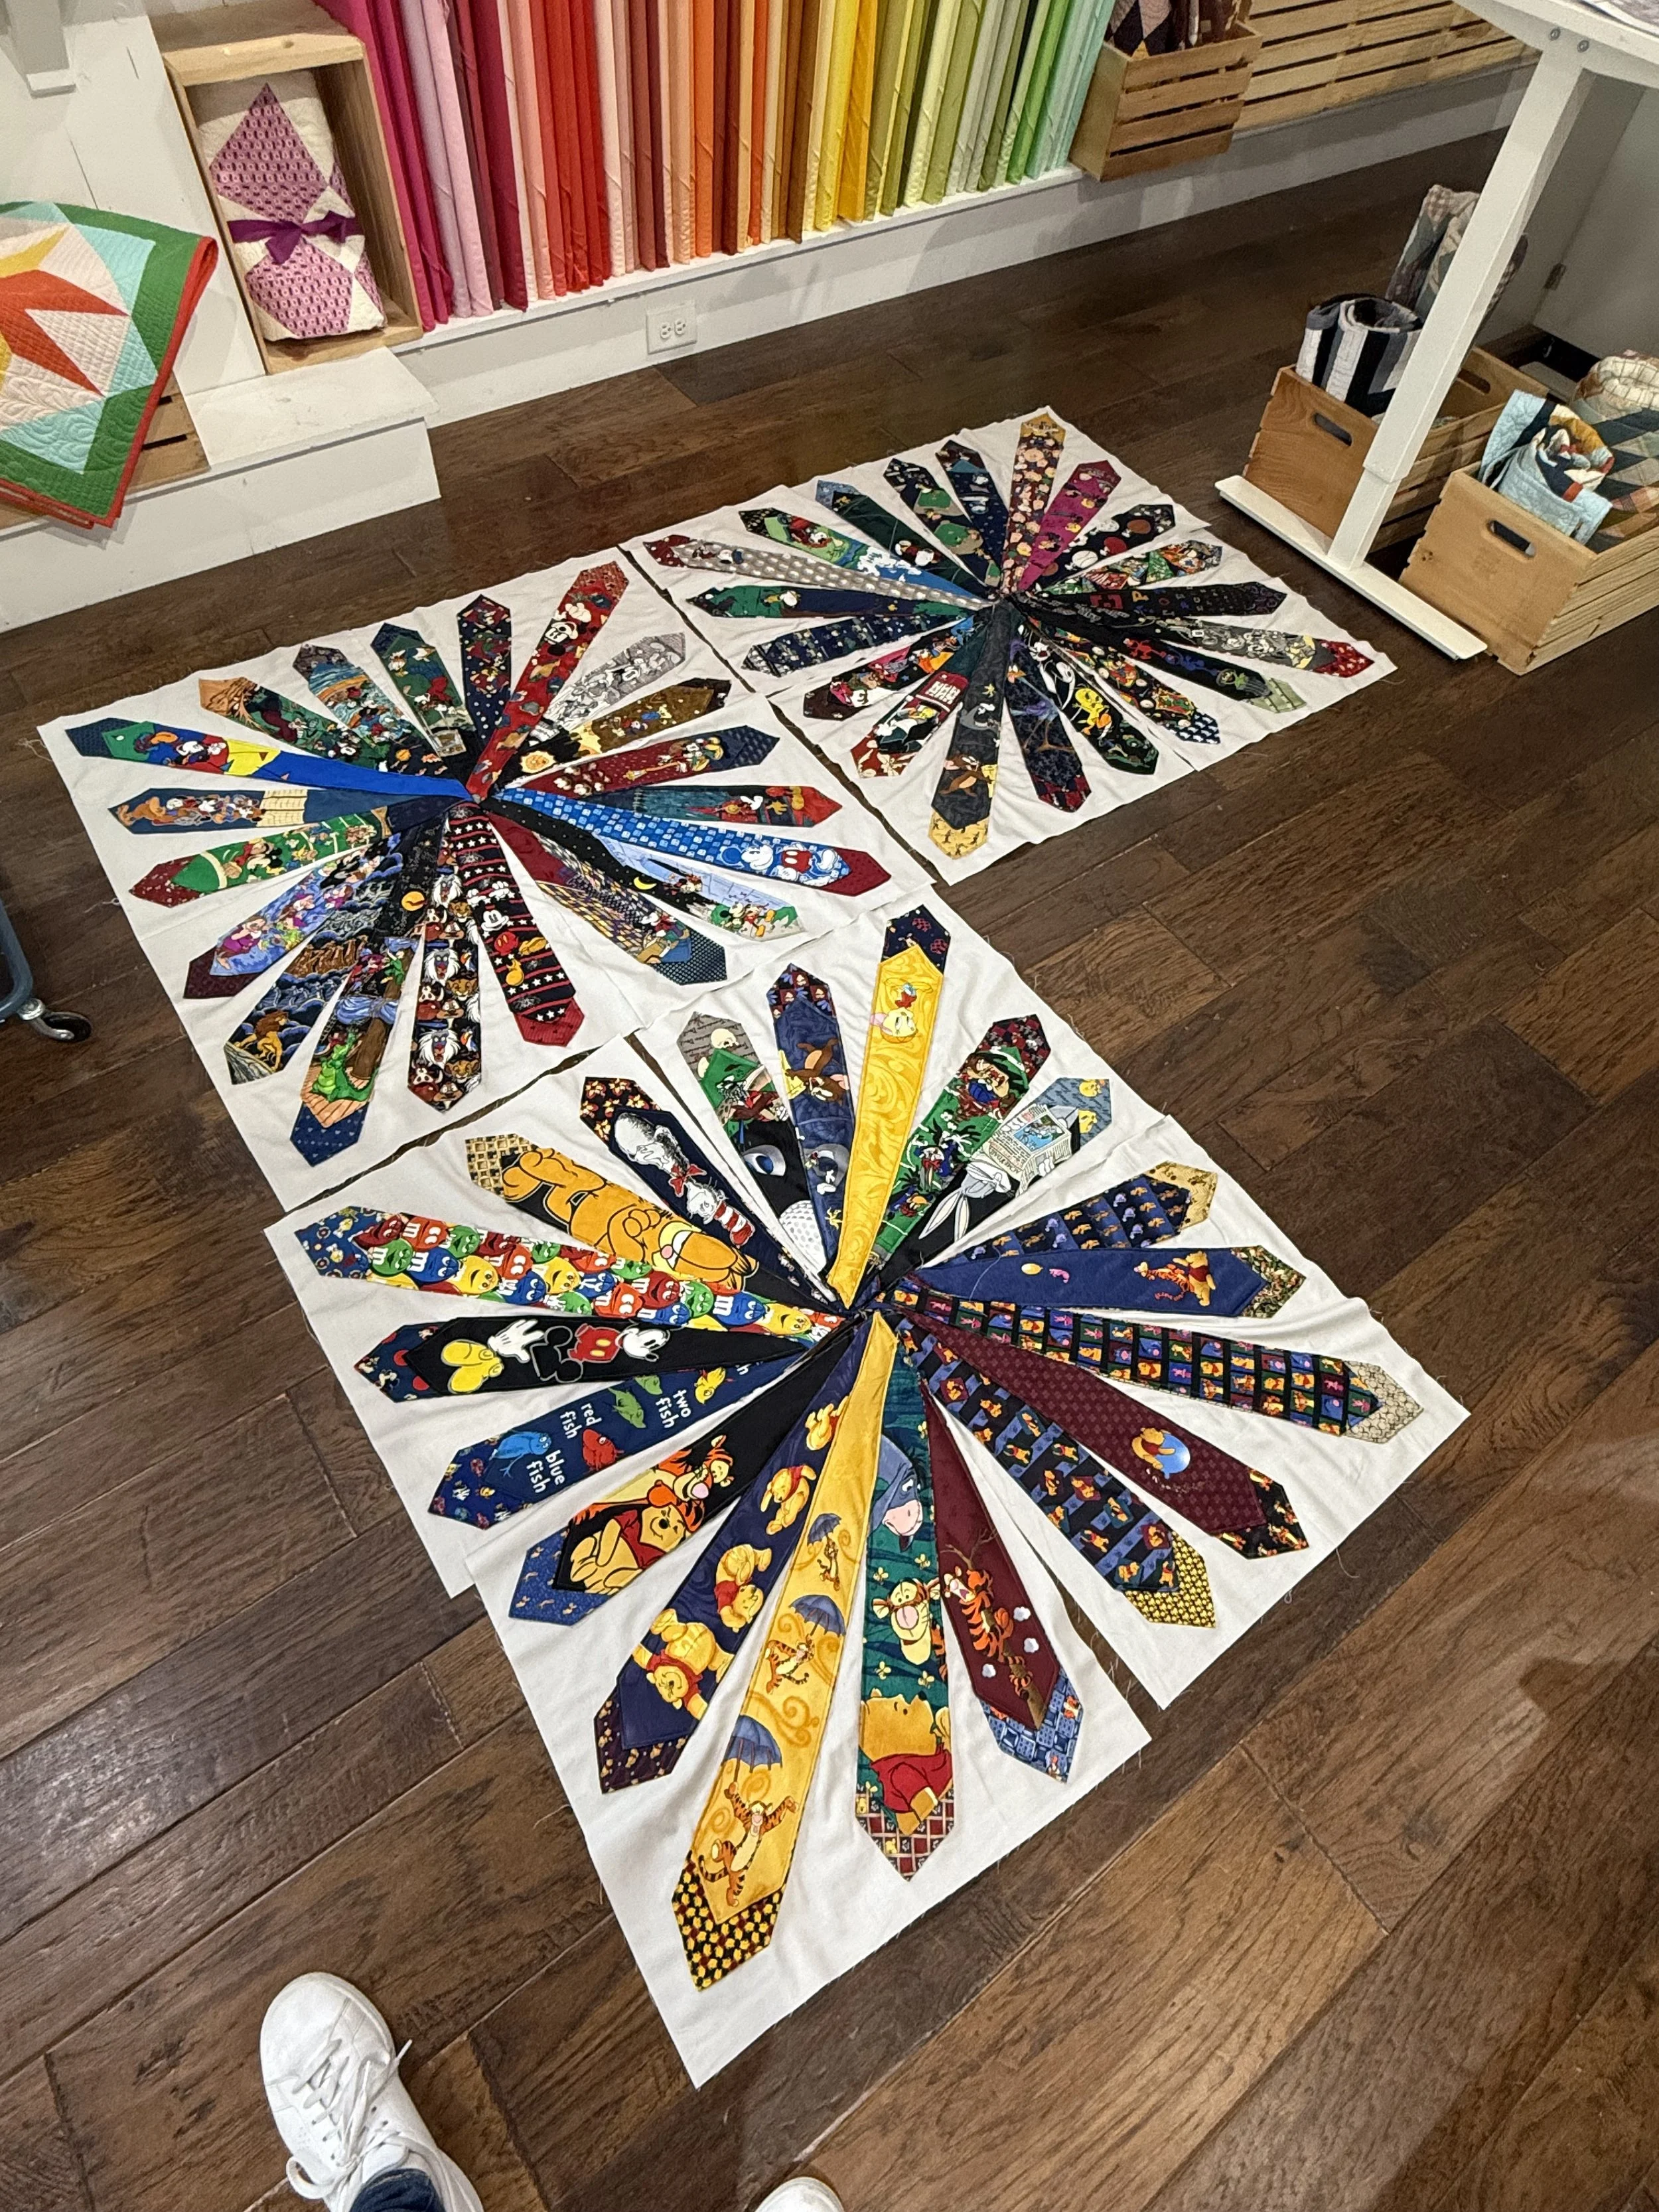
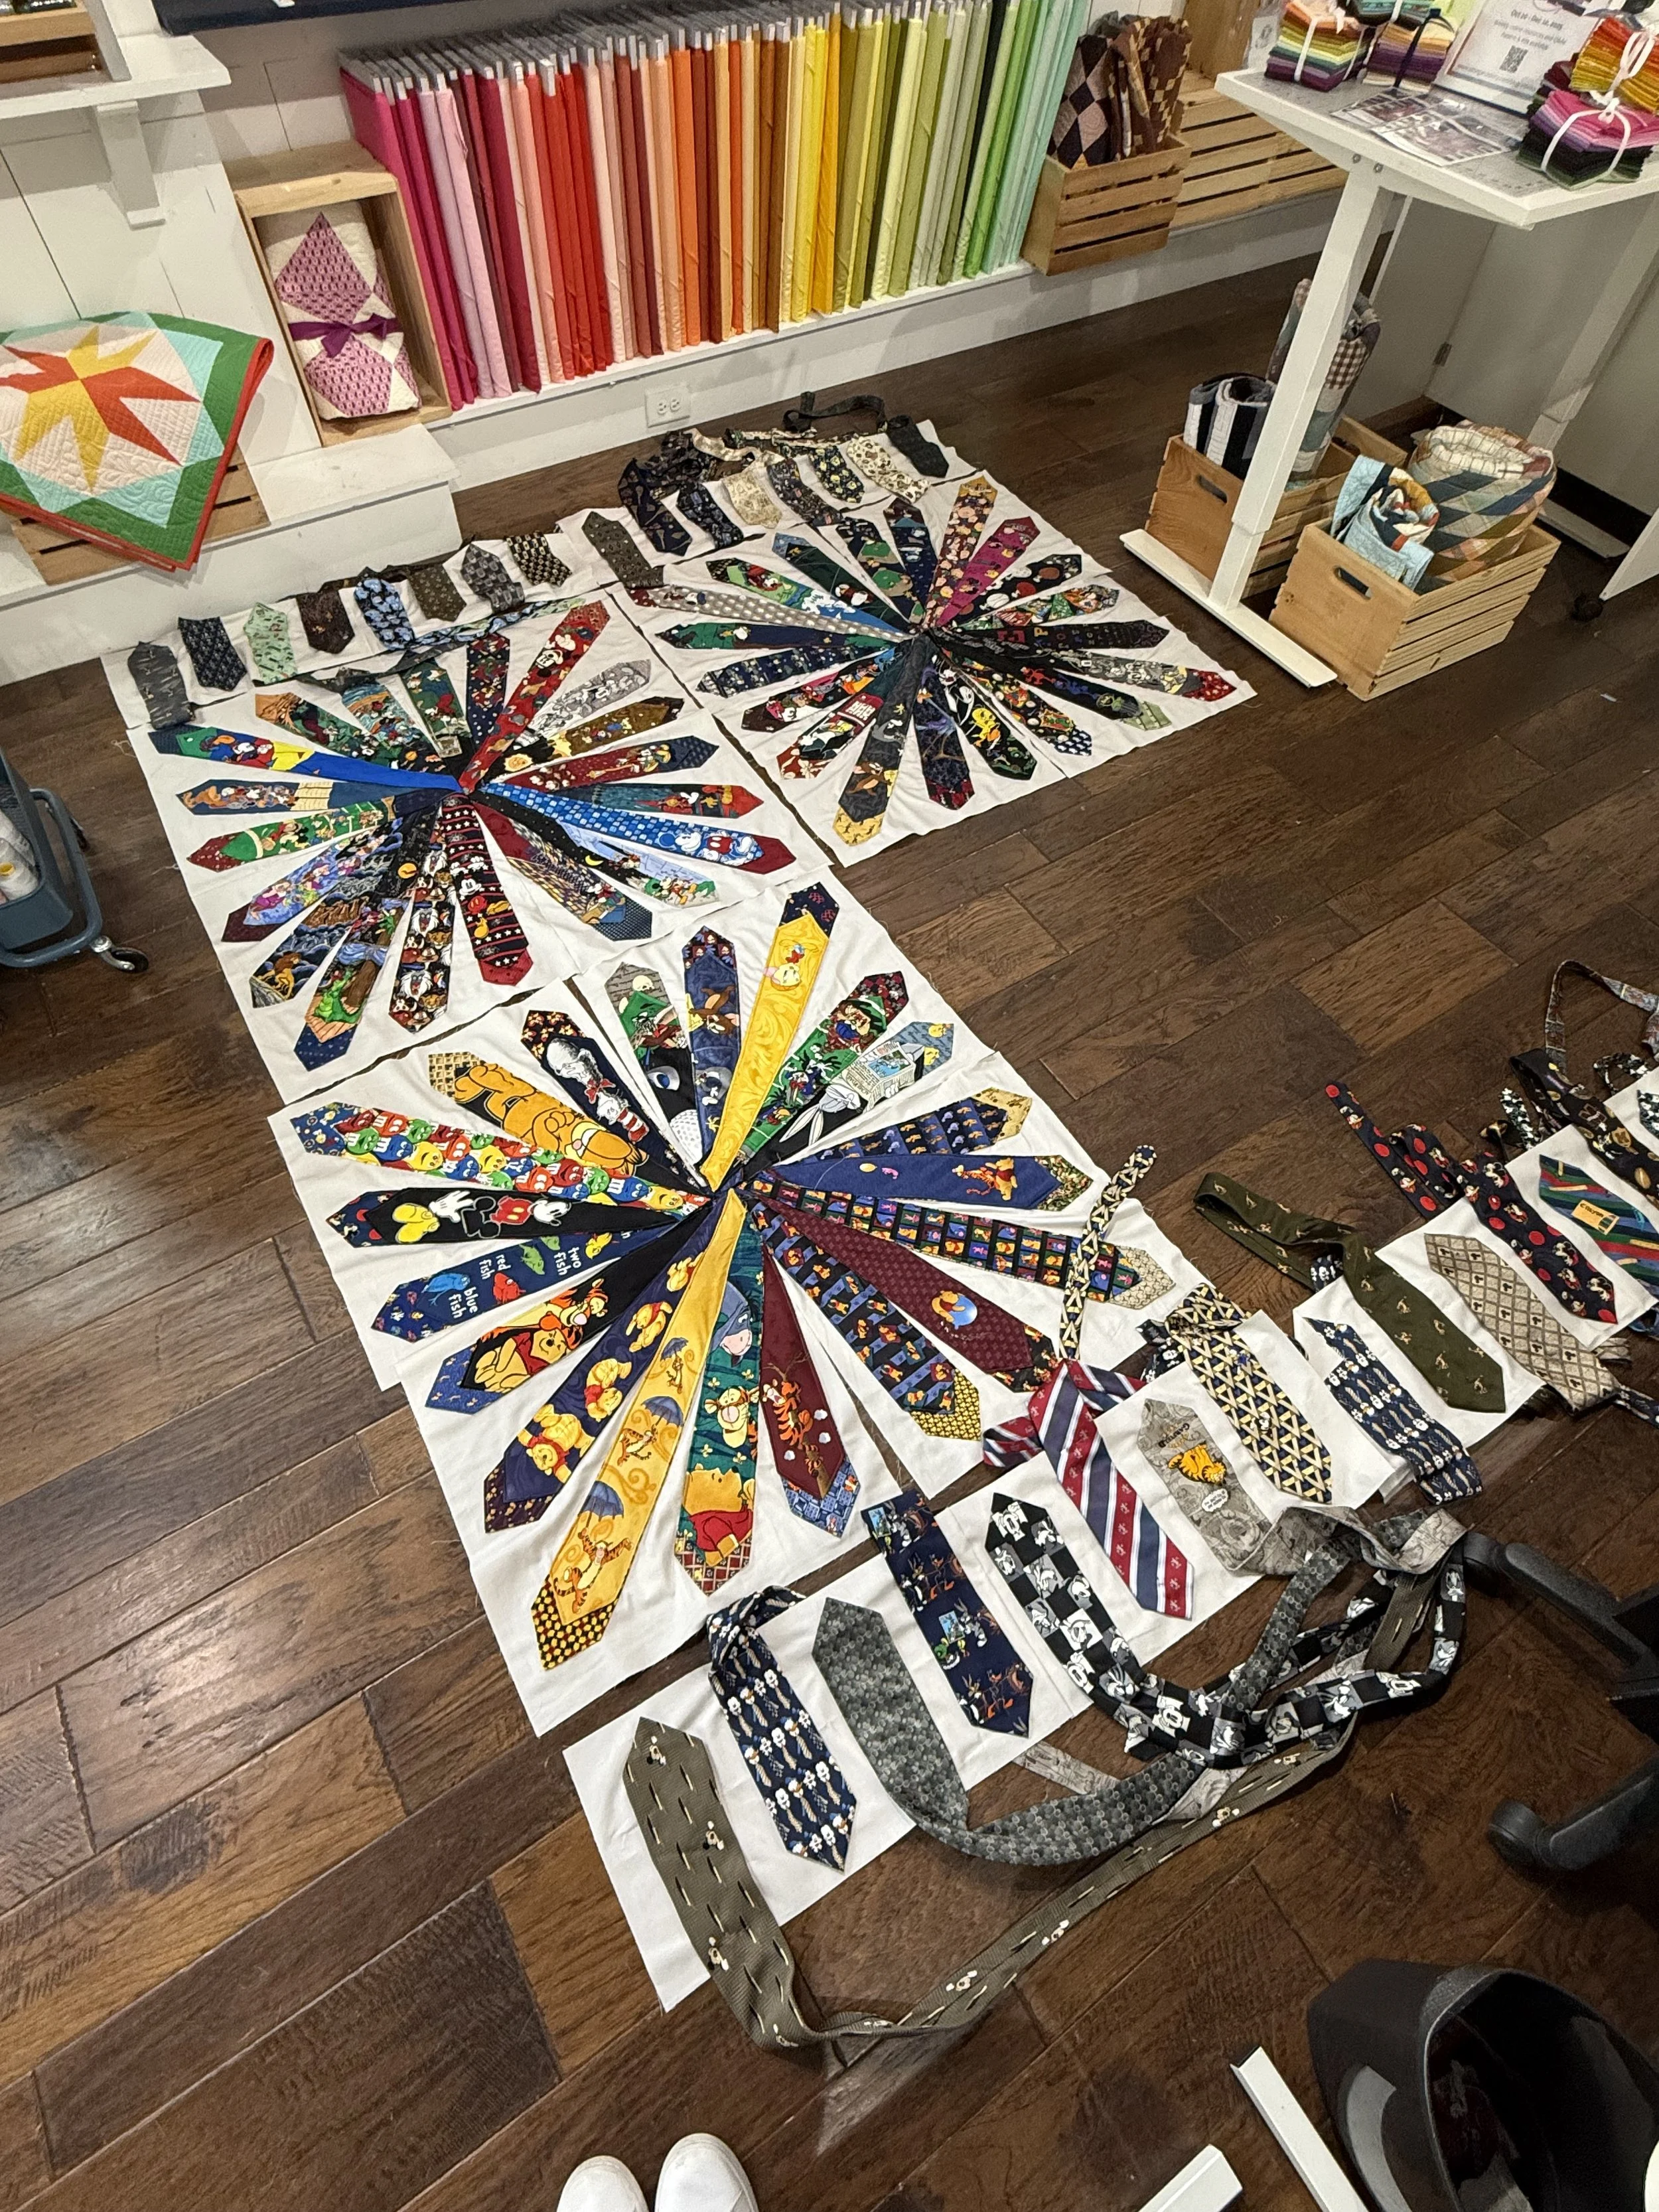
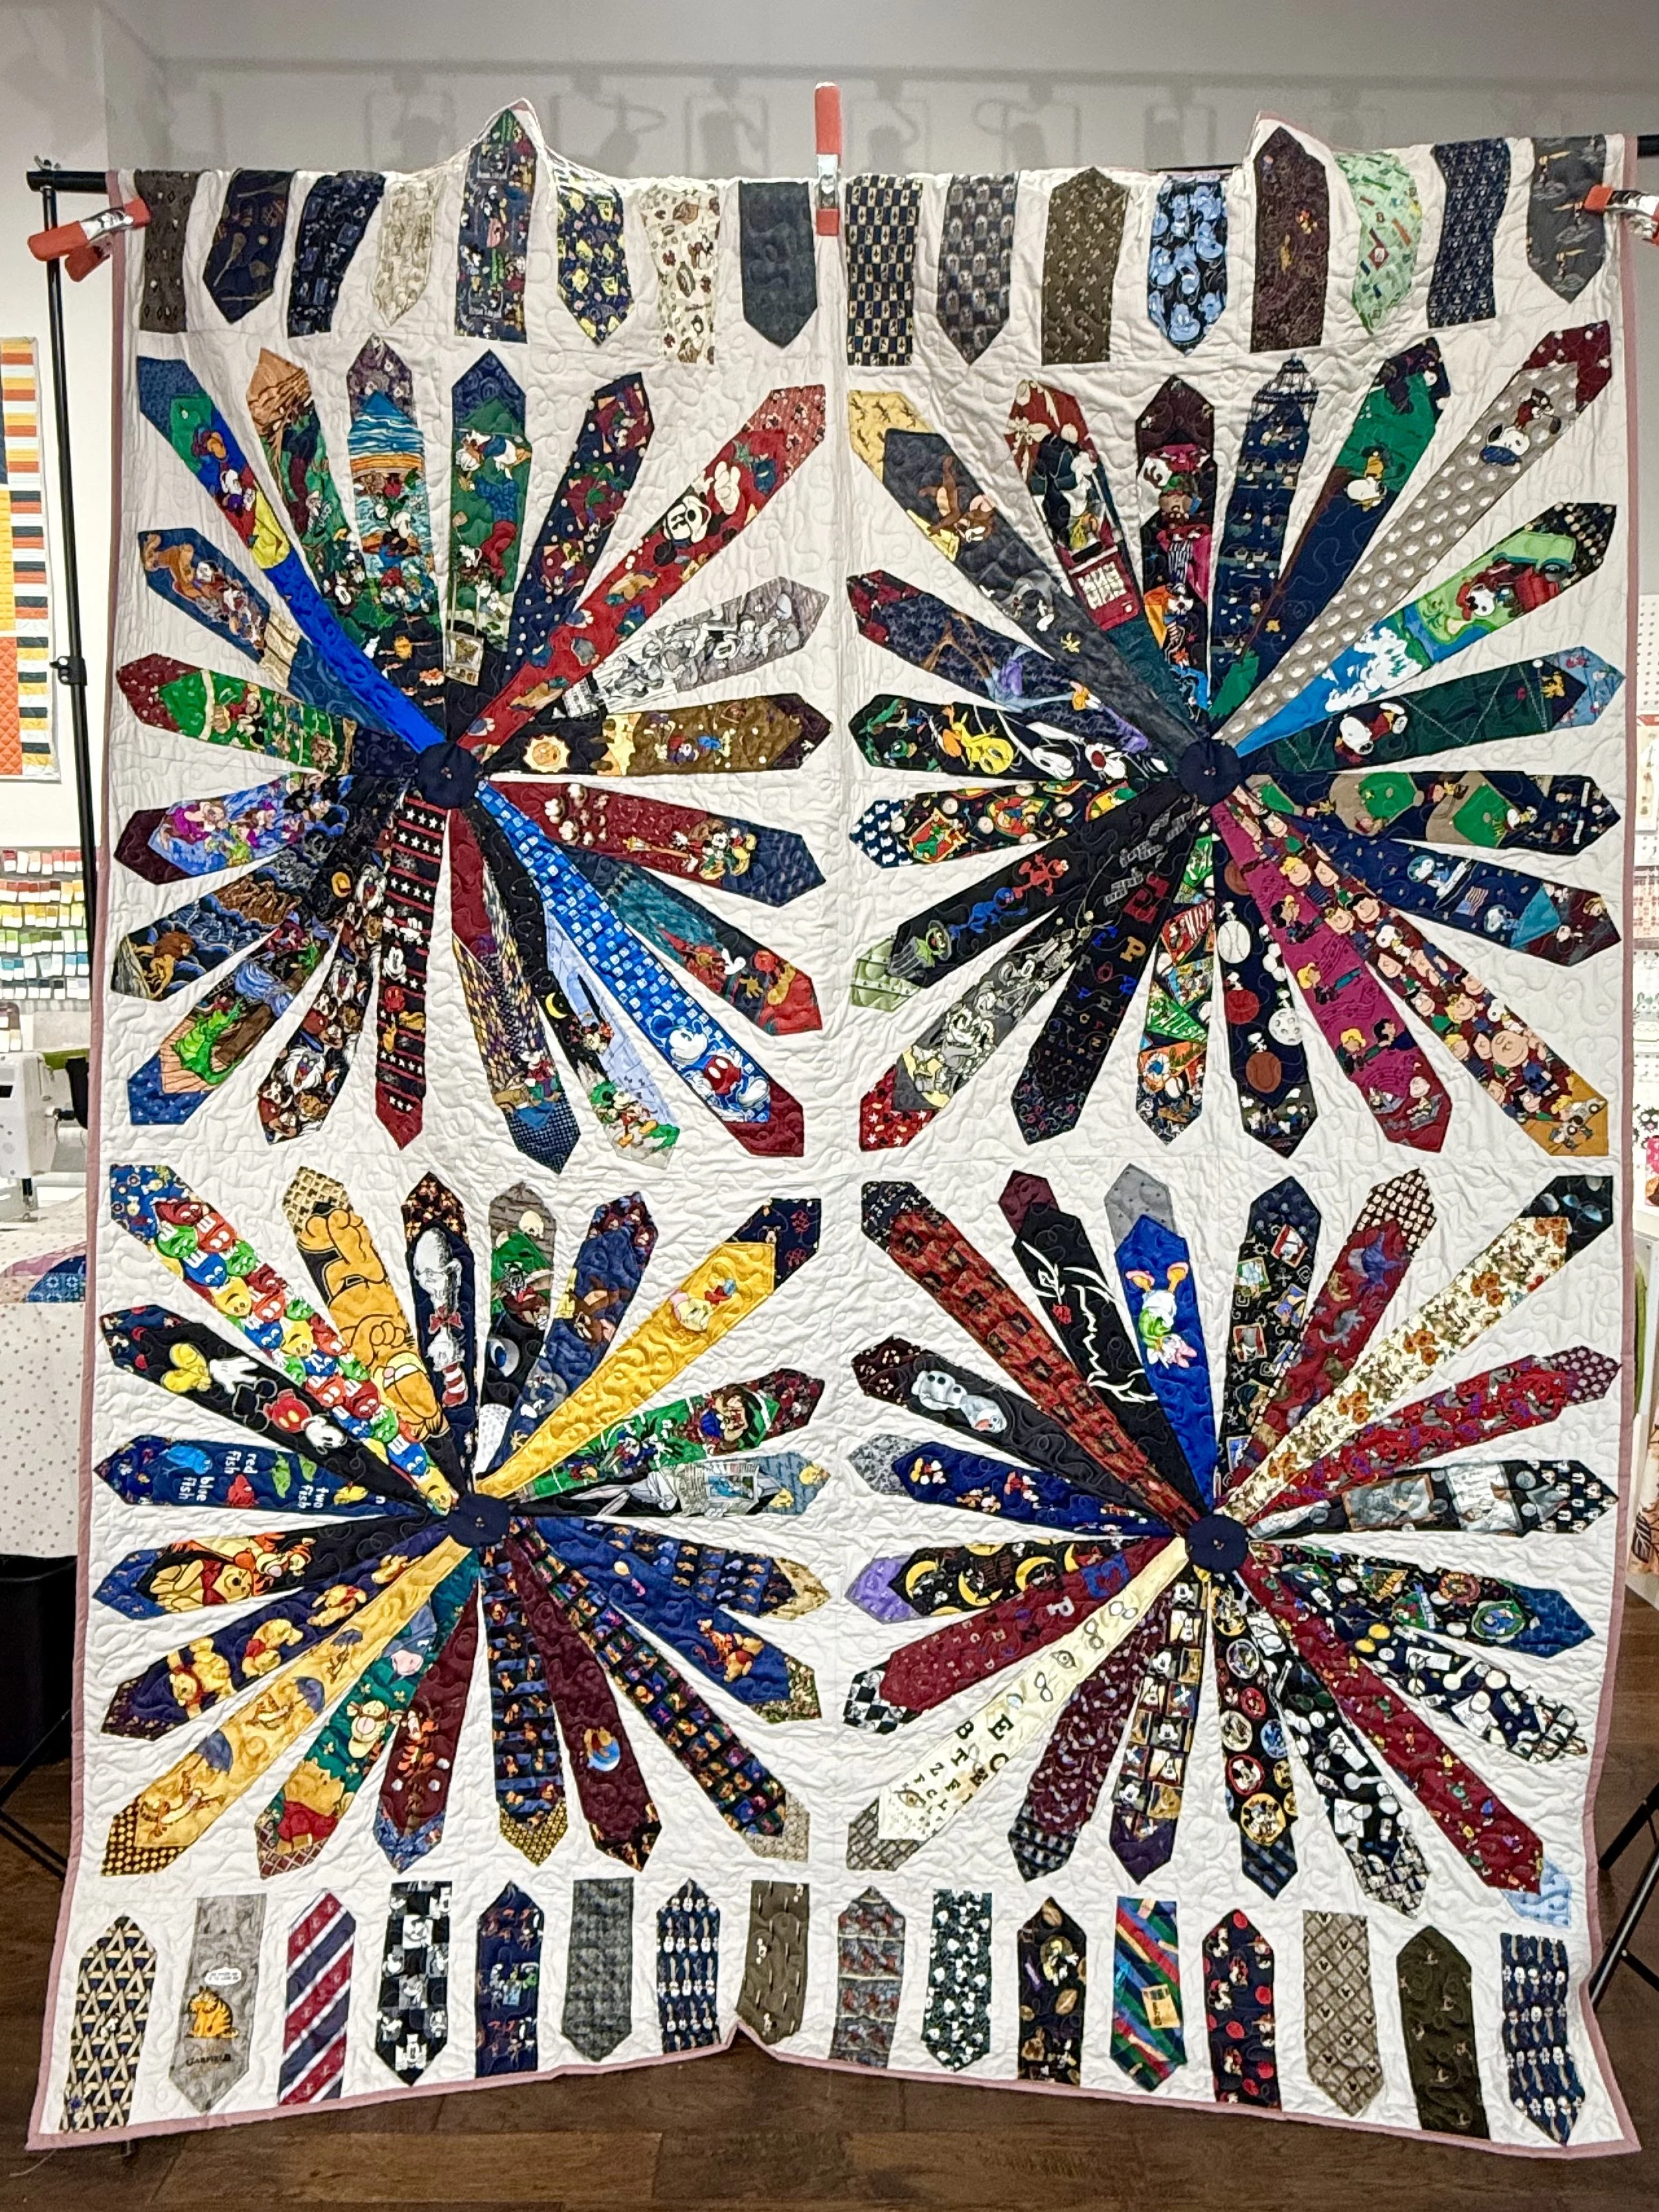
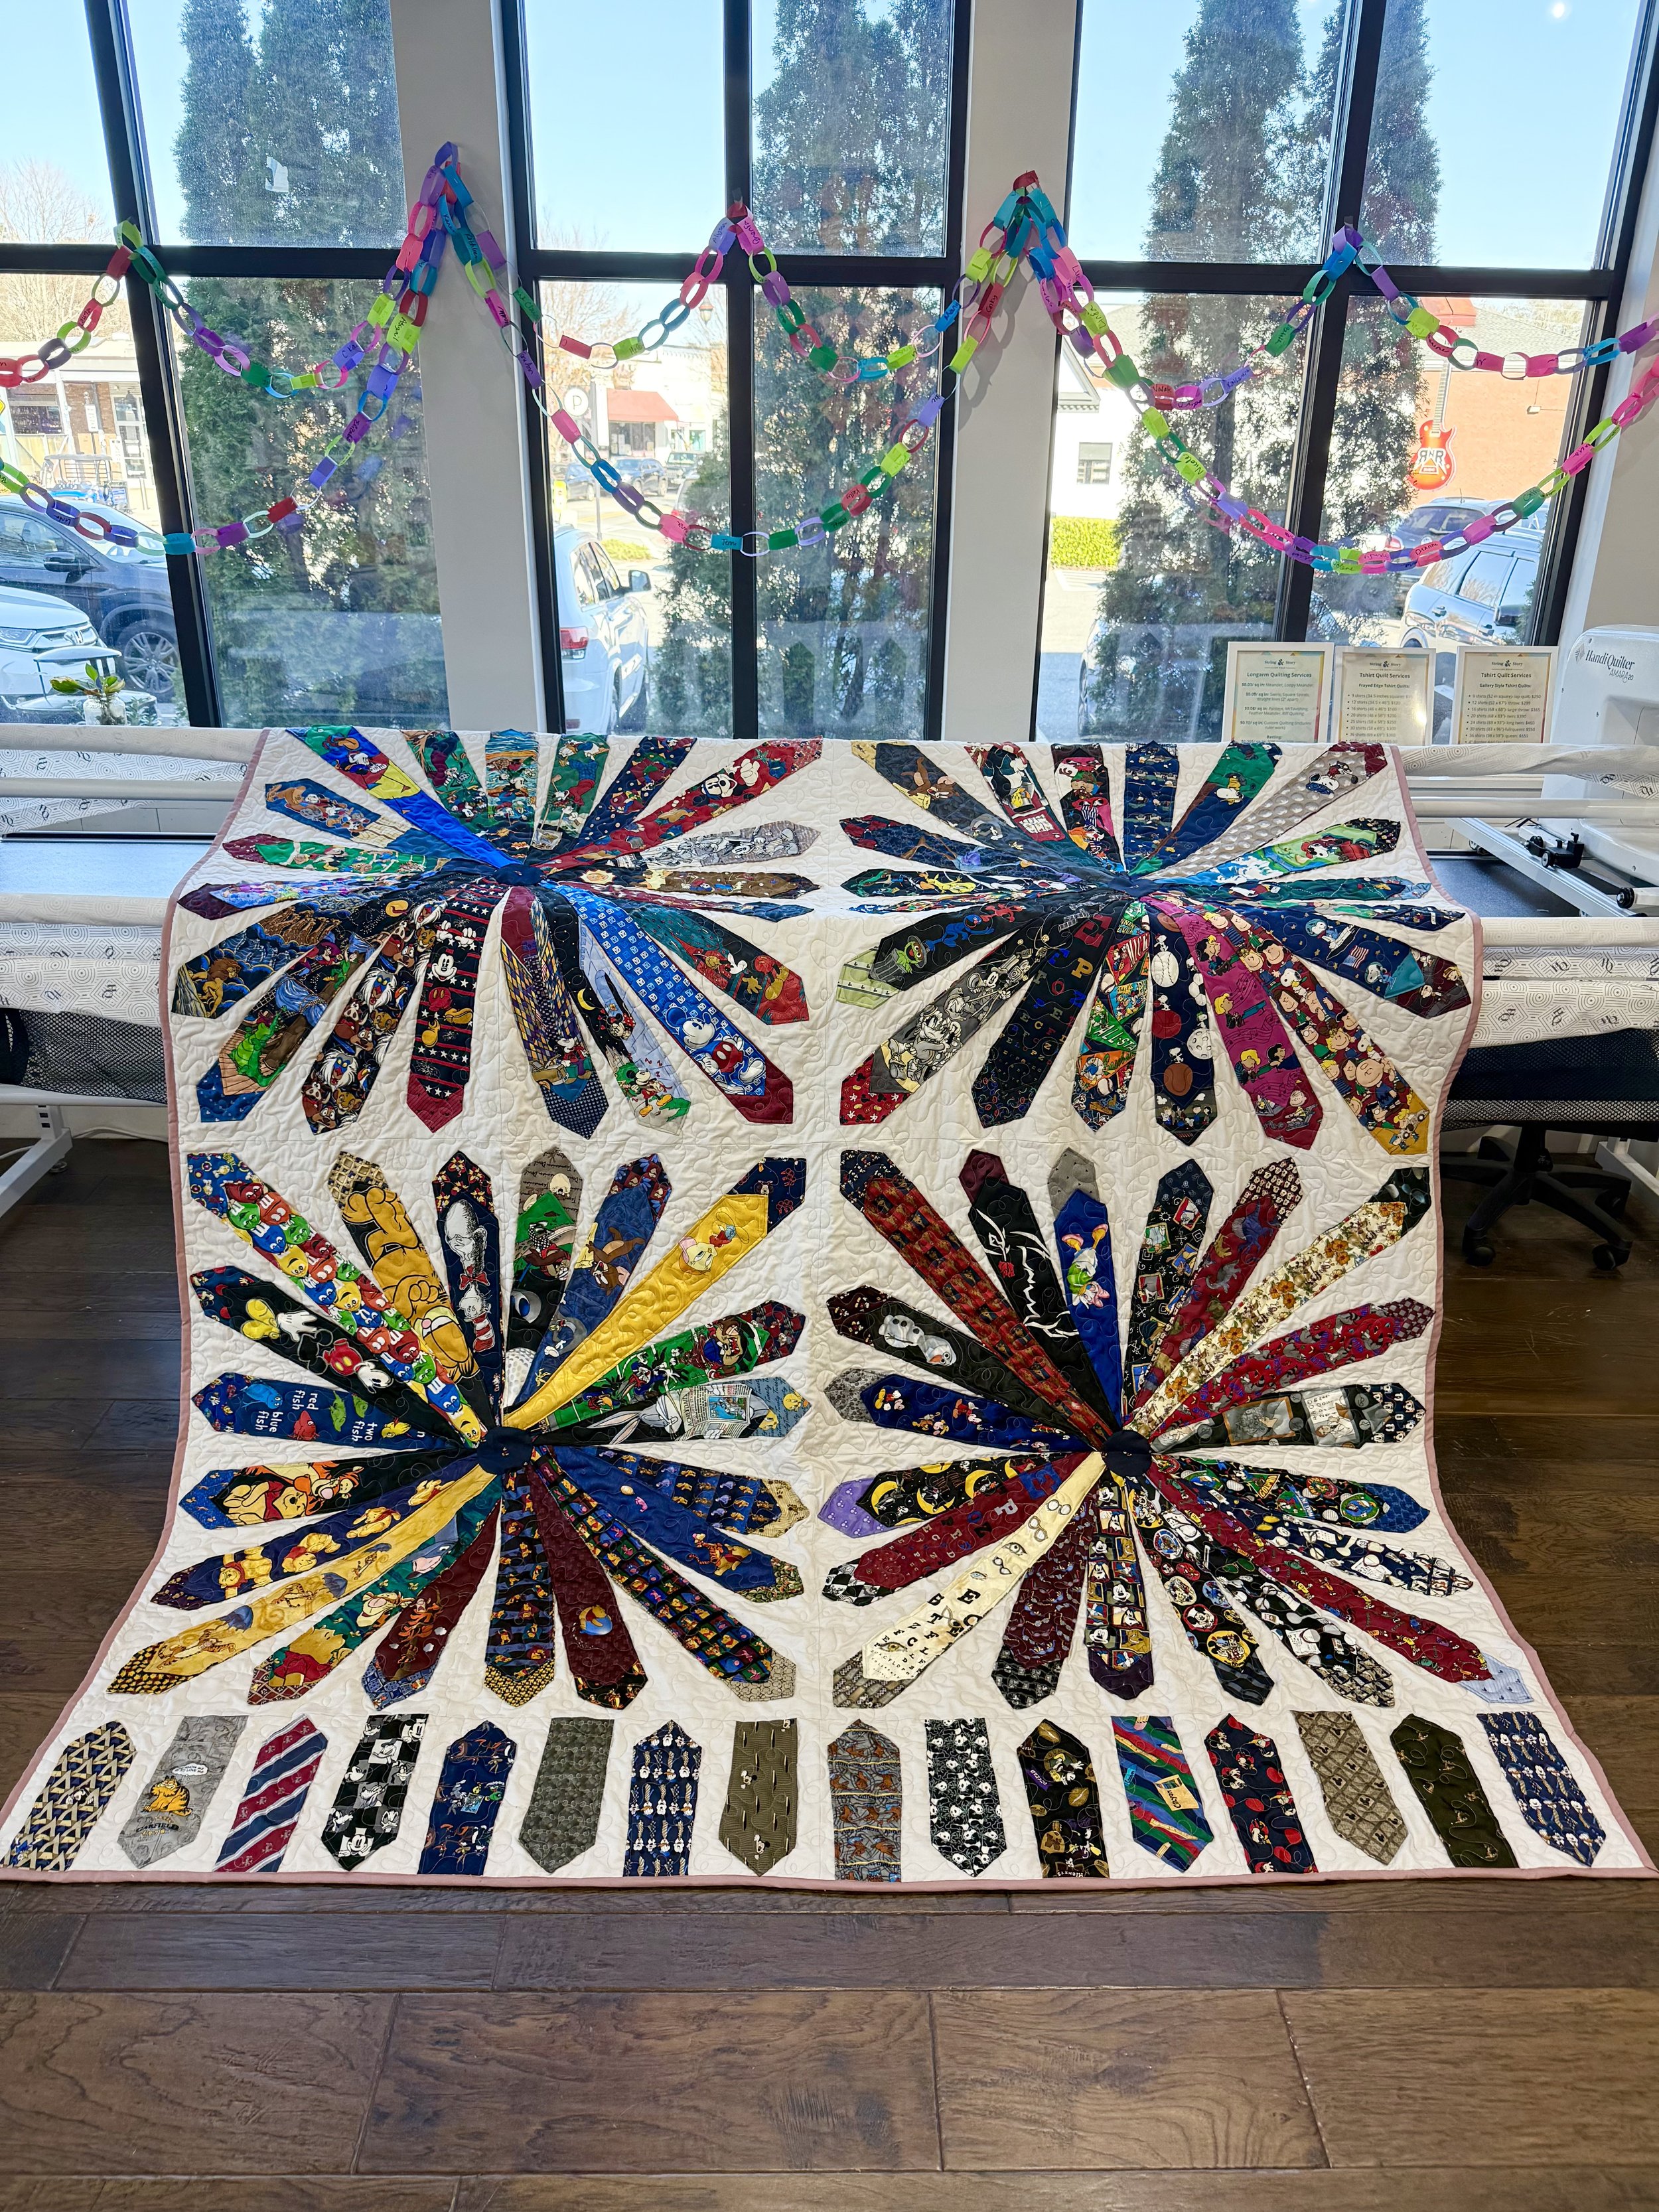
In total, I created 16 quarter-dresdens and pieced 4 large (42”) dresden blocks. To complete the quilt, I pieced a top and bottom border that was 12 1/2” x 85” unfinished. The border contained ties spaced 1 1/2” apart and appliquéd as described above.
My quilt top finished at about 84 x 108 inches (and weighed a ton).
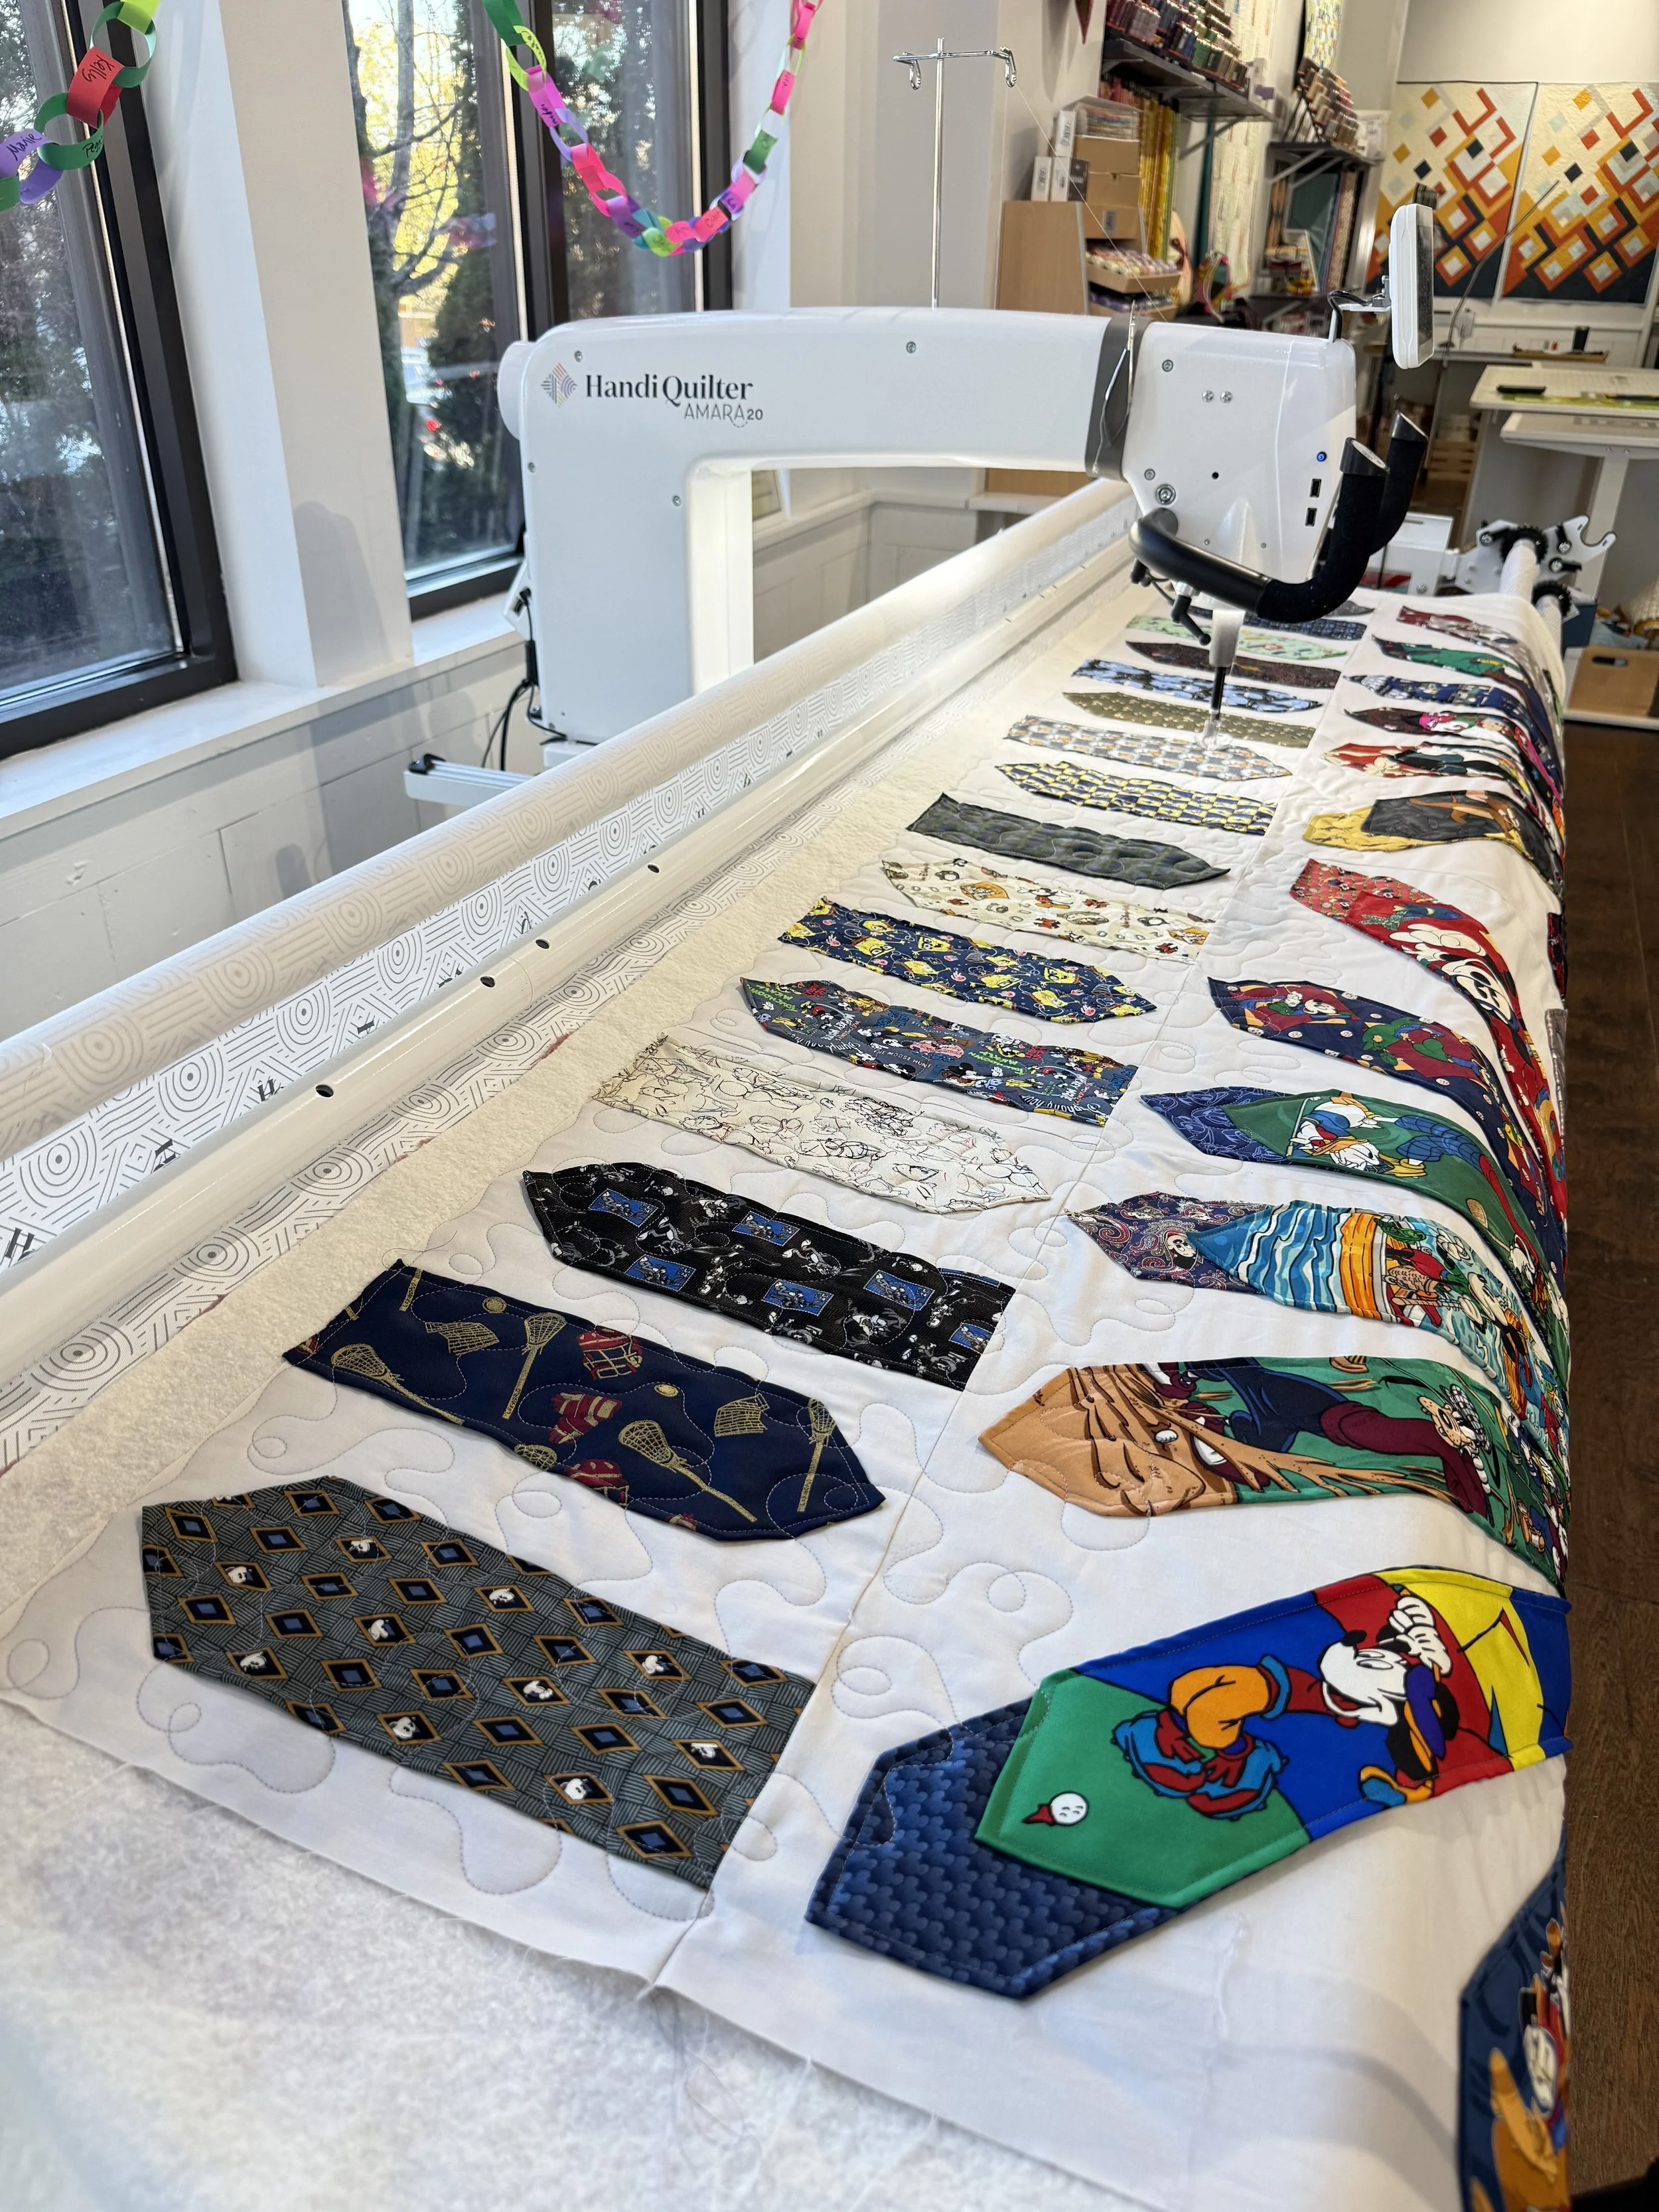
Quilting
I quilted the dresden plate tie quilt on my HandiQuilter Amara 20 using Dove Grey Aurifil 50 wt thread, Hobbs cotton batting, and a Glide foot. I quilted a loopy meander over the entire surface of the quilt, getting as close to the center of each block as the bulk would allow.
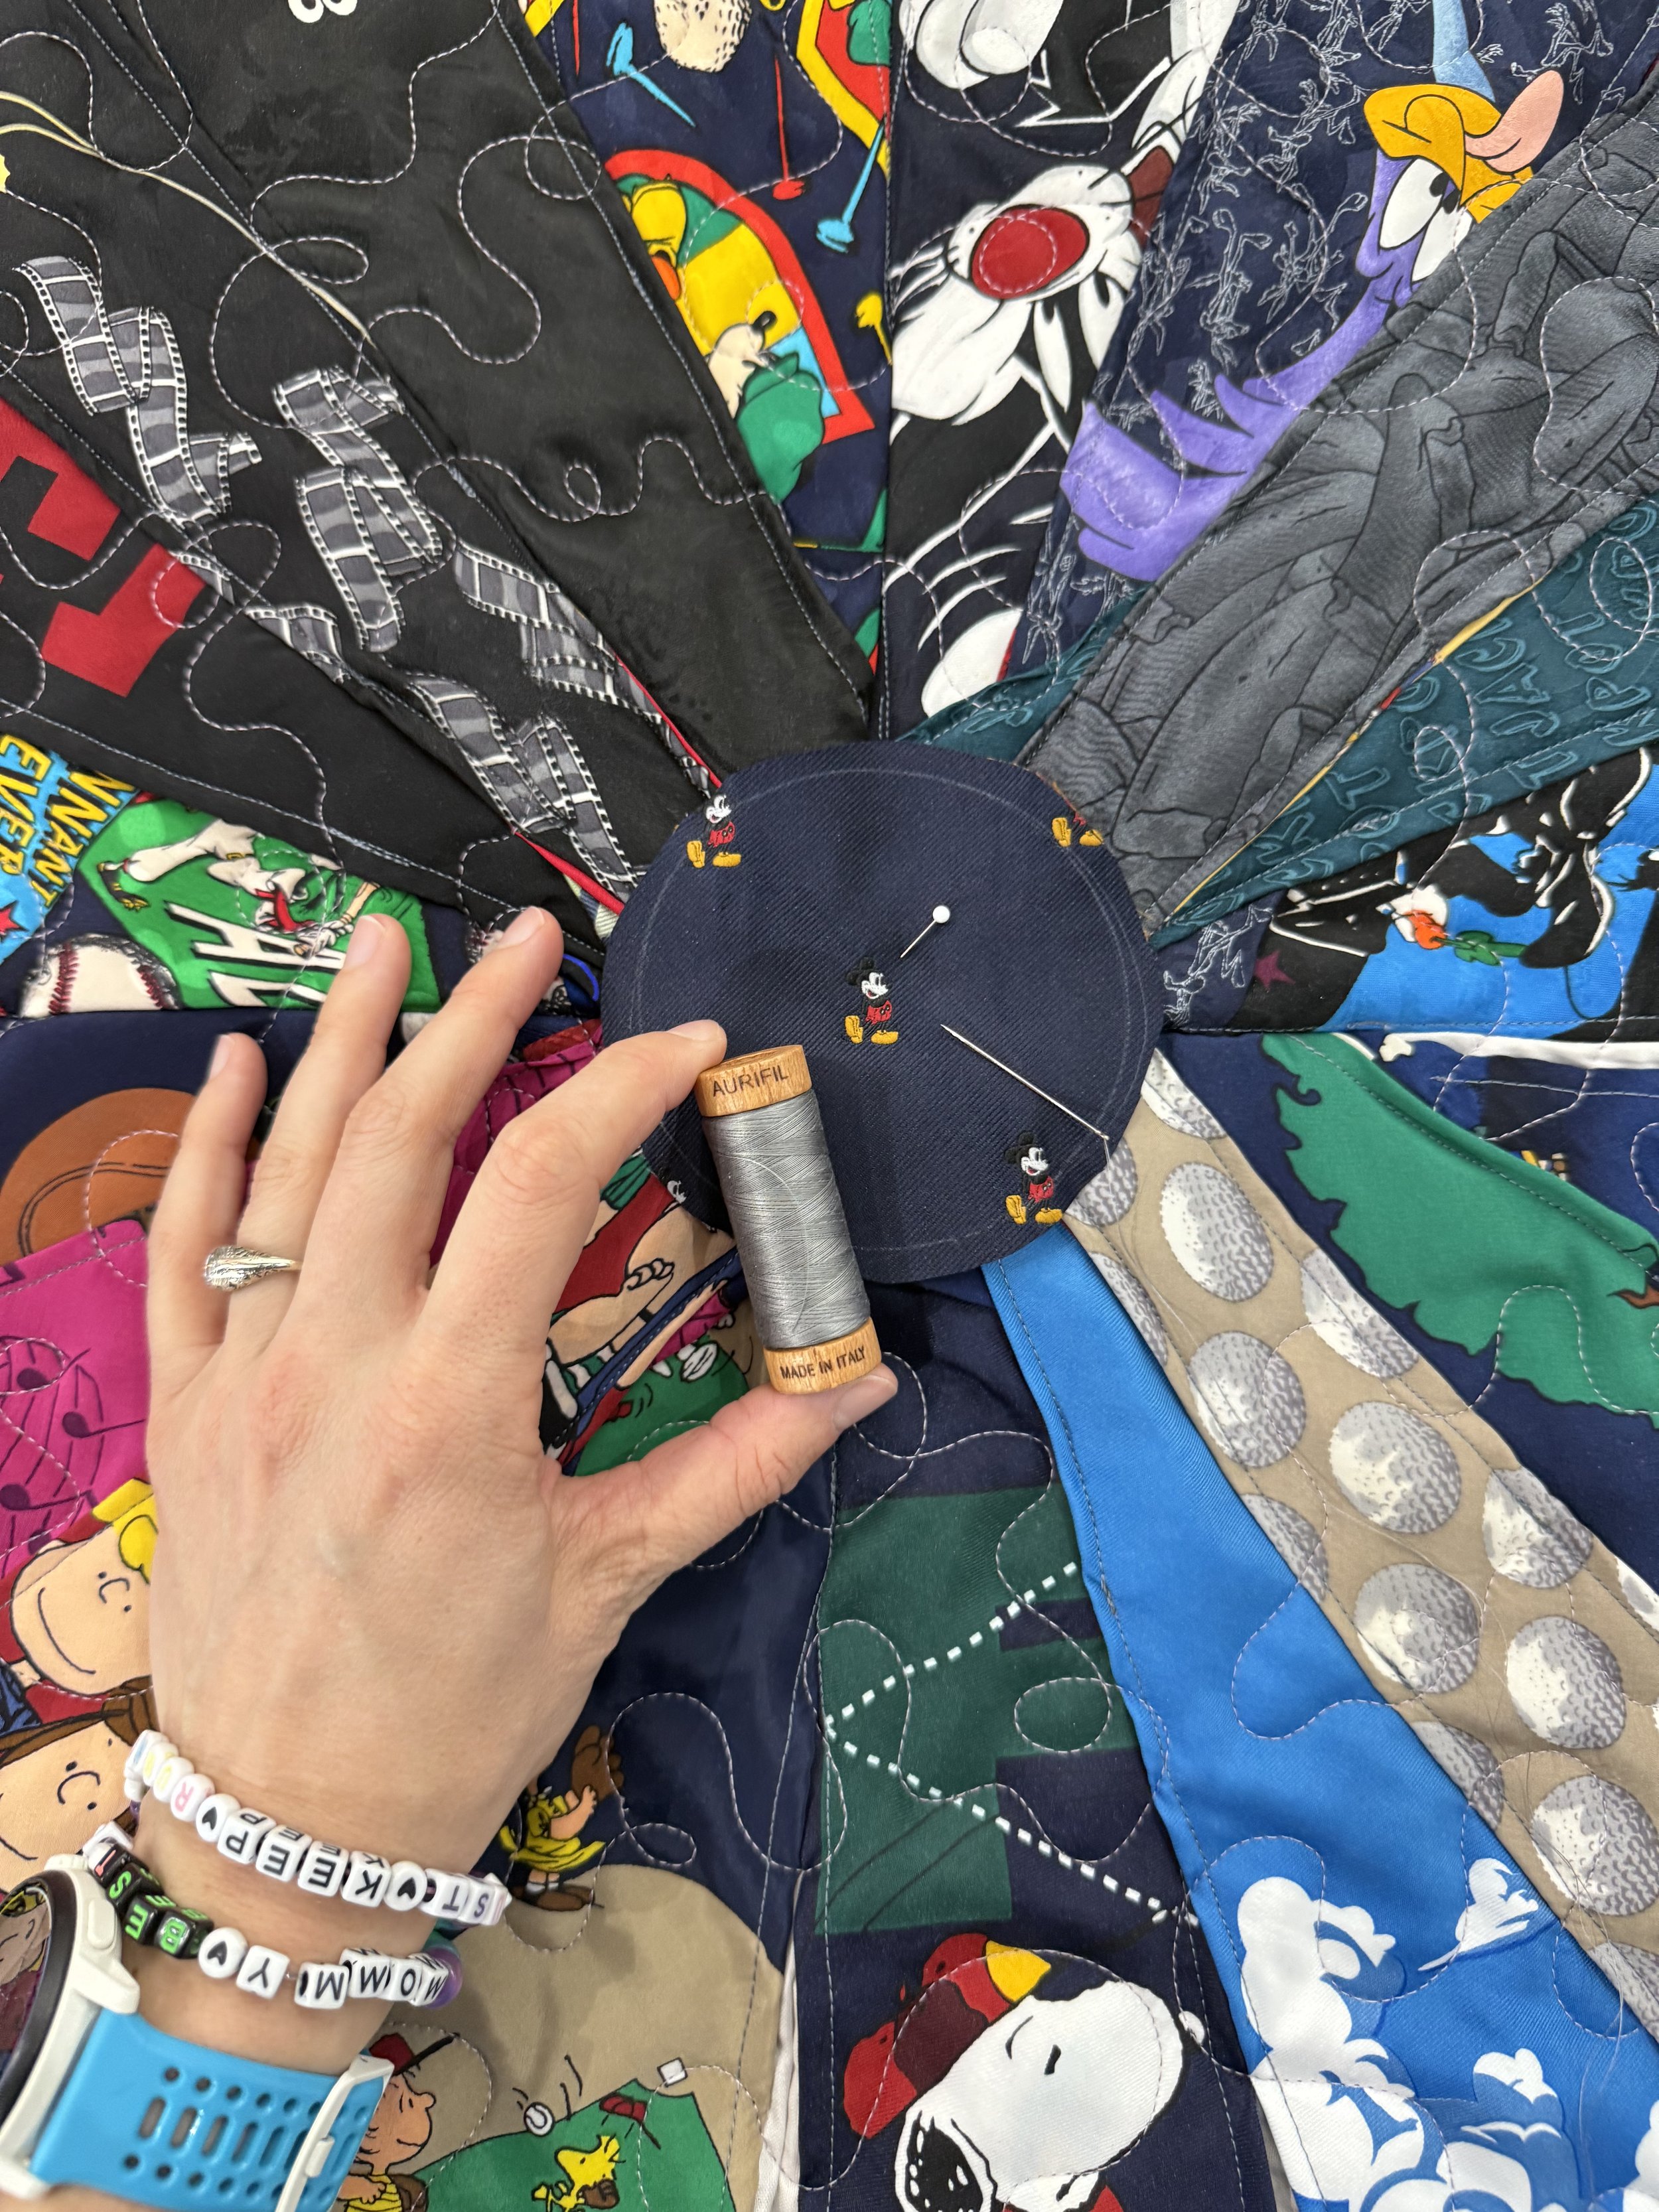
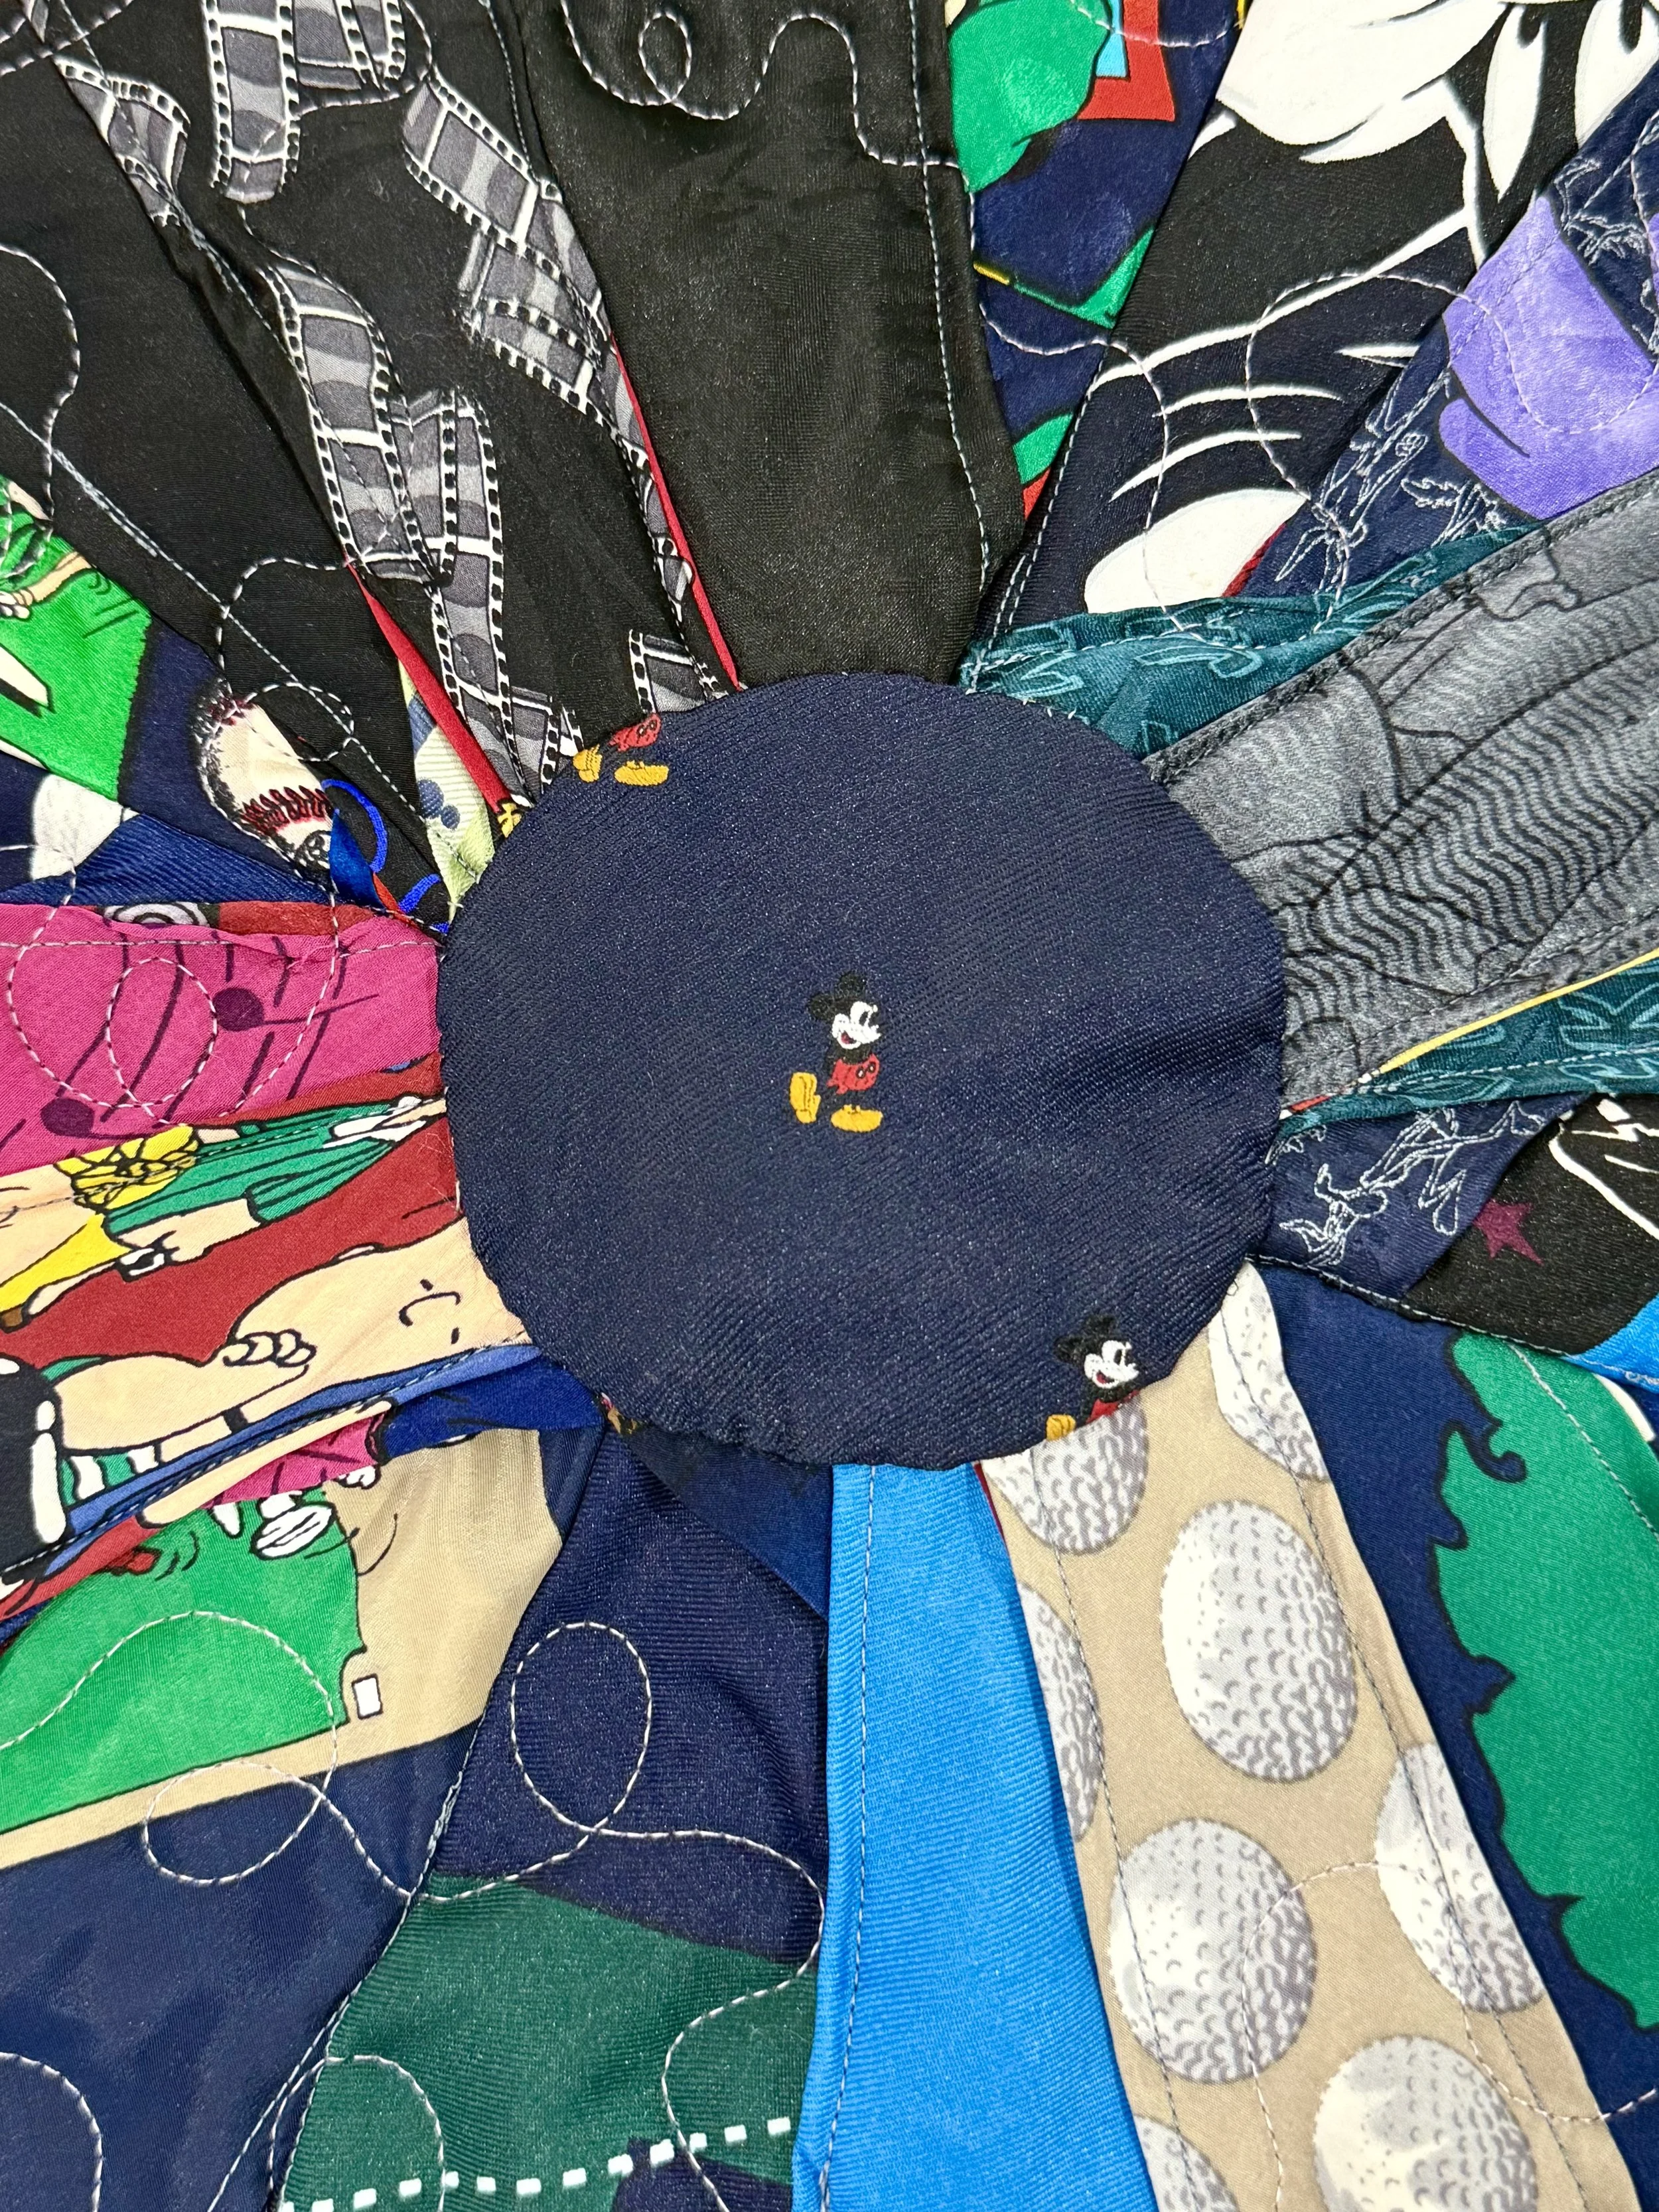
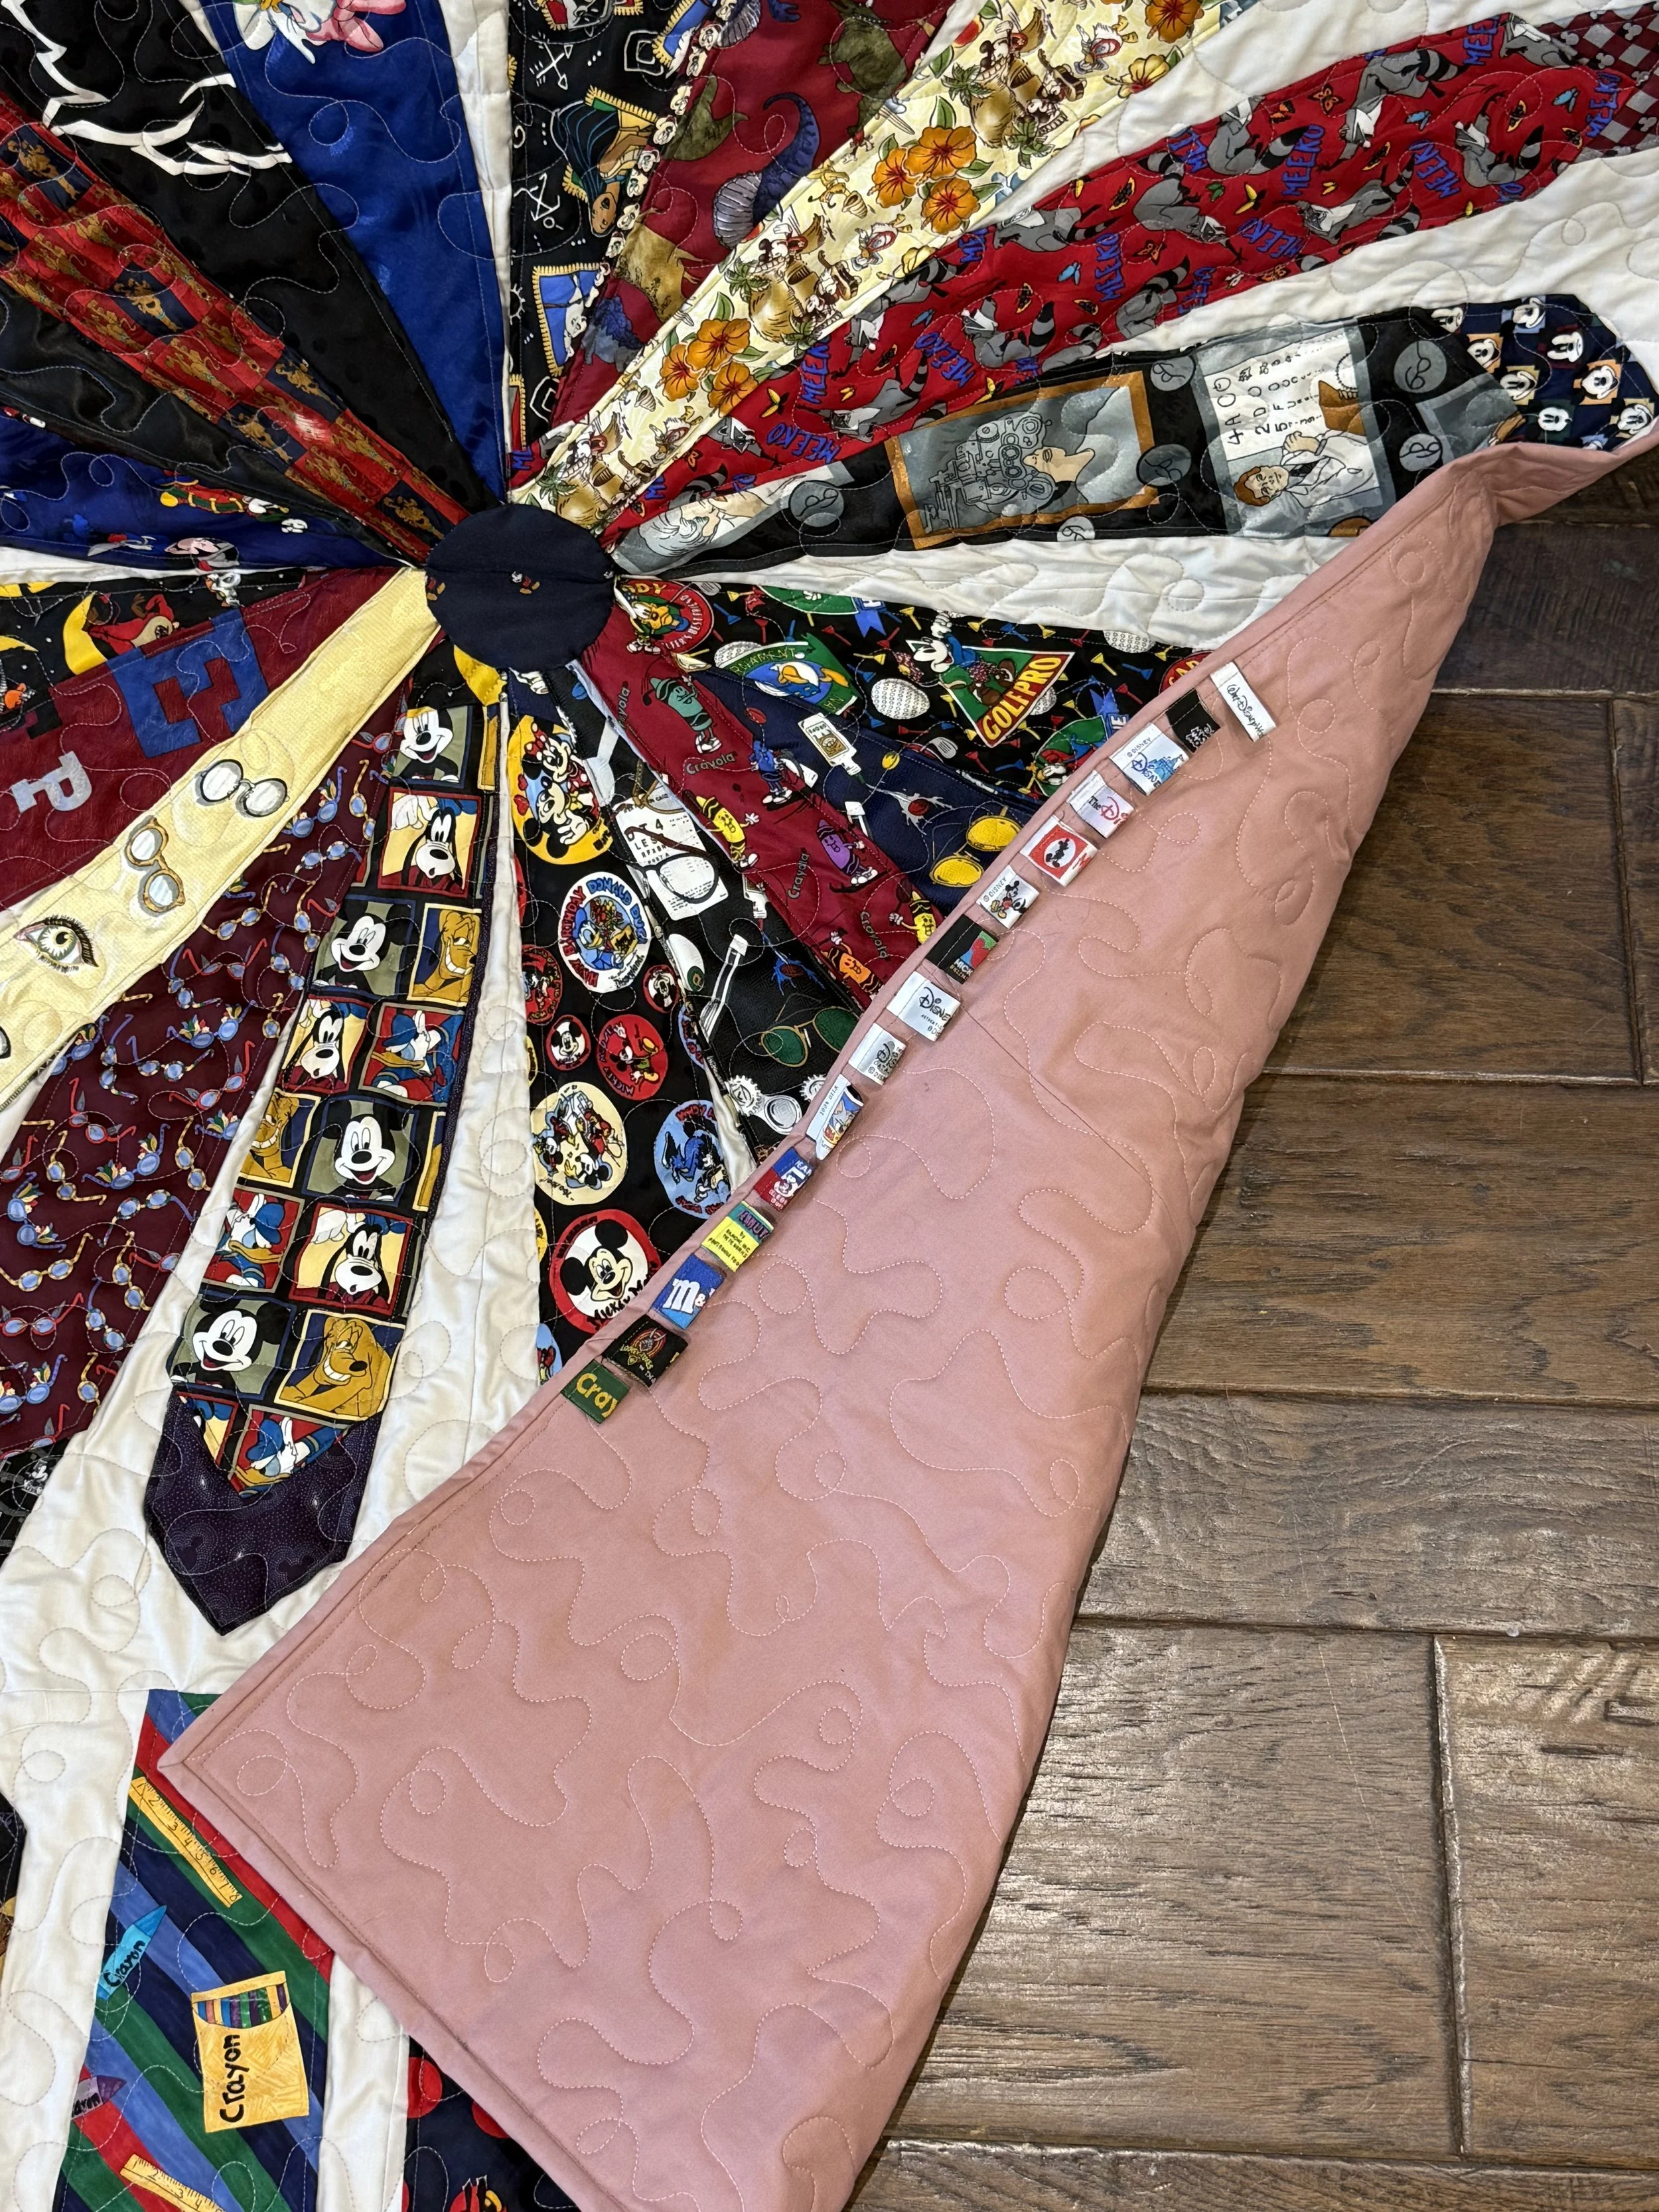
After quilting and machine binding, I used the final (and favorite) tie to create centers for the dresdens. This significantly improved the effect by covering the bulky centers and creating a neat, tidy finish. I used Aurifil 80 wt thread for the appliqué, and was guided by this handy dandy Fons & Porter tutorial. I found it very helpful to mark my seam allowance and use a super fine thread, and I was delighted by how much progress I made in my needle turn skills in just four little circles!
Final Thoughts
This was my first tie quilt, so every step was an experiment and a learning process. One of my final favorite details was on the back of the quilt. As I pieced the ties into blocks, I removed the tags. This collection featured ties from many Disney locations– the parks, the store, etc. I tucked the tags into the binding on the back as a little reminder of all the places he’d collected his ties.
Like tshirt quilts, this quilt was HEAVY (I made a silly reel of me using it as a barbell for squats here). Unlike tshirt quilts, I’m not sure how it will wash. The ties are silk, so, in theory, a gentle handwash with gentle detergent should be okay. I would not recommend wringing out the quilt but would instead press extra water out with towels and dry flat. A smaller quilt would certainly be easier to wash.
While this quilt was made to go on a couch or bed, for the best longevity of the ties, consider making a wallhanging. Simply attach a sleeve on the back for easy hanging (my dad likes to use flat steel bar to mount quilts as they are sleeker and stronger than the traditional curtain rod).
What started as an intriguing challenge blossomed into a massive opus. It was very special to preserve such an incredible tie collection, and I hope the Golds enjoy the quilt very much!
Resources
FREE WORKBOOK: Quilt Your First Project with Confidence
BLOG: Machine Binding Tips
THREAD: Aurifil 80wt