
How to Organize and Bust Your Stash
If you're going to use all that beautiful fabric, you need to know what you have and what you're going to make. It's time to see what you have and pick some great projects to plow through some serious yardage!
(This post may contain affiliate links)
Organizing Your Fabric
Yardage
If you have a very large stash, you might mostly have a SPACE problem. If this is the case, organize your favorites onto your shelves and into your drawers first. If you come across things you don't like any more, set them aside for possible destashing later. But, if you know you have enough room, but everything just feels piled up and ready to fall over, use these two key questions to get a handle on and reorganize your yardage.
Decide how you want to sort your fabrics: In rainbow order? By collection? By length? Some combination? My stash is pretty small, so I keep mostly solids on the top shelf, random prints all jumbled up in the middle, and I mostly sort by designer on the bottom shelf.
How do want to "contain" your fabric? I buy mostly fat quarters, so they come pre-folded, and I simply toss them on the shelf. The biggest thing for me is that I like to SEE everything so I know what I have. This is part of why I keep my stash more limited than many quilters. Common solutions include wrapping fabric around comic book boards or using plastic bins.
Scraps
These little buggers multiply when we're not looking, amiright?! Here's some ideas to wrangle scraps based on how you are most likely to use them.
If you love improv piecing or foundation paper piecing, your scrap storage system might be as simple as bins or baskets sorted by color
If traditional piecing is more your jam, then the QUEEN of scrap using is Bonnie Hunter of Quiltville. An exhaustive explanation of her fabulous Scrap User's System is available on her blog, and more "bite size" explanation is in the introduction to her wonderful book, Addicted to Scraps.

I tried the "general bins" strategy for a couple of years but didn't seem to ever make any progress on really using my scraps; I just don't do enough scrappy improv or scrappy paper piecing. Now, I'm in the process of migrating to a modified version of Bonnie's Scrap User's System and learning how to use these precut scraps. As Bonnie says, "If you build the units, the quilts will come!" Some of my favorite units include 1.5, 2, 2.5, 3, and 3.5 strips and squares.

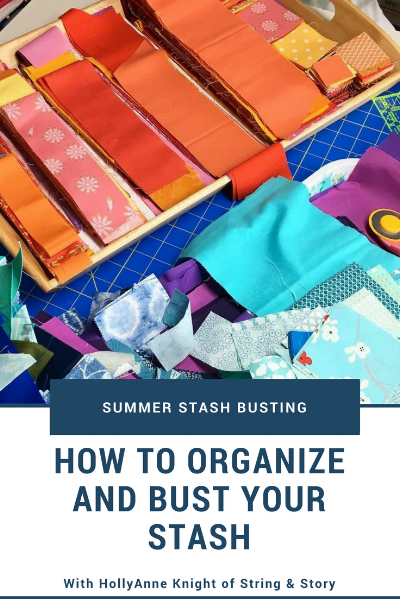
So far, my first leader and ender scrap busting project is an excessively cheerful quilt made from aqua and orange pinwheels, four patches, and squares. It will not be the most glamorous quilt I've ever made, but I'm amazed at how many scraps it is using, and I was SHOCKED at how quickly the units really started coming together. In just one afternoon of using them as leaders and enders, I had a whole stack of square pairs ready to become four patches, and I don't feel like sewing them in-between the other bits I was working on slowed me down at all.

WIPs / Tops
Sometimes the "extra" in our sewing room is actually projects half done and unquilted tops. To organize these, start by pulling everything out and creating a separate pile for each project to see everything you have. Next, if you have any "quilts in progress" that you haven't cut fabric for (i.e. you bought a pattern and pulled fabric but never started cutting), consider putting the fabric back in your stash and setting the pattern aside for now unless you know you will be tackling that project ASAP. Then, make a list of the remaining projects and tops that need to be finished. If there are things you have fallen out of love with, consider destashing, tossing, or donating them. Finally, set goals for yourself about when you want to finish each remaining WIP/ top on your list.
Resources
Use these resources to help you finish more projects from your stash
Quilting Rockstar Set List: This freebie is a PDF goal sheet to help you move your projects toward the finish line
Confident FMQ Workbook: free motion quilt your own quilts with the handy tips in this free guide!
BLOGS: Burrito Pillowcases (a great way to store quilts, gift quilts, and use over a yard of fabric!), Tote Bags, and Zippy Pouches are all fun, fast projects
PATTERN: Dogwood Blossoms is a fast, fat quarter friendly quilt pattern perfect for bold prints and textures

PS Don't forget to pin this post so you can find it later!
Share this blog if you found it helpful: