
How to Sew an Easy Zippy Bag
I love a good tote bag or backpack, but there’s nothing more annoying than losing my small things like keys, chapstick, and headphones down inside. An easy zippy bag is a great solution, plus making them is an opportunity to practice installing zippers and boxing corners.
(This post contains affiliate links)

If you’ve been looking for a fun project that can use up cute free motion quilting practice sandwiches, this is it! Grab a handful of zippers at Ye Olde Big Box Store (or snag them from us here), some coordinating thread, and let’s practice some bag making skills. Pro tip: these also make cute gift items and could be filled with treasures such as earrings, lip gloss, and lotion for a friend or your favorite notions for a fellow quilter! Just think of all the ways you could turn them into travel toy bags, make up bags, teacher gifts, beard care kits, etc!
IMAGE
Supplies
Before we begin, let’s gather our supplies. Clean and oil, and put in a fresh 14 Universal needle. Also gather:
Quilted fabric, at least 20” x 10”
lining fabric (a fat quarter will do)
a 9” zipper
Coordinating thread (I used Aurifil 50wt, but 28 wt or 40 wt would also make the top stitching look nice)
1/4 inch foot
Rotary mat, cutter, and ruler
Make the Bag
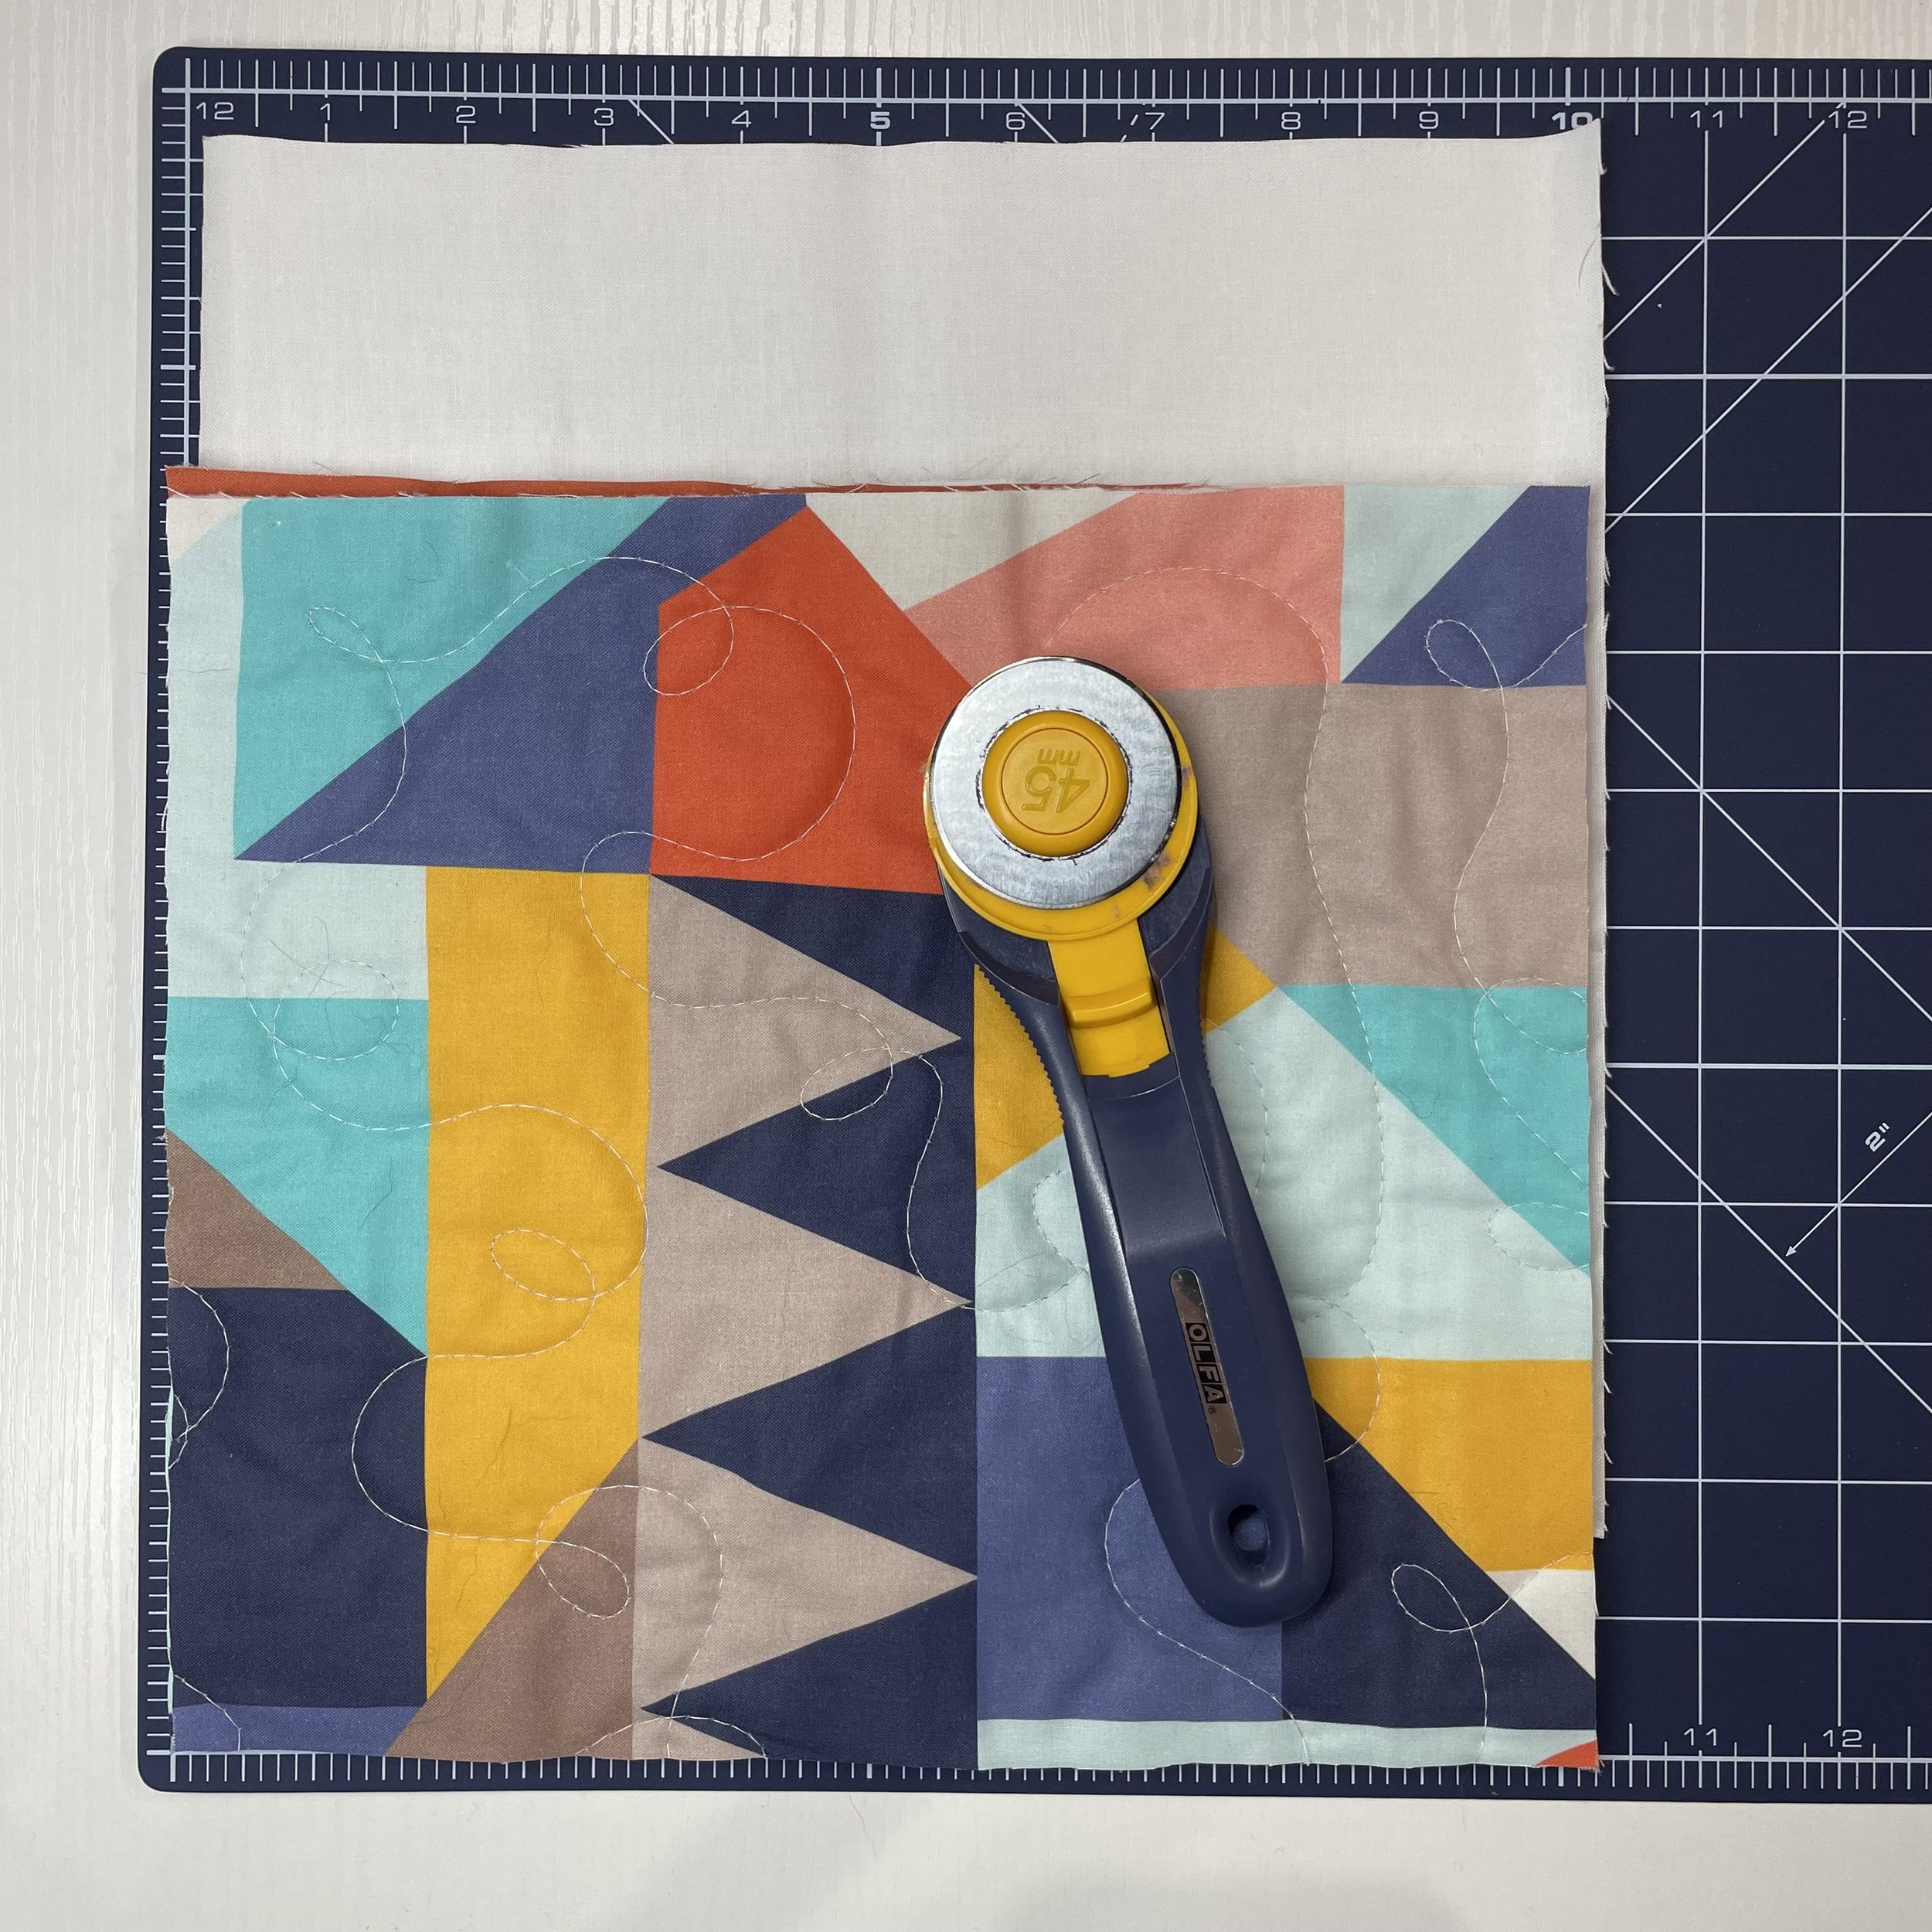

Cut two (2) 10” squares out of the quilted fabric and two from the lining fabric
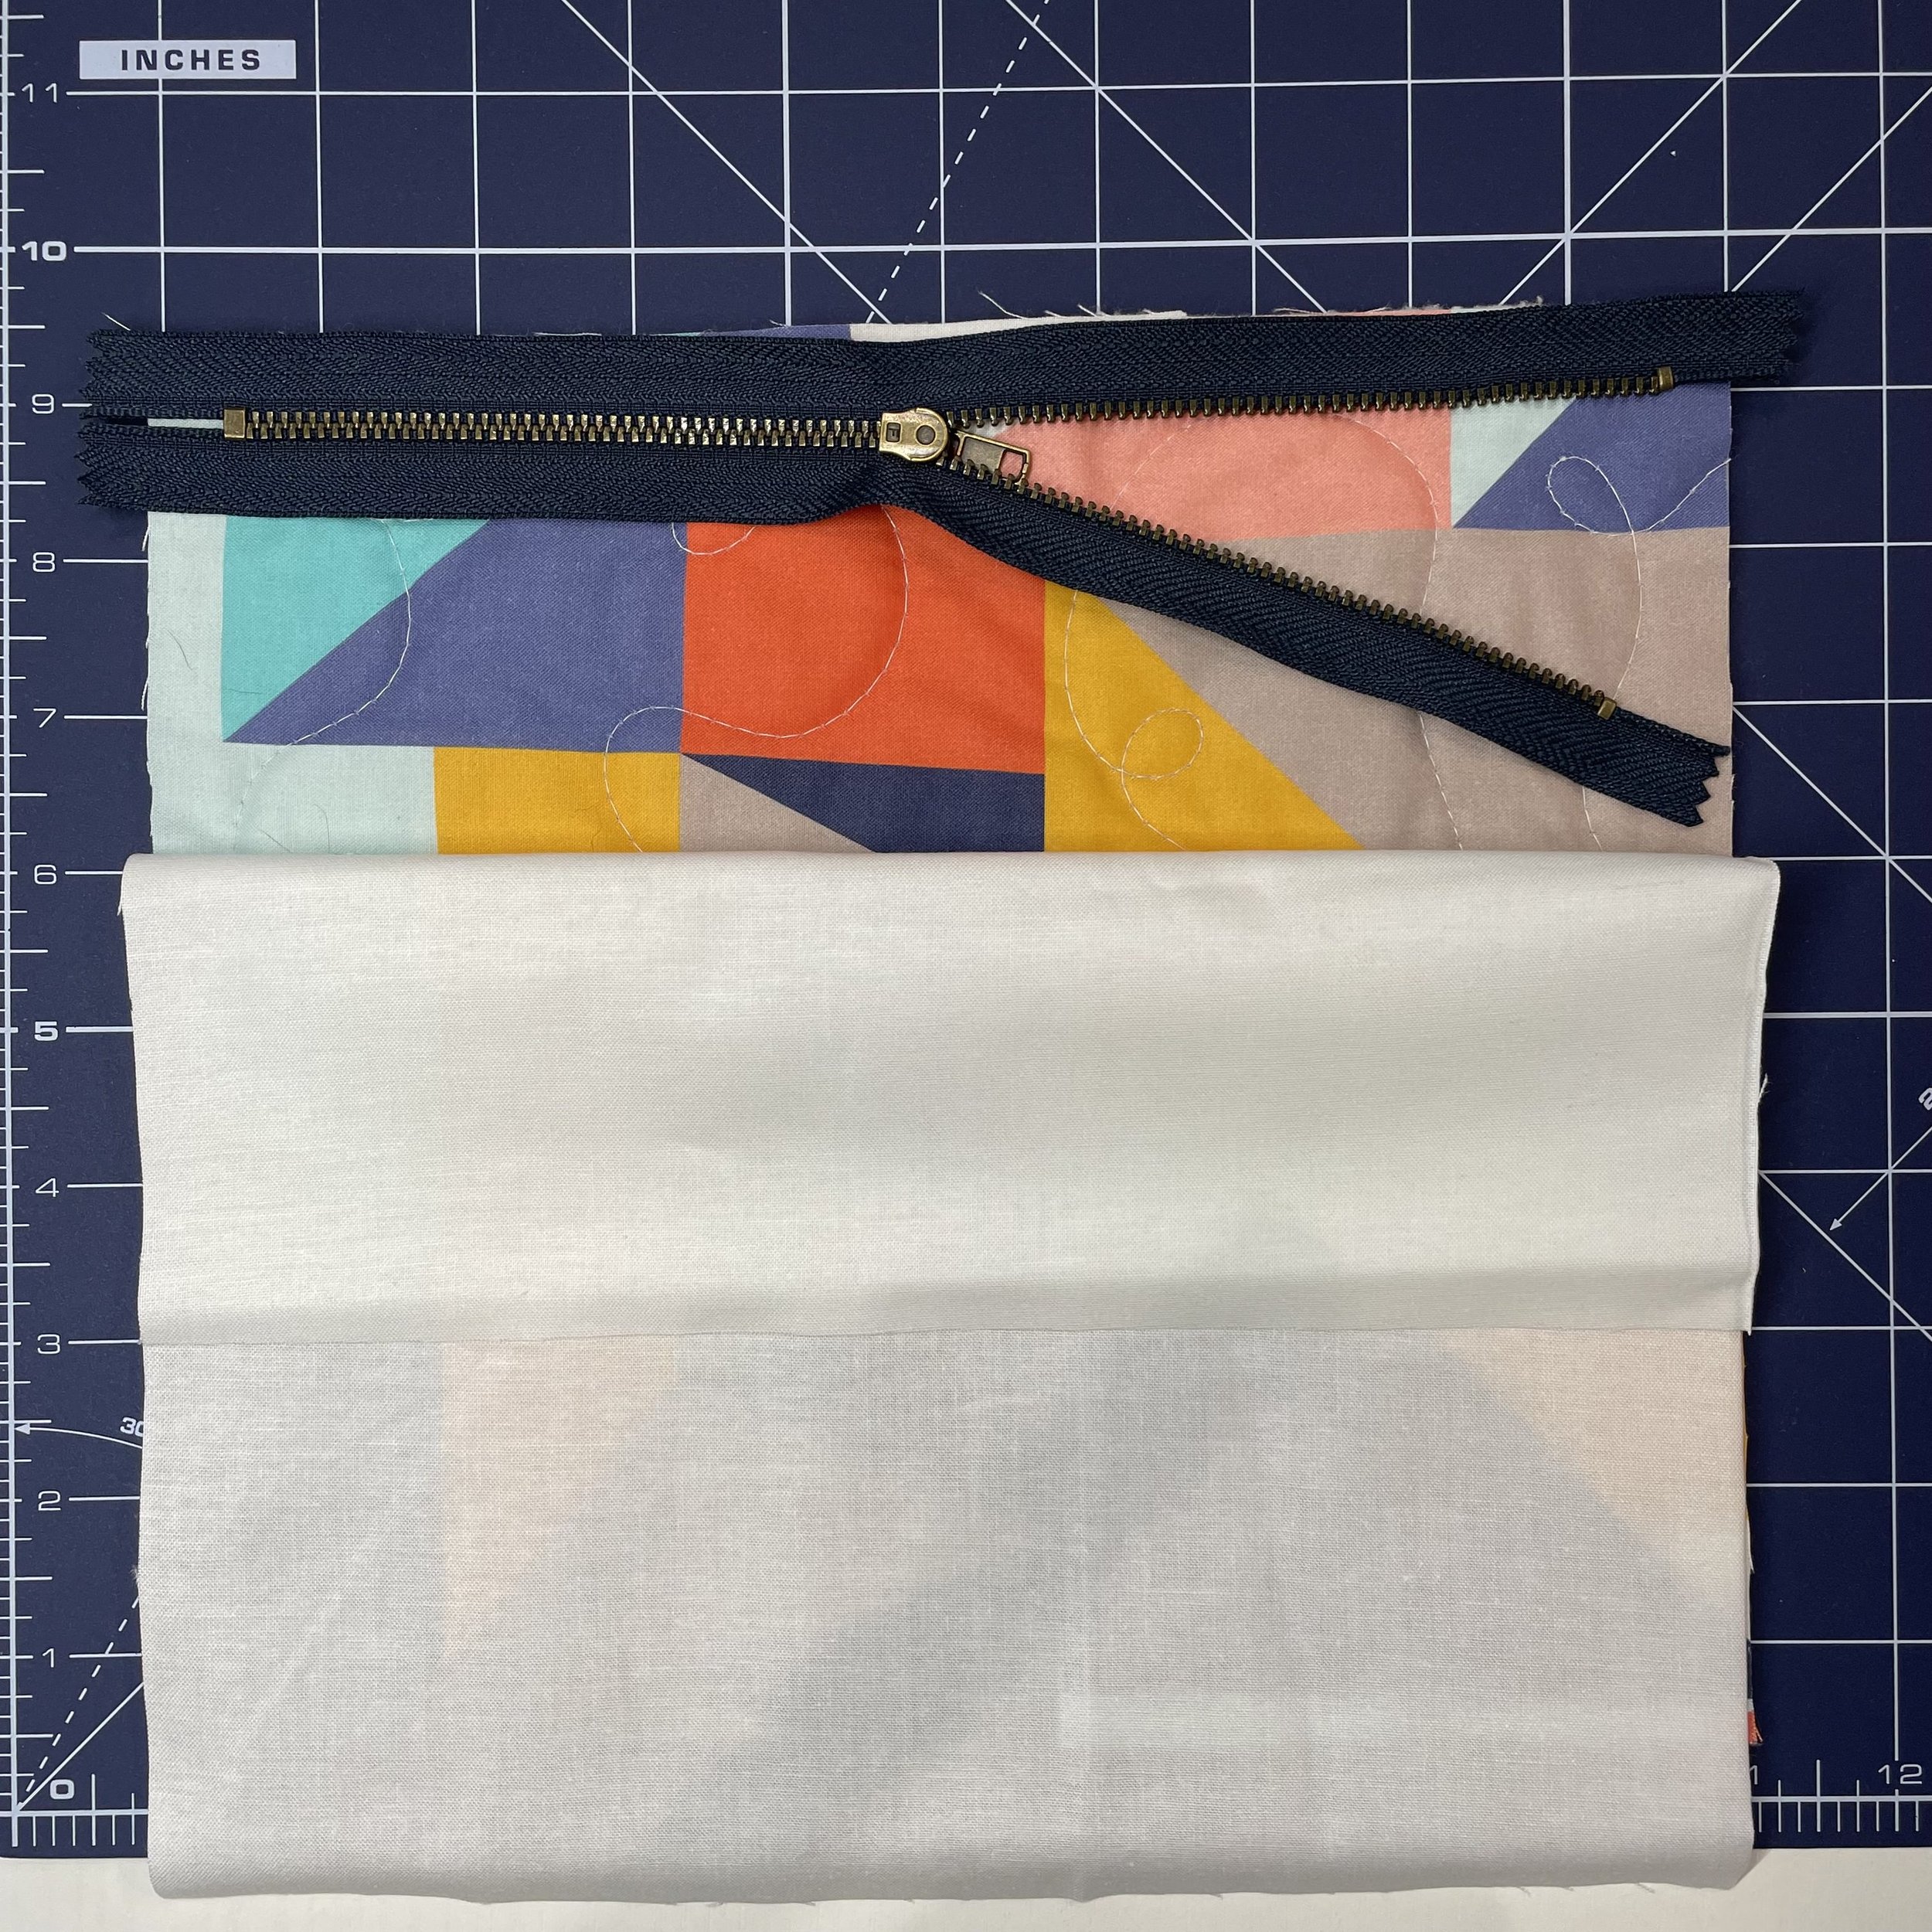
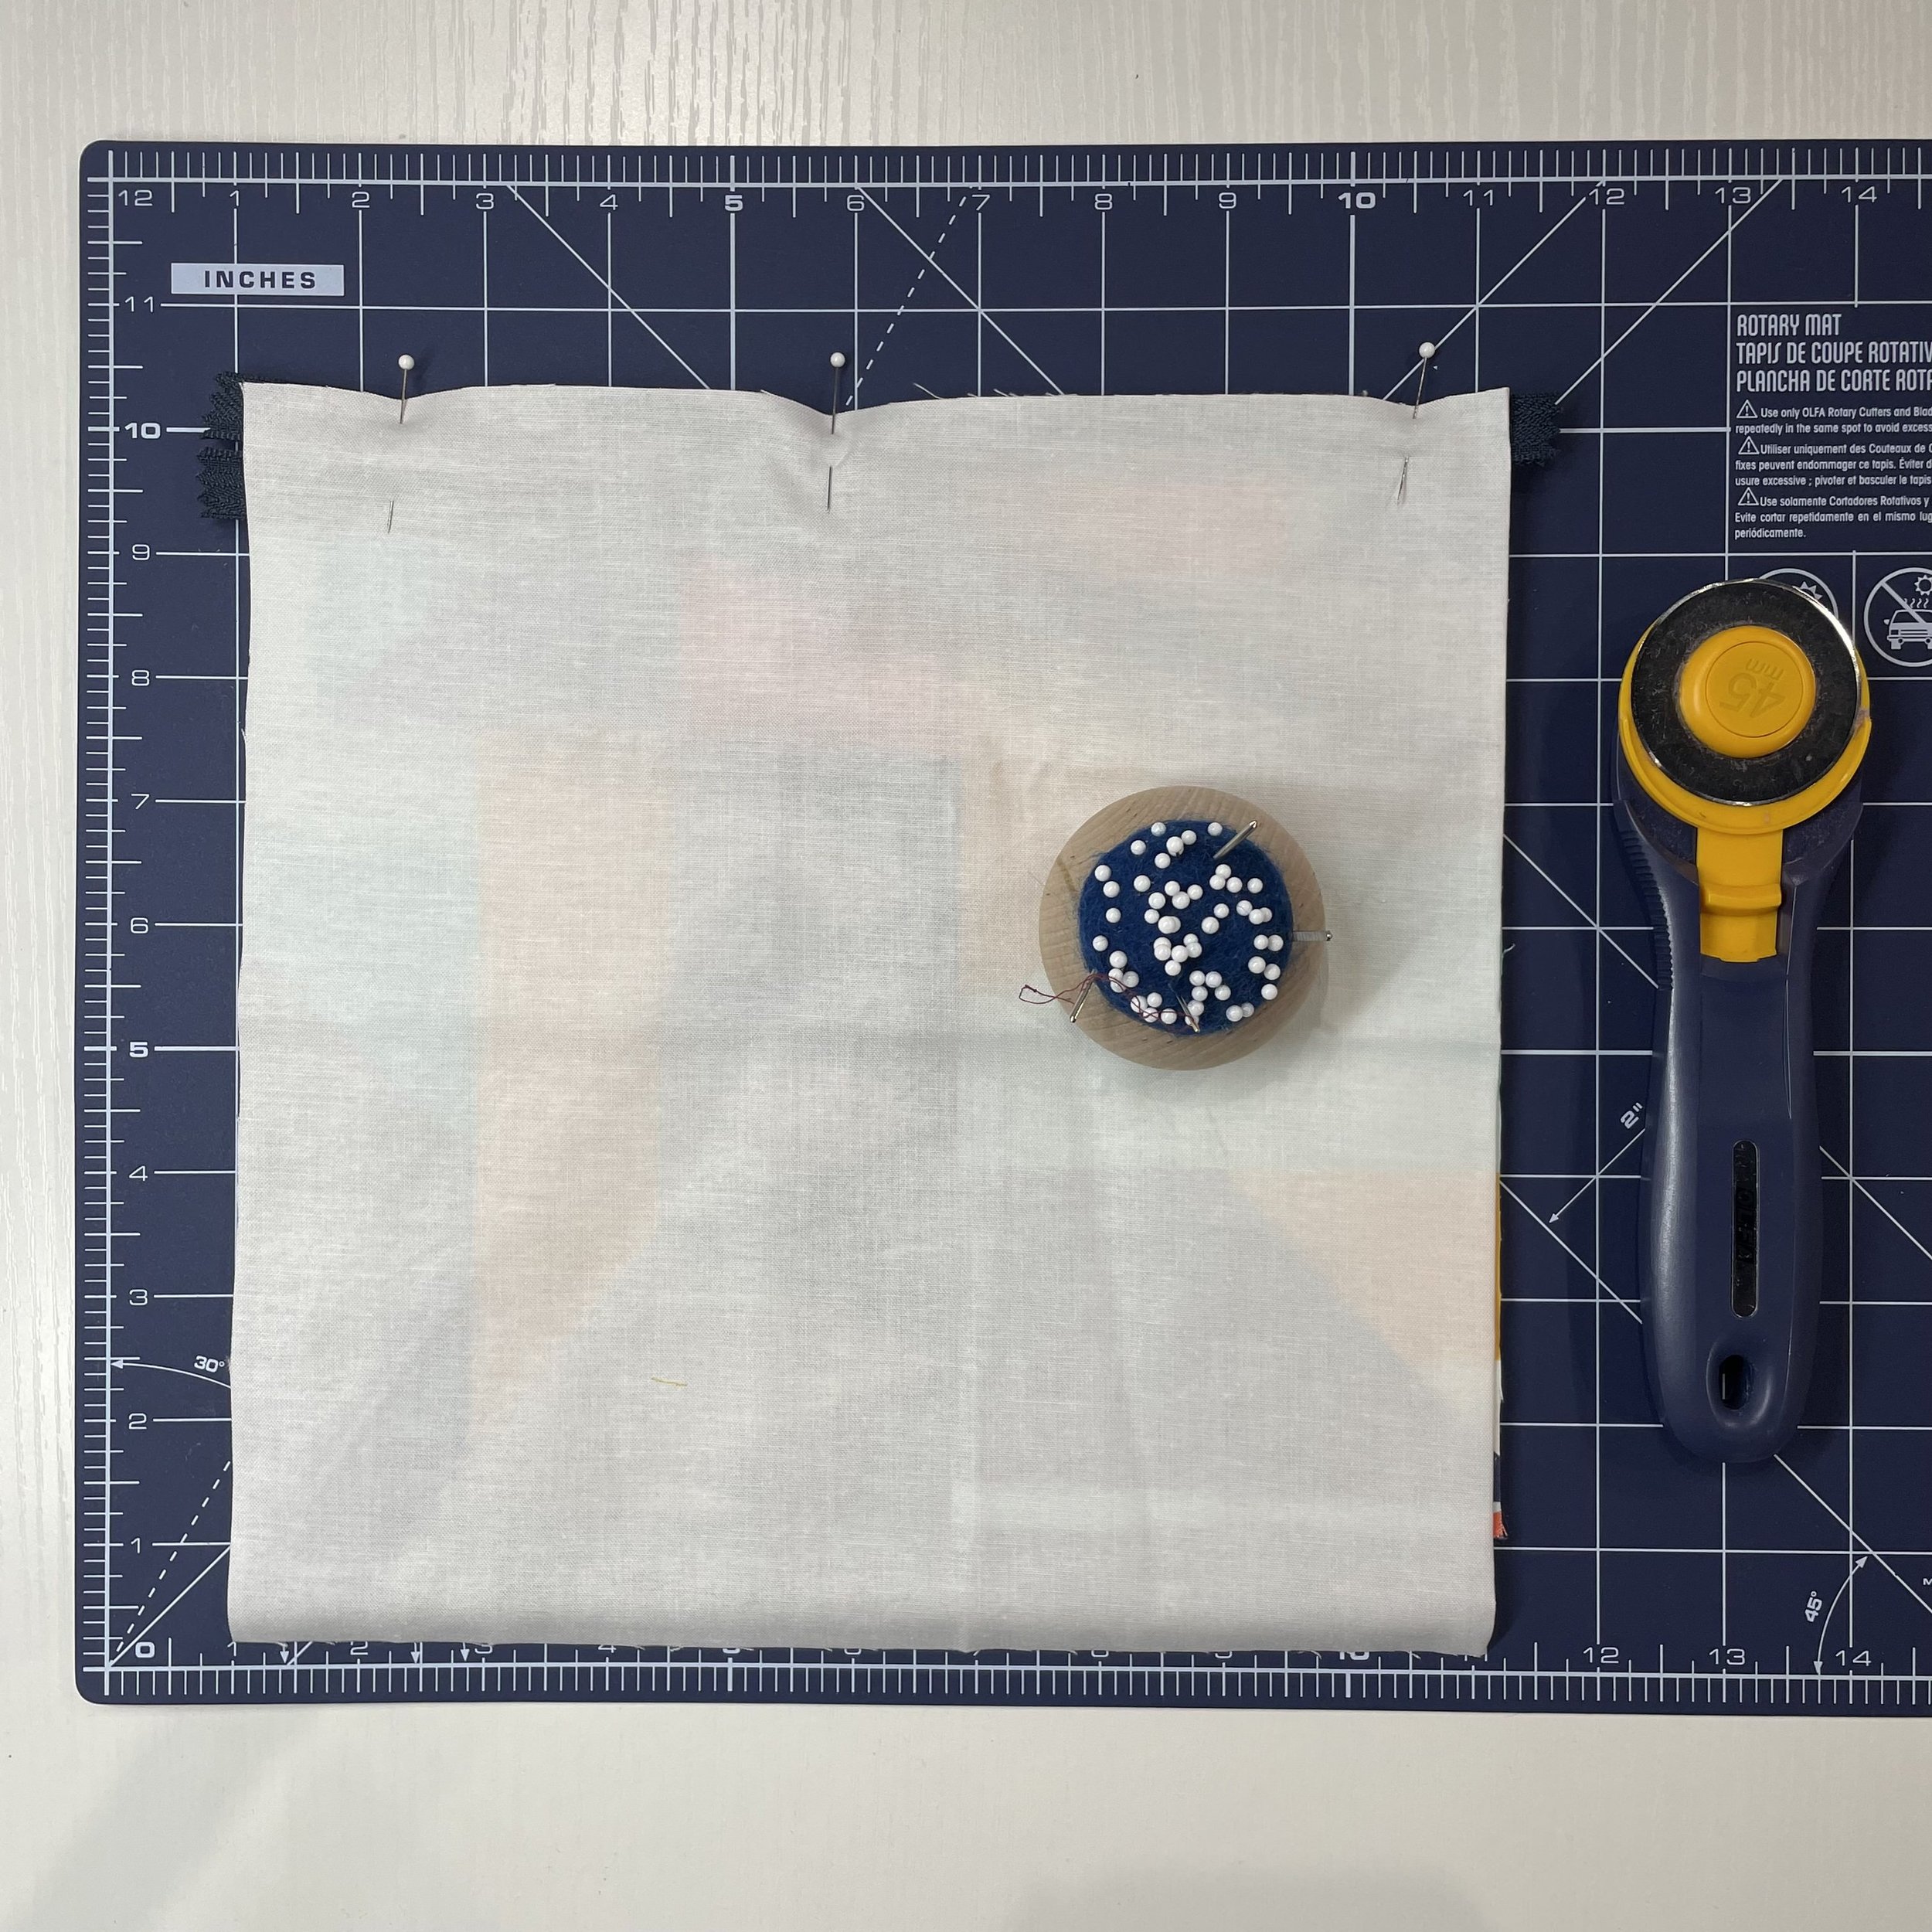
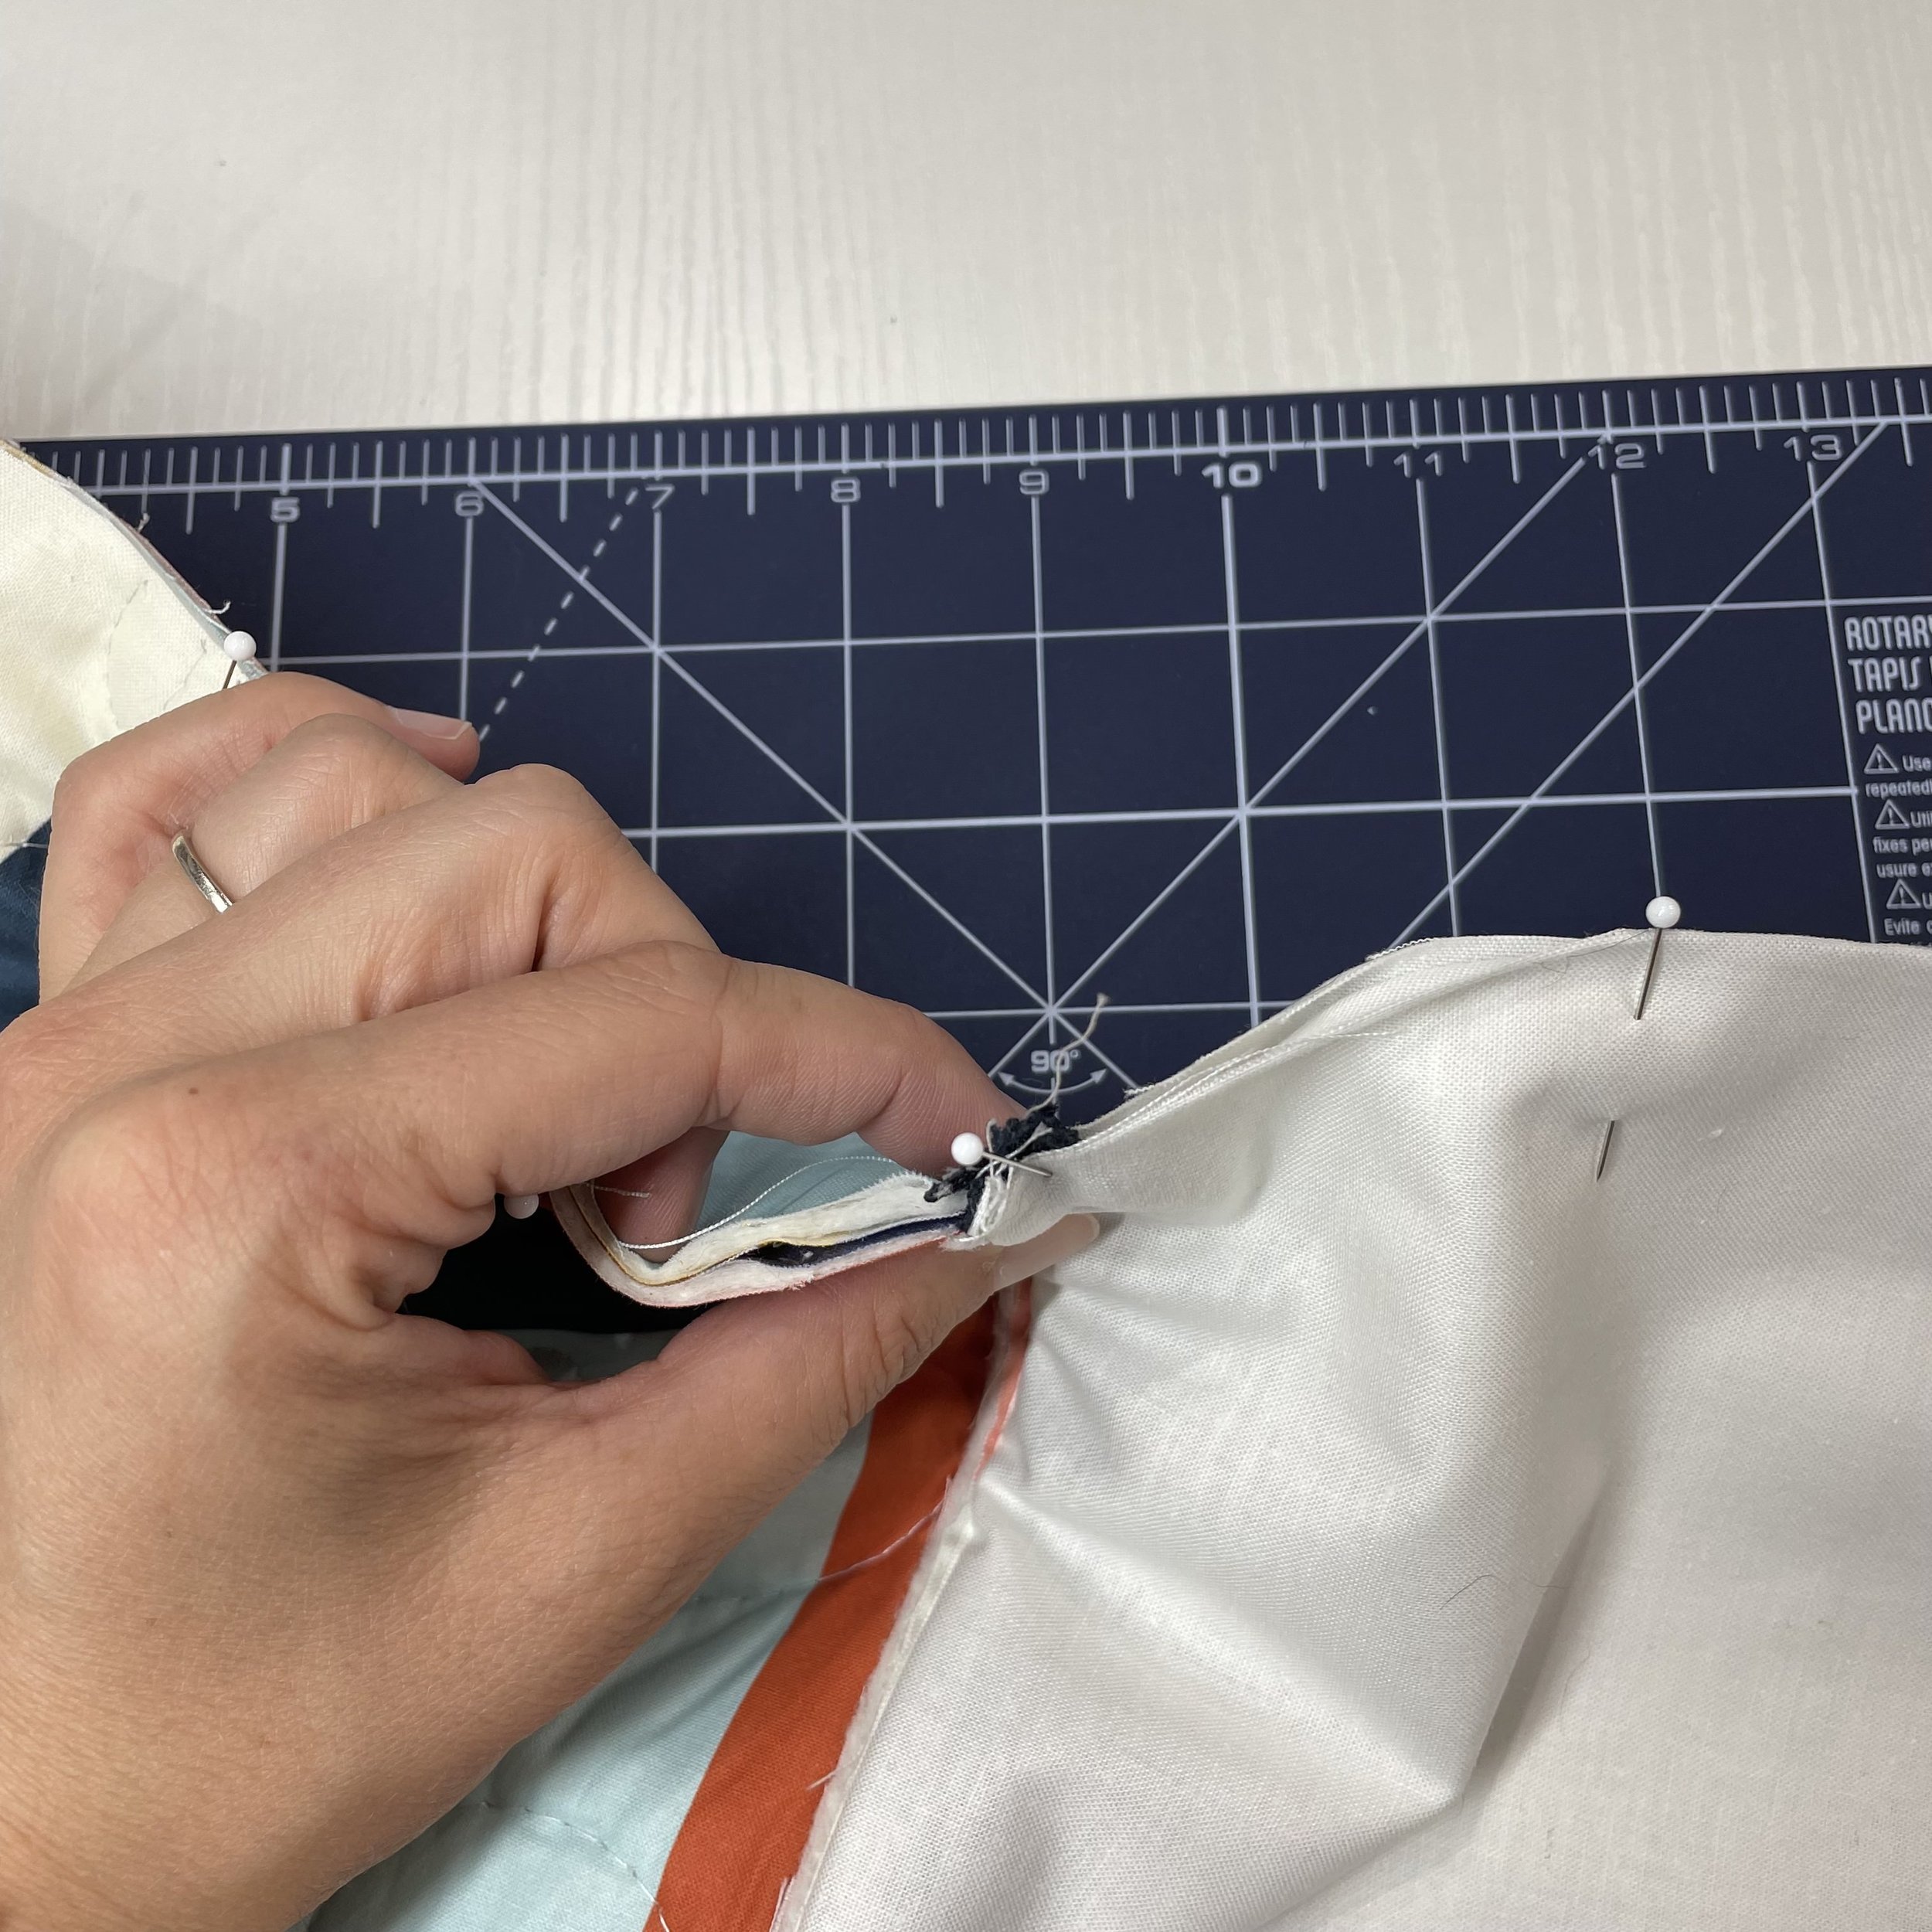
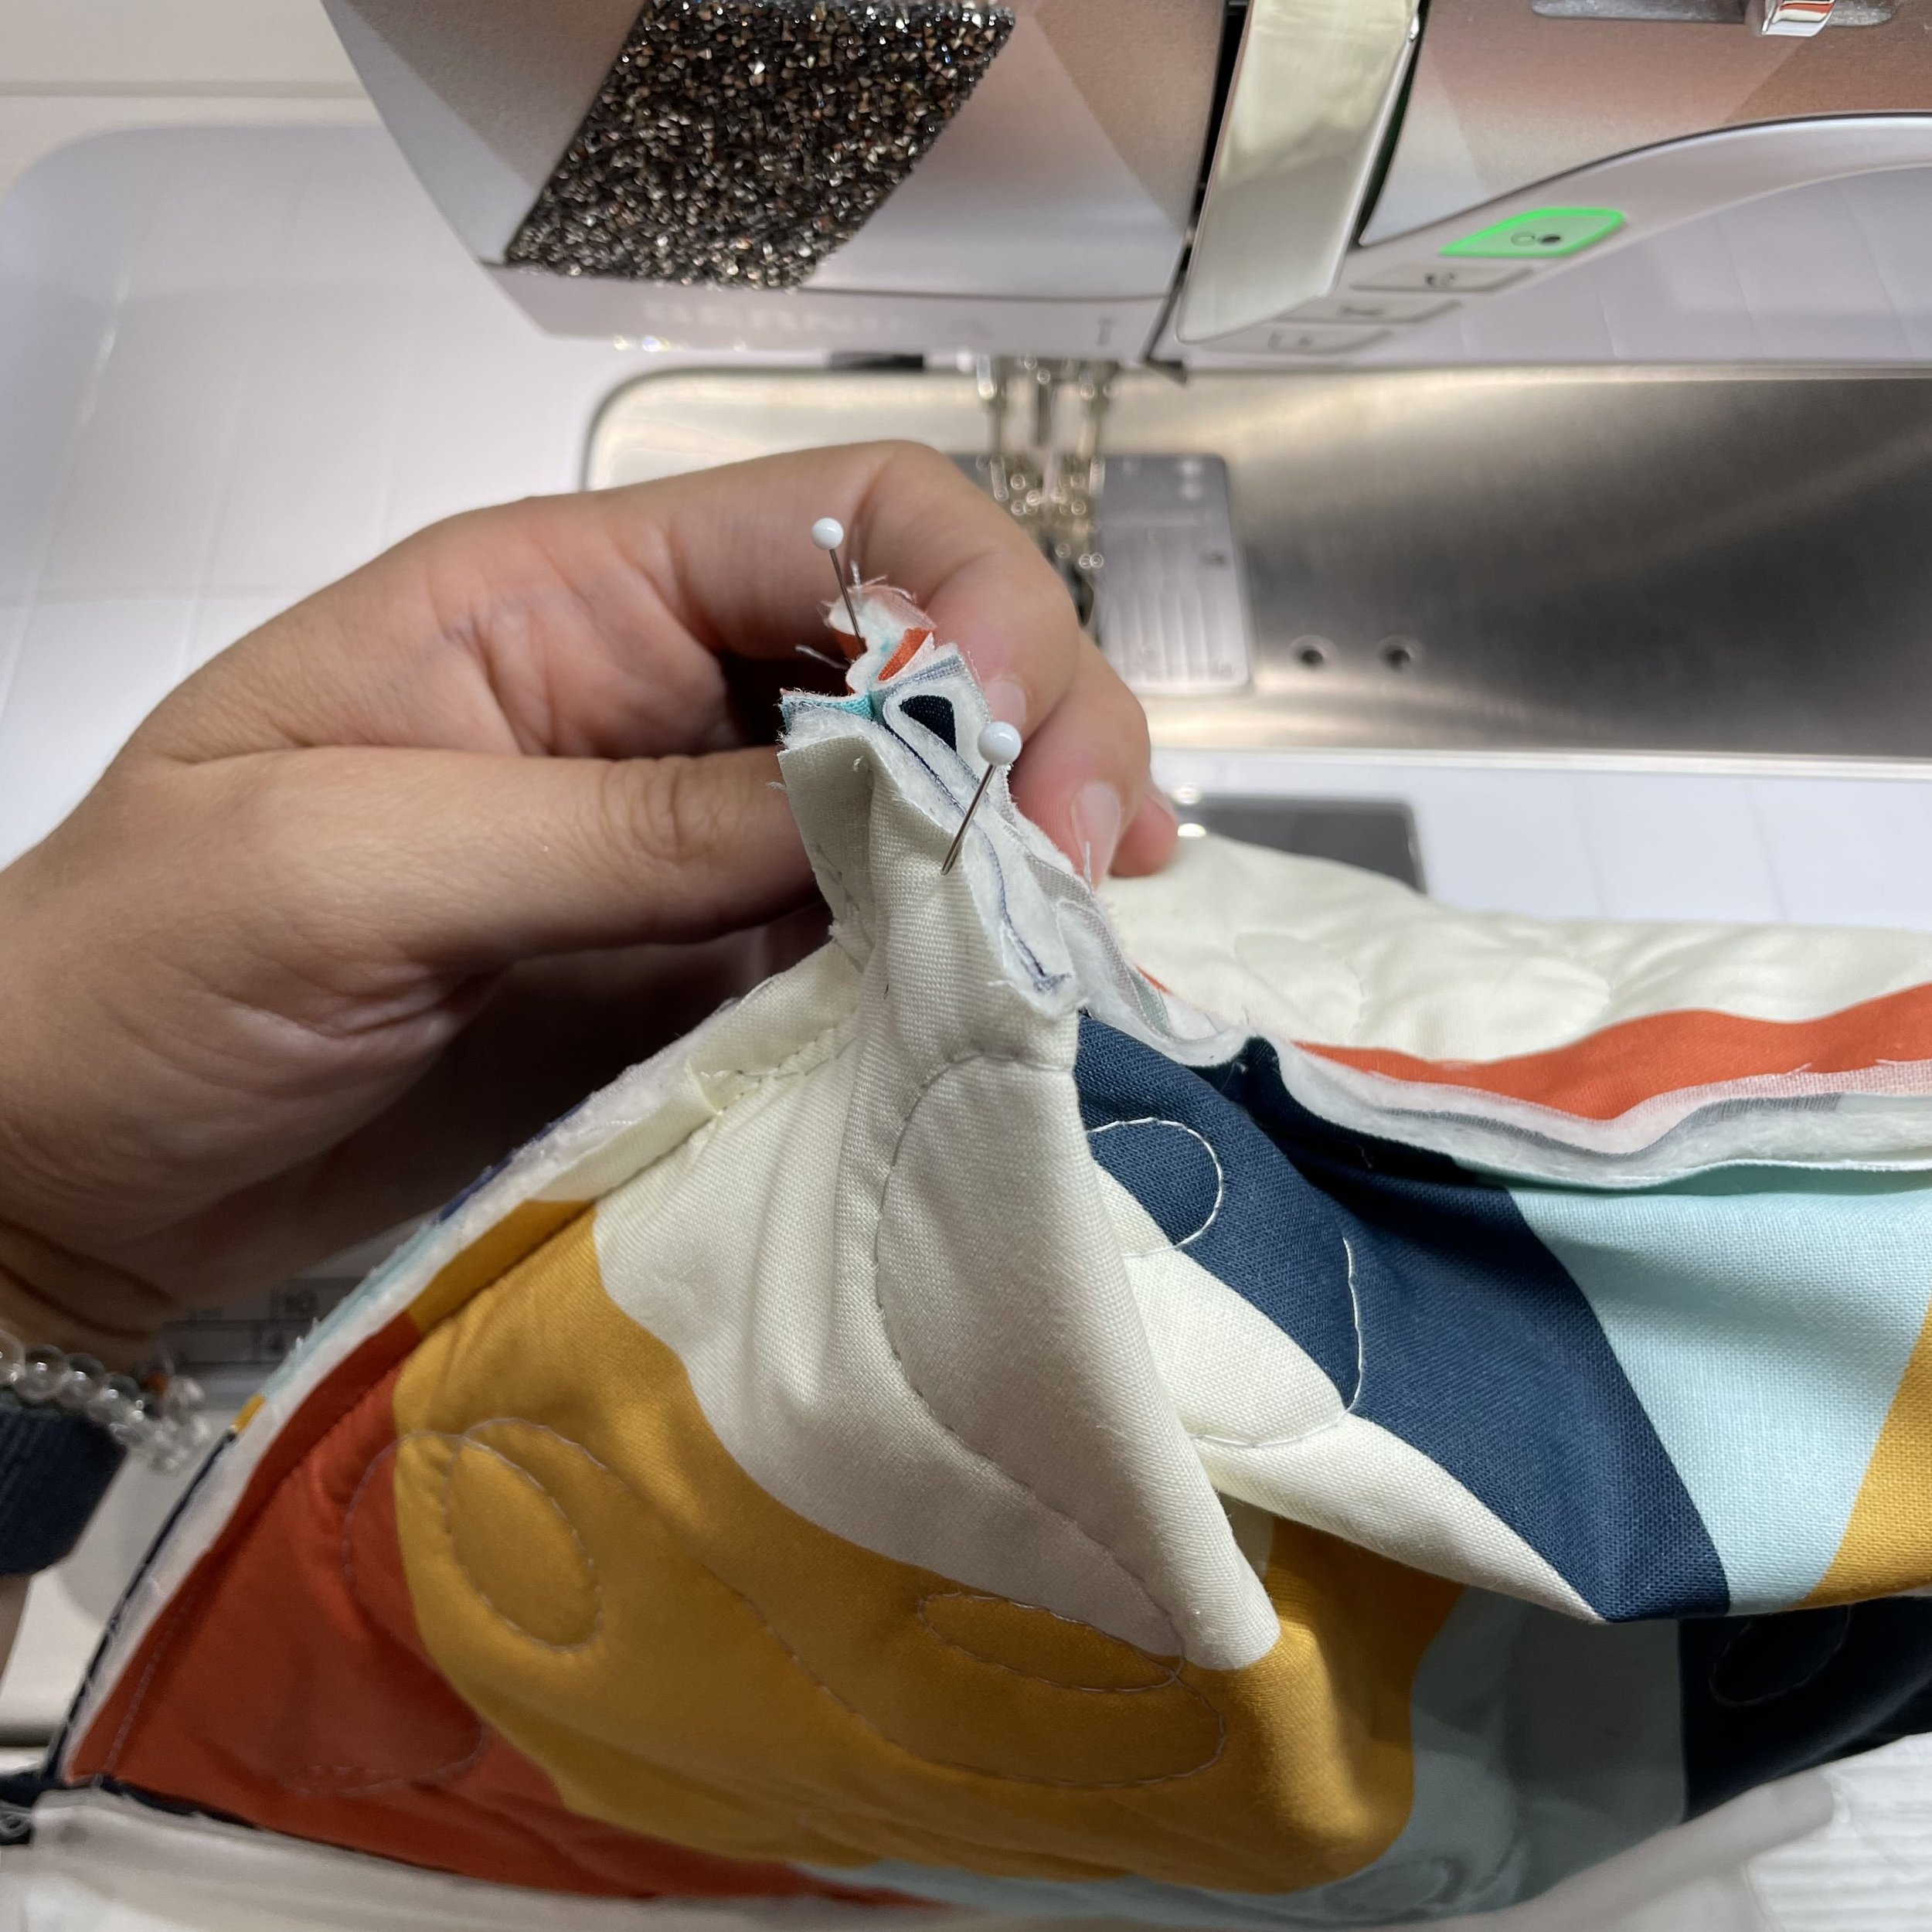
Take one quilted square and one lining square and place them right sides together. Sandwich the zipper between two so the top of the zipper pull is facing the quilted (outer) fabric with the entire zipper between the fabrics. Pin the three layers, taking care that the two metal ends of the zipper teeth fall 3/5 - 1/2” from the outer edge of the squares
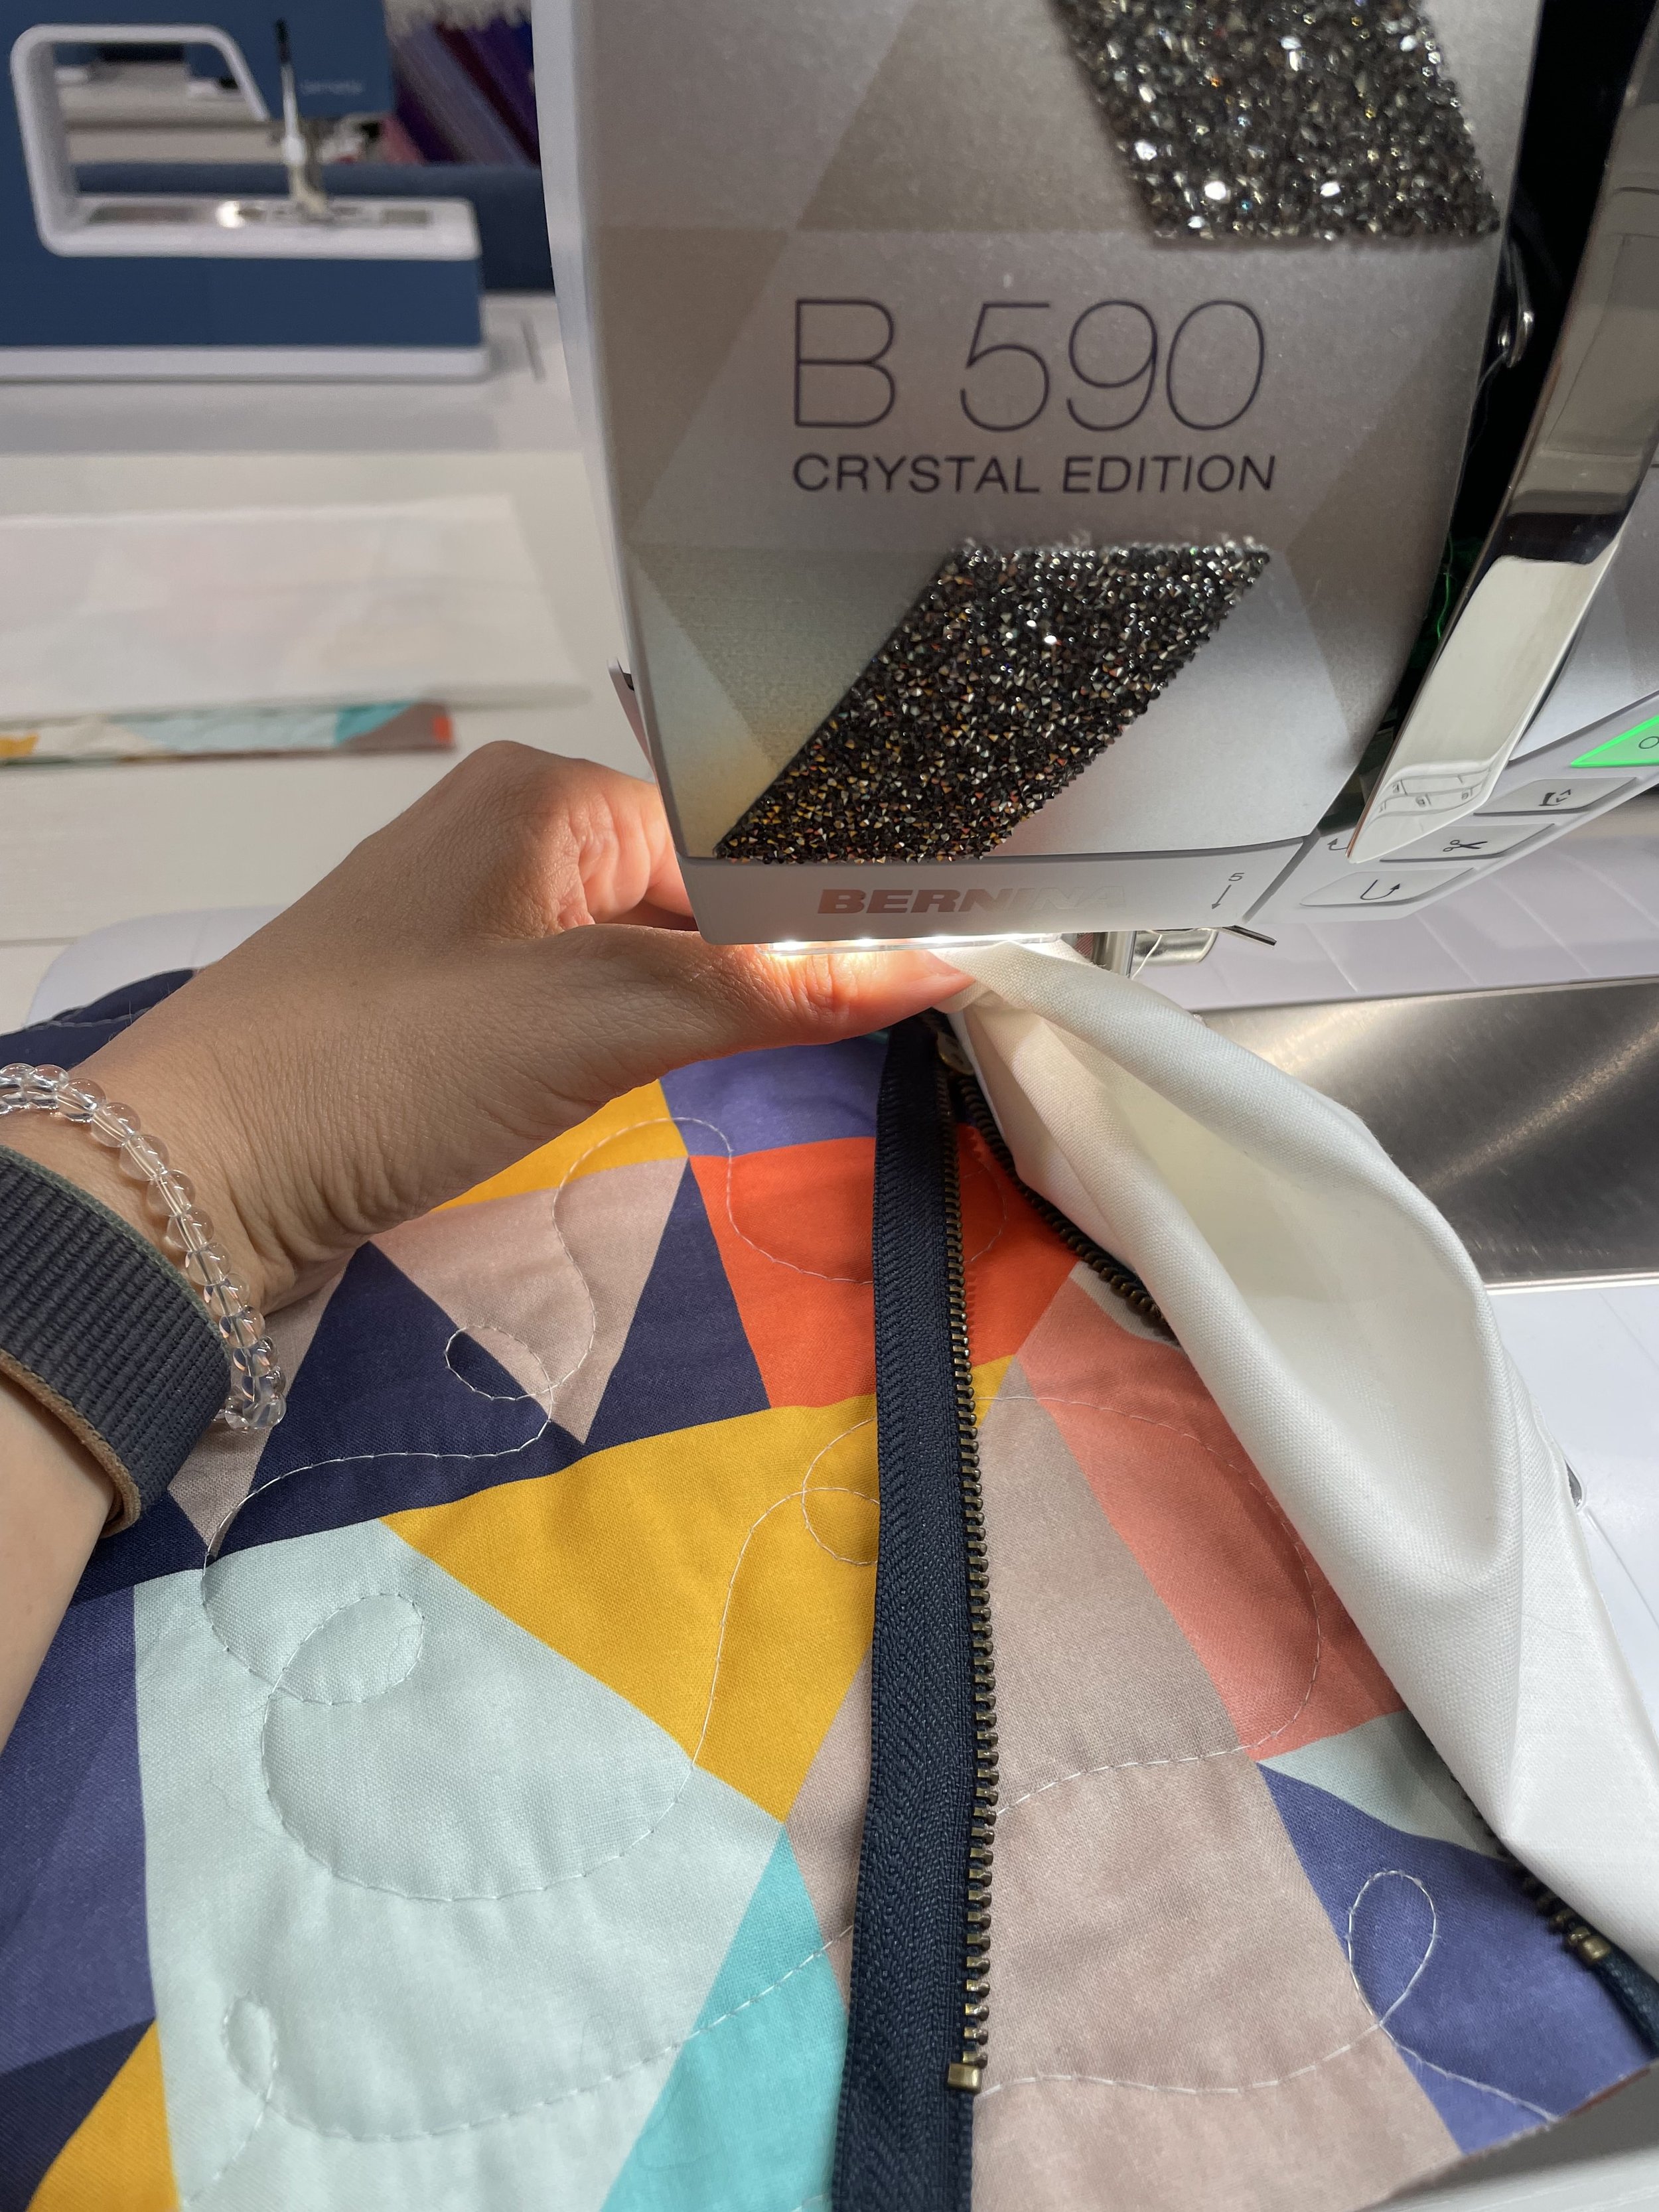
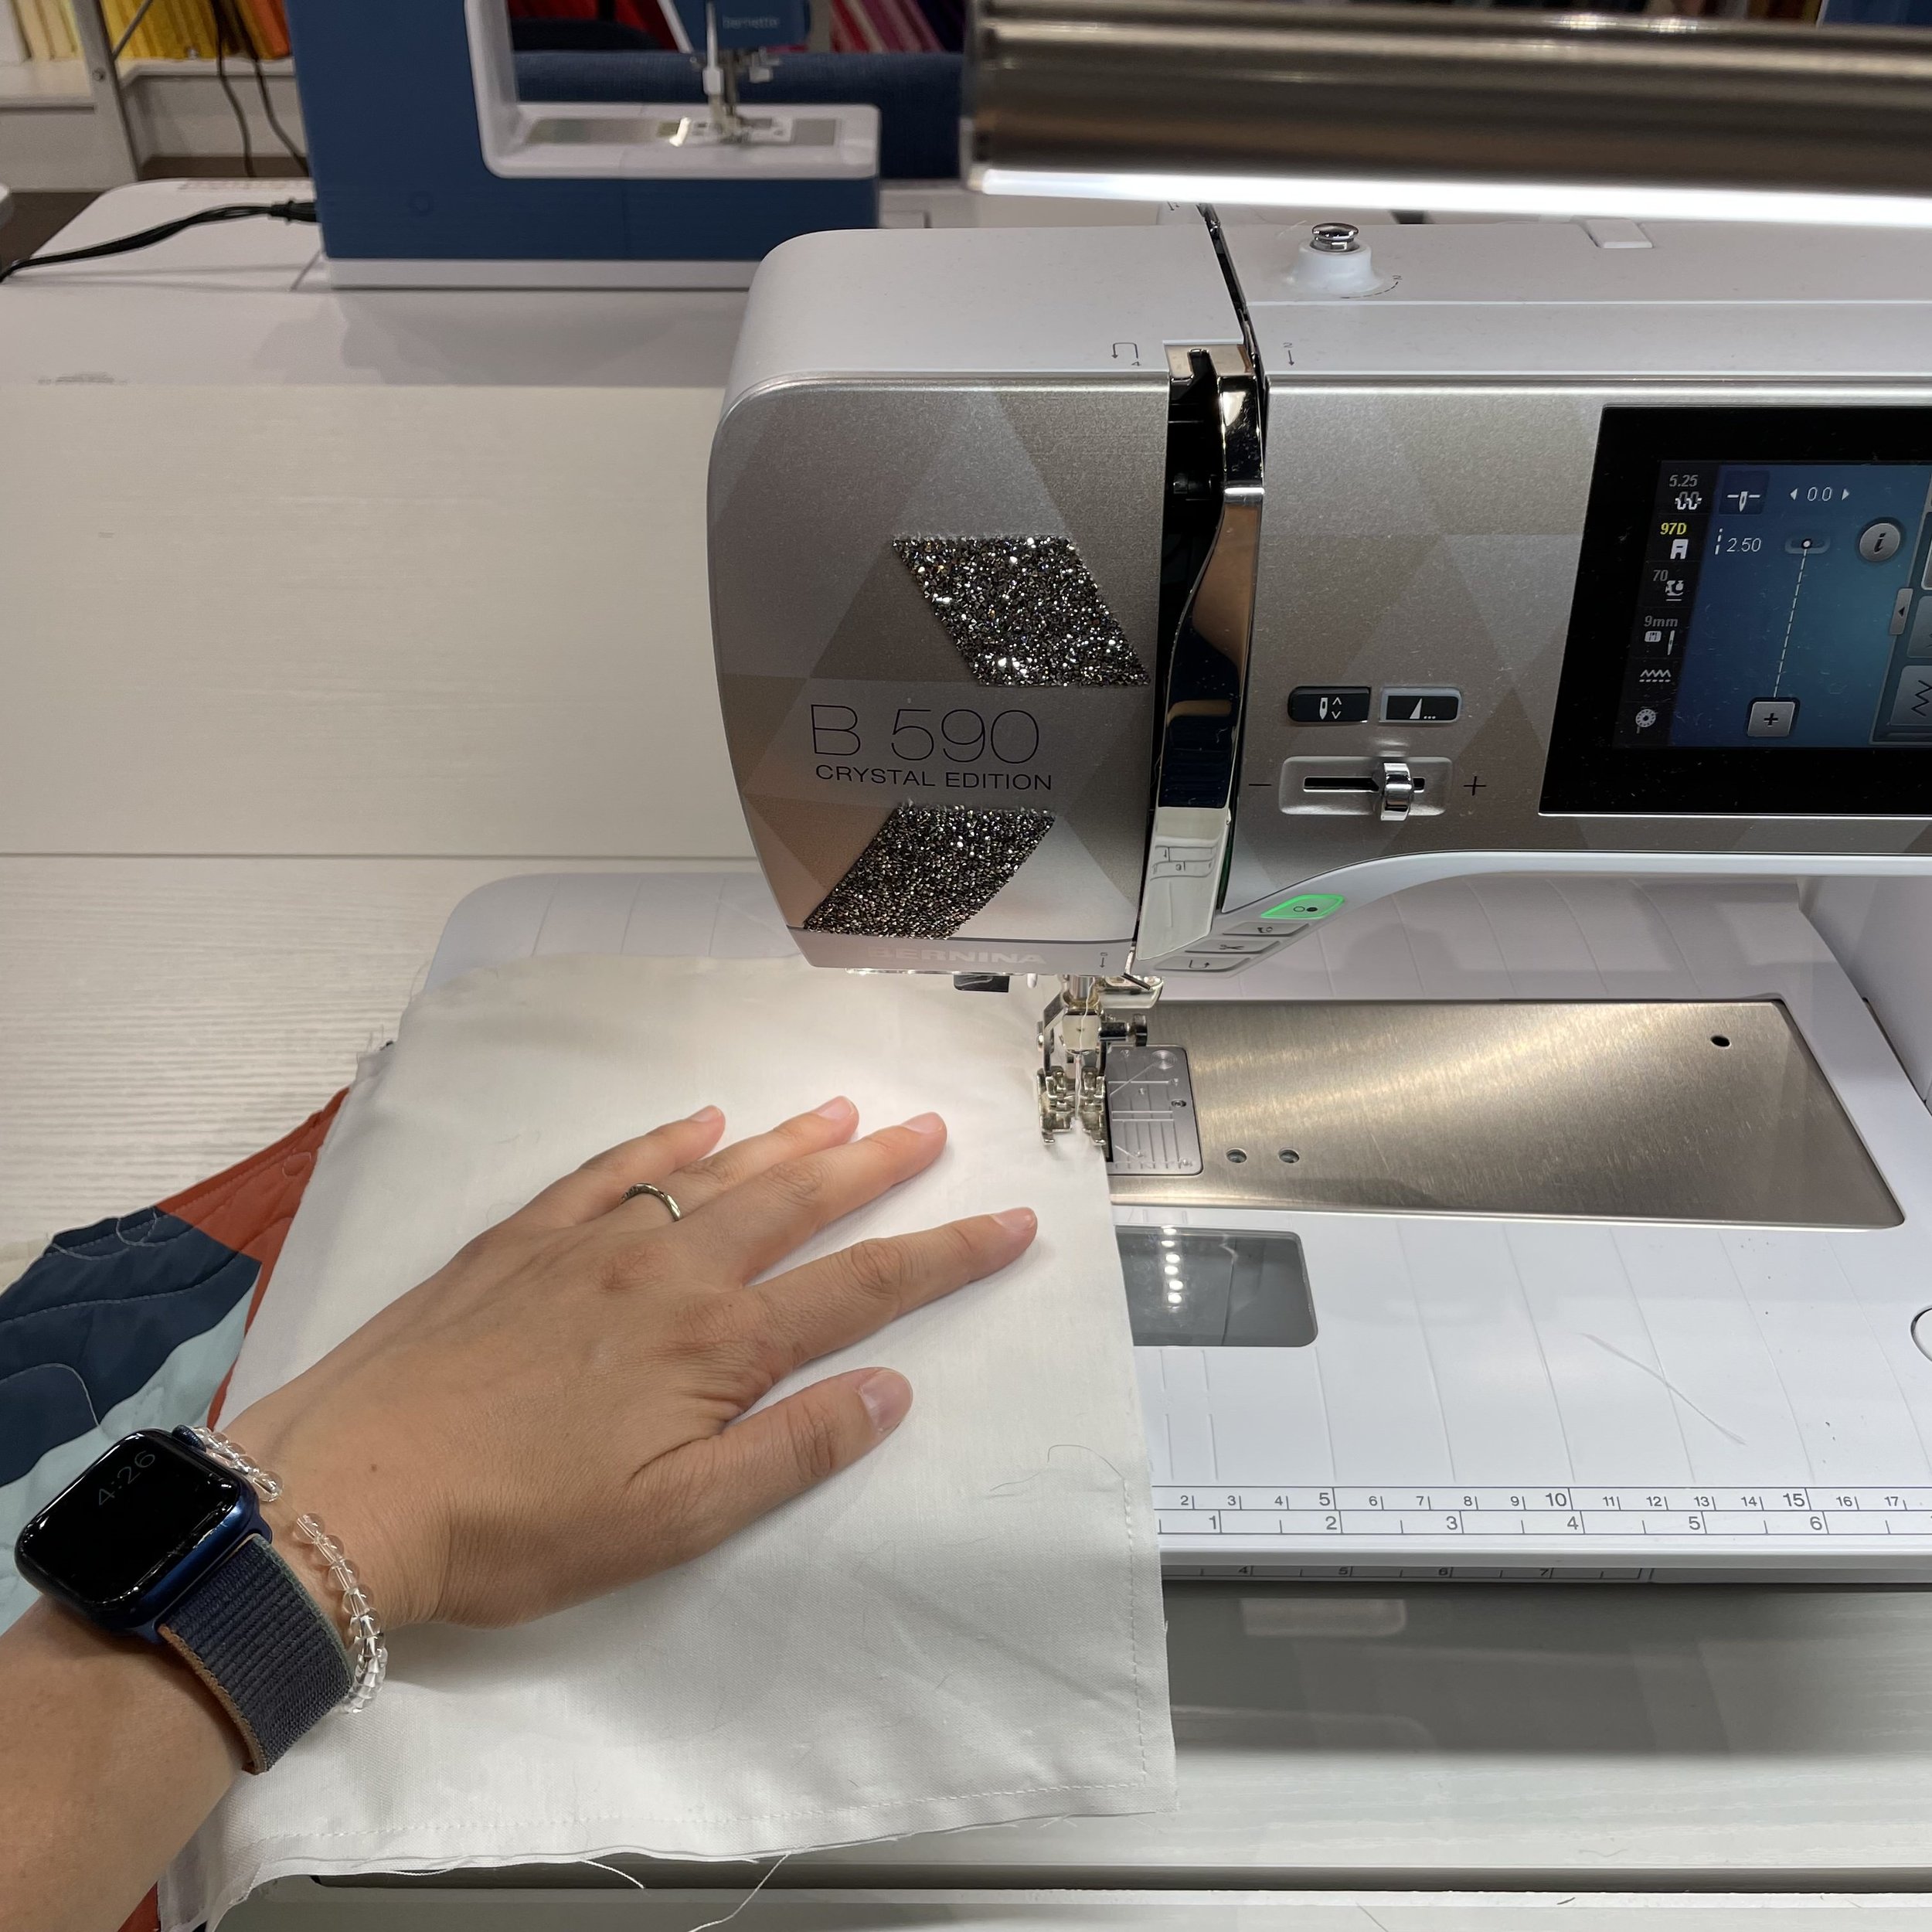
Sew 1/4” seam down the top edge of the “zipper sandwich,” taking care not to stitch any of the zipper teeth. Open zipper halfway at the beginning then close part way through to keep the big zipper pull out of the way
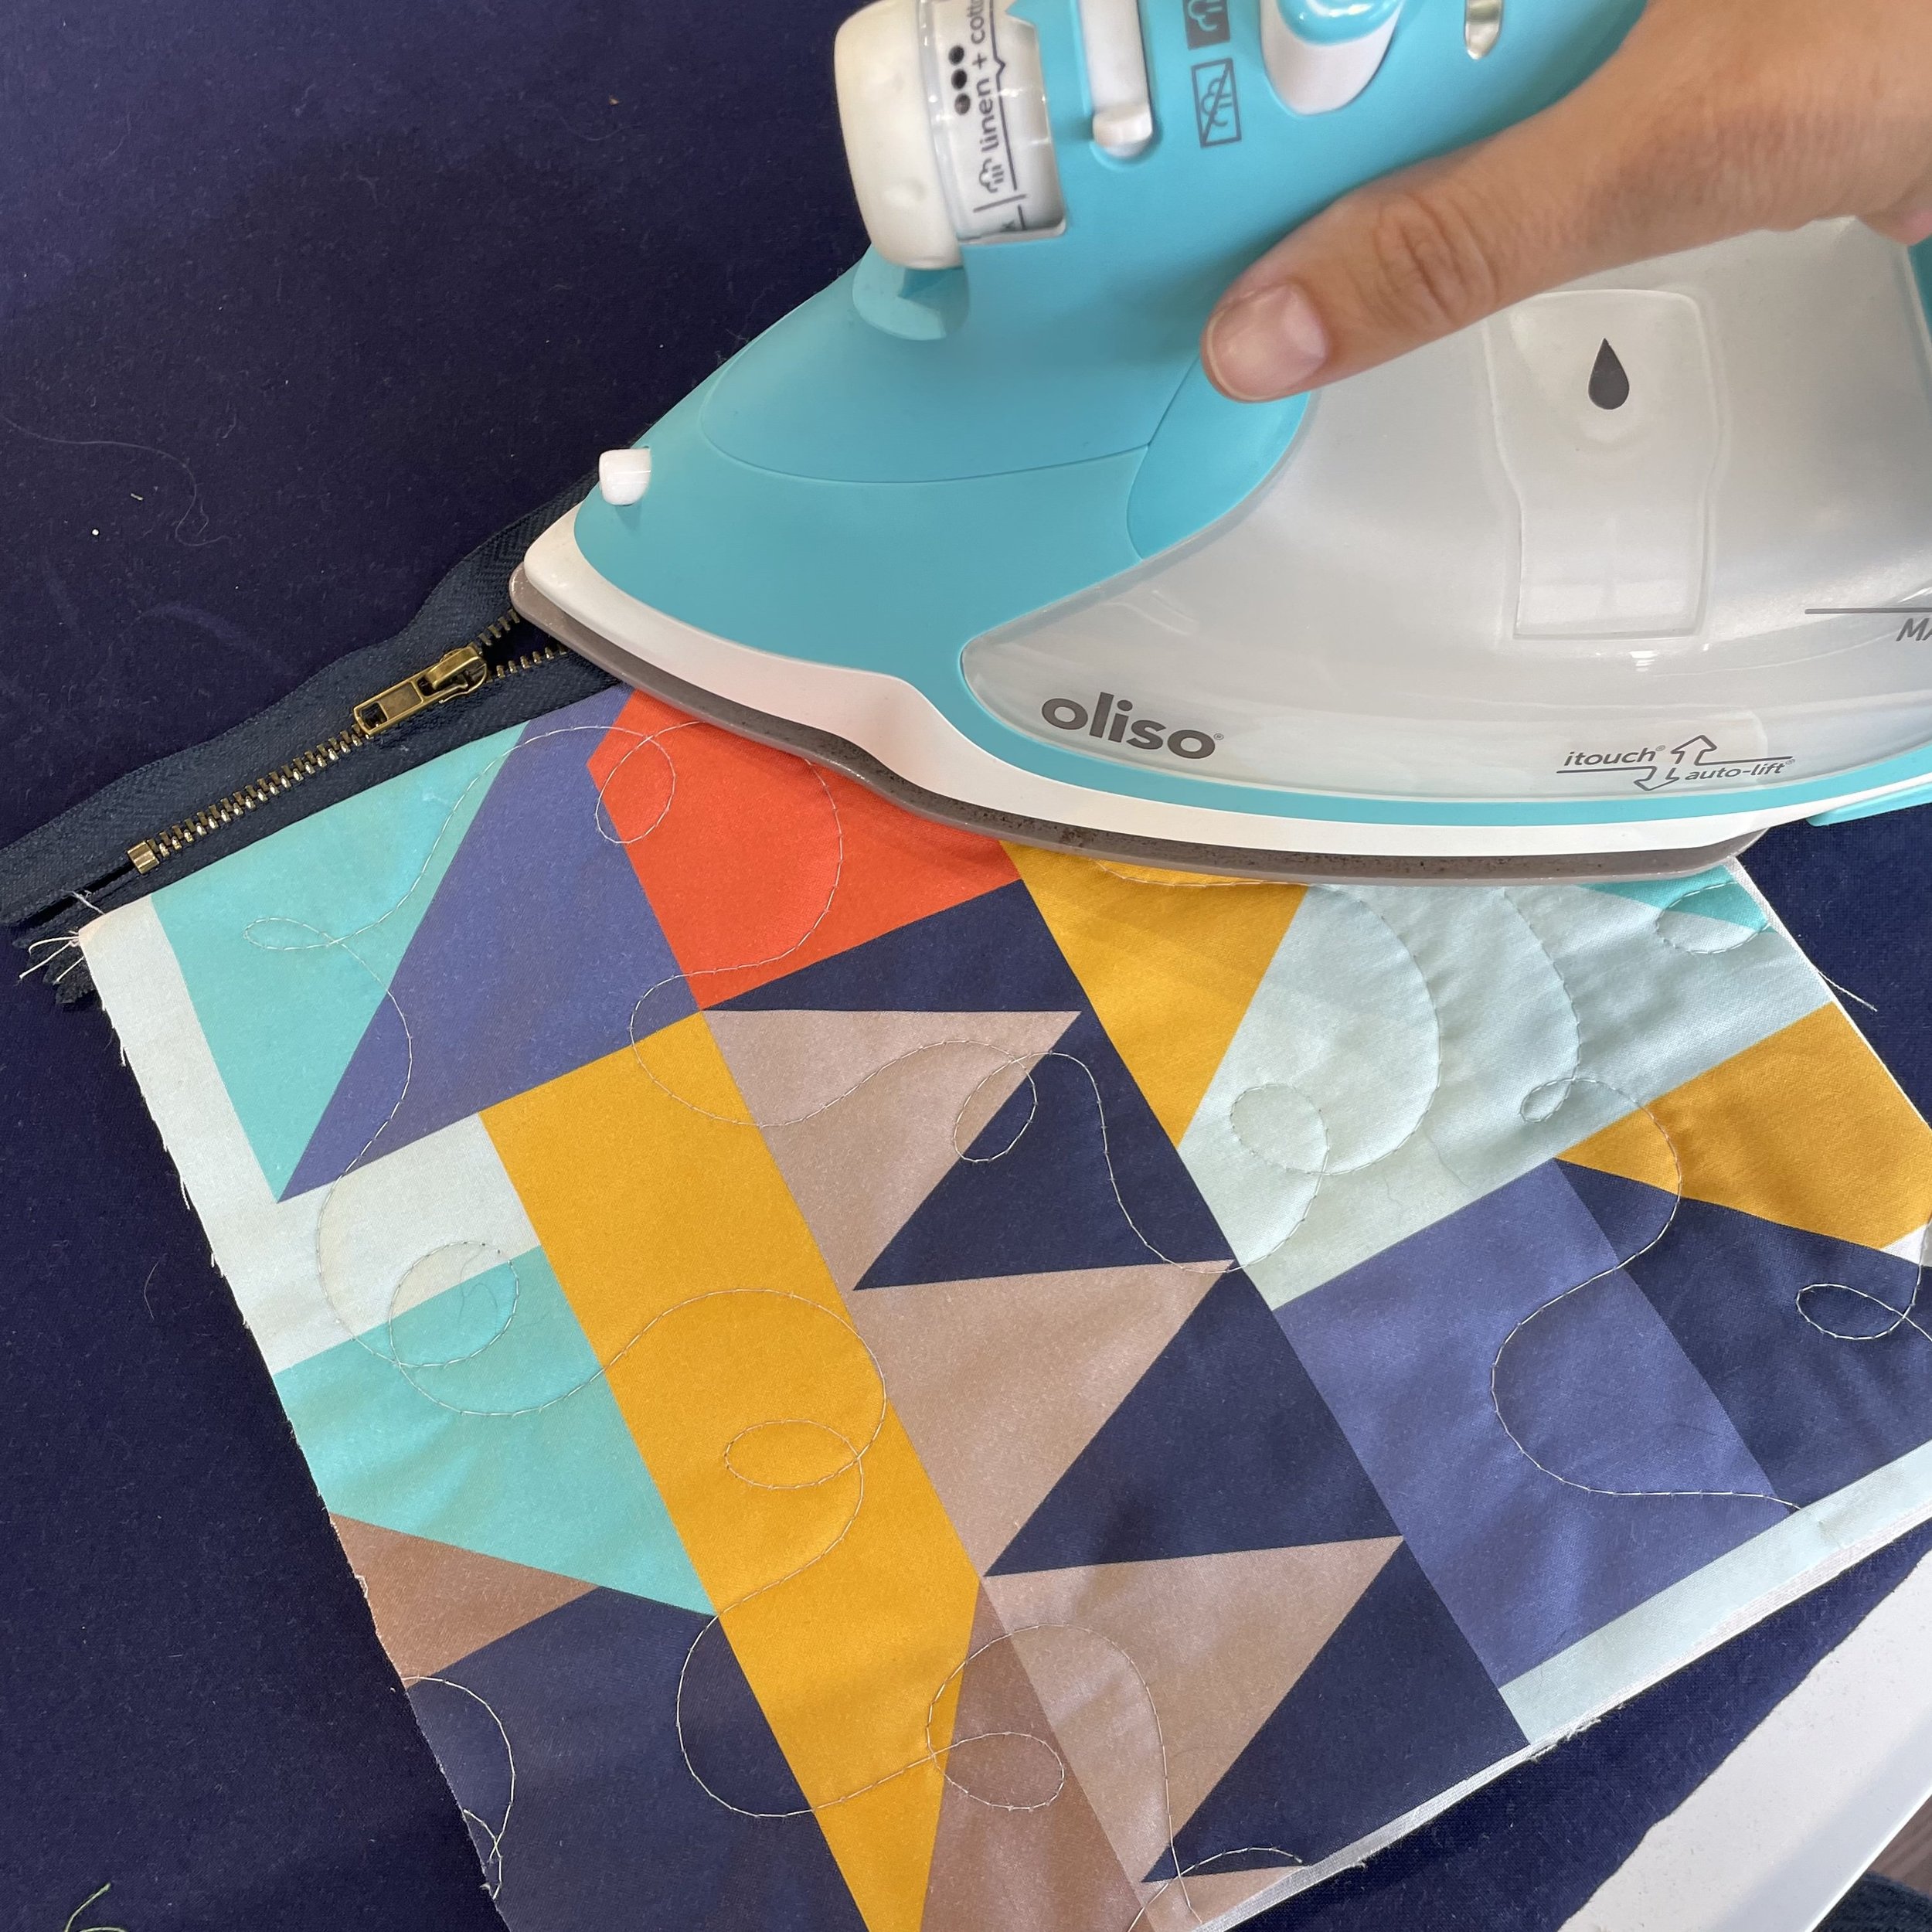
Press both the quilted fabric and lining away from zipper
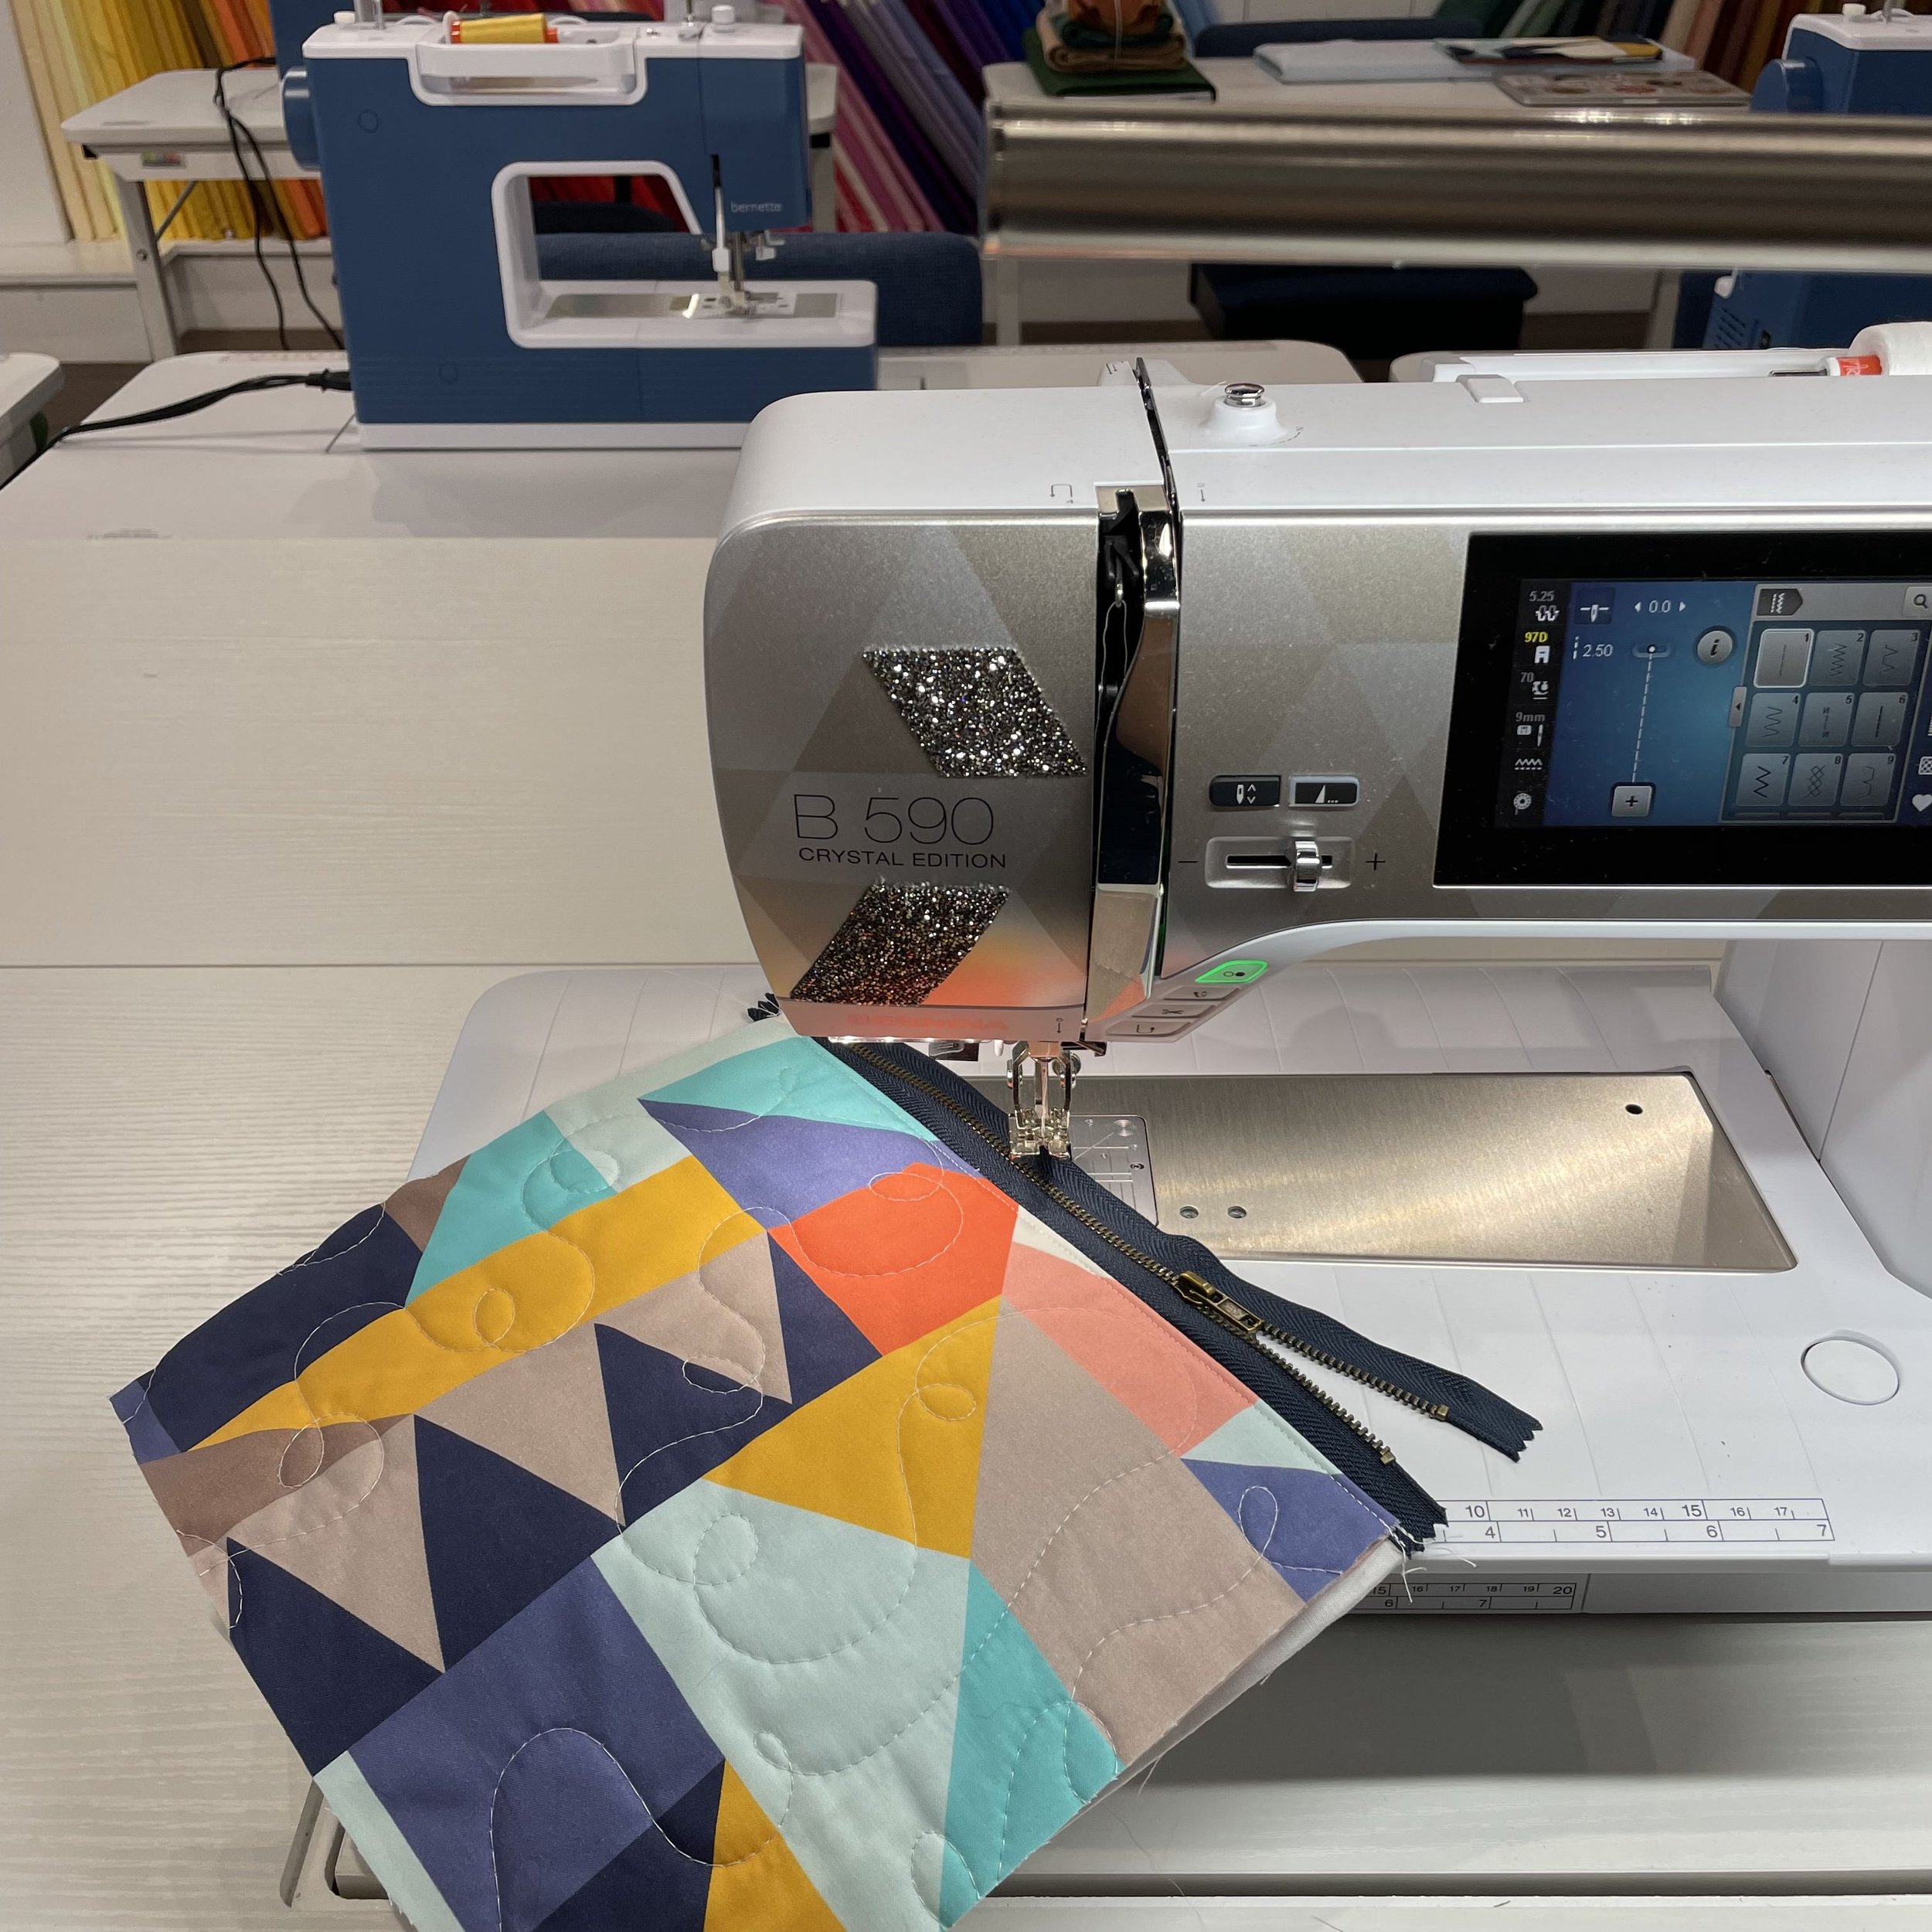
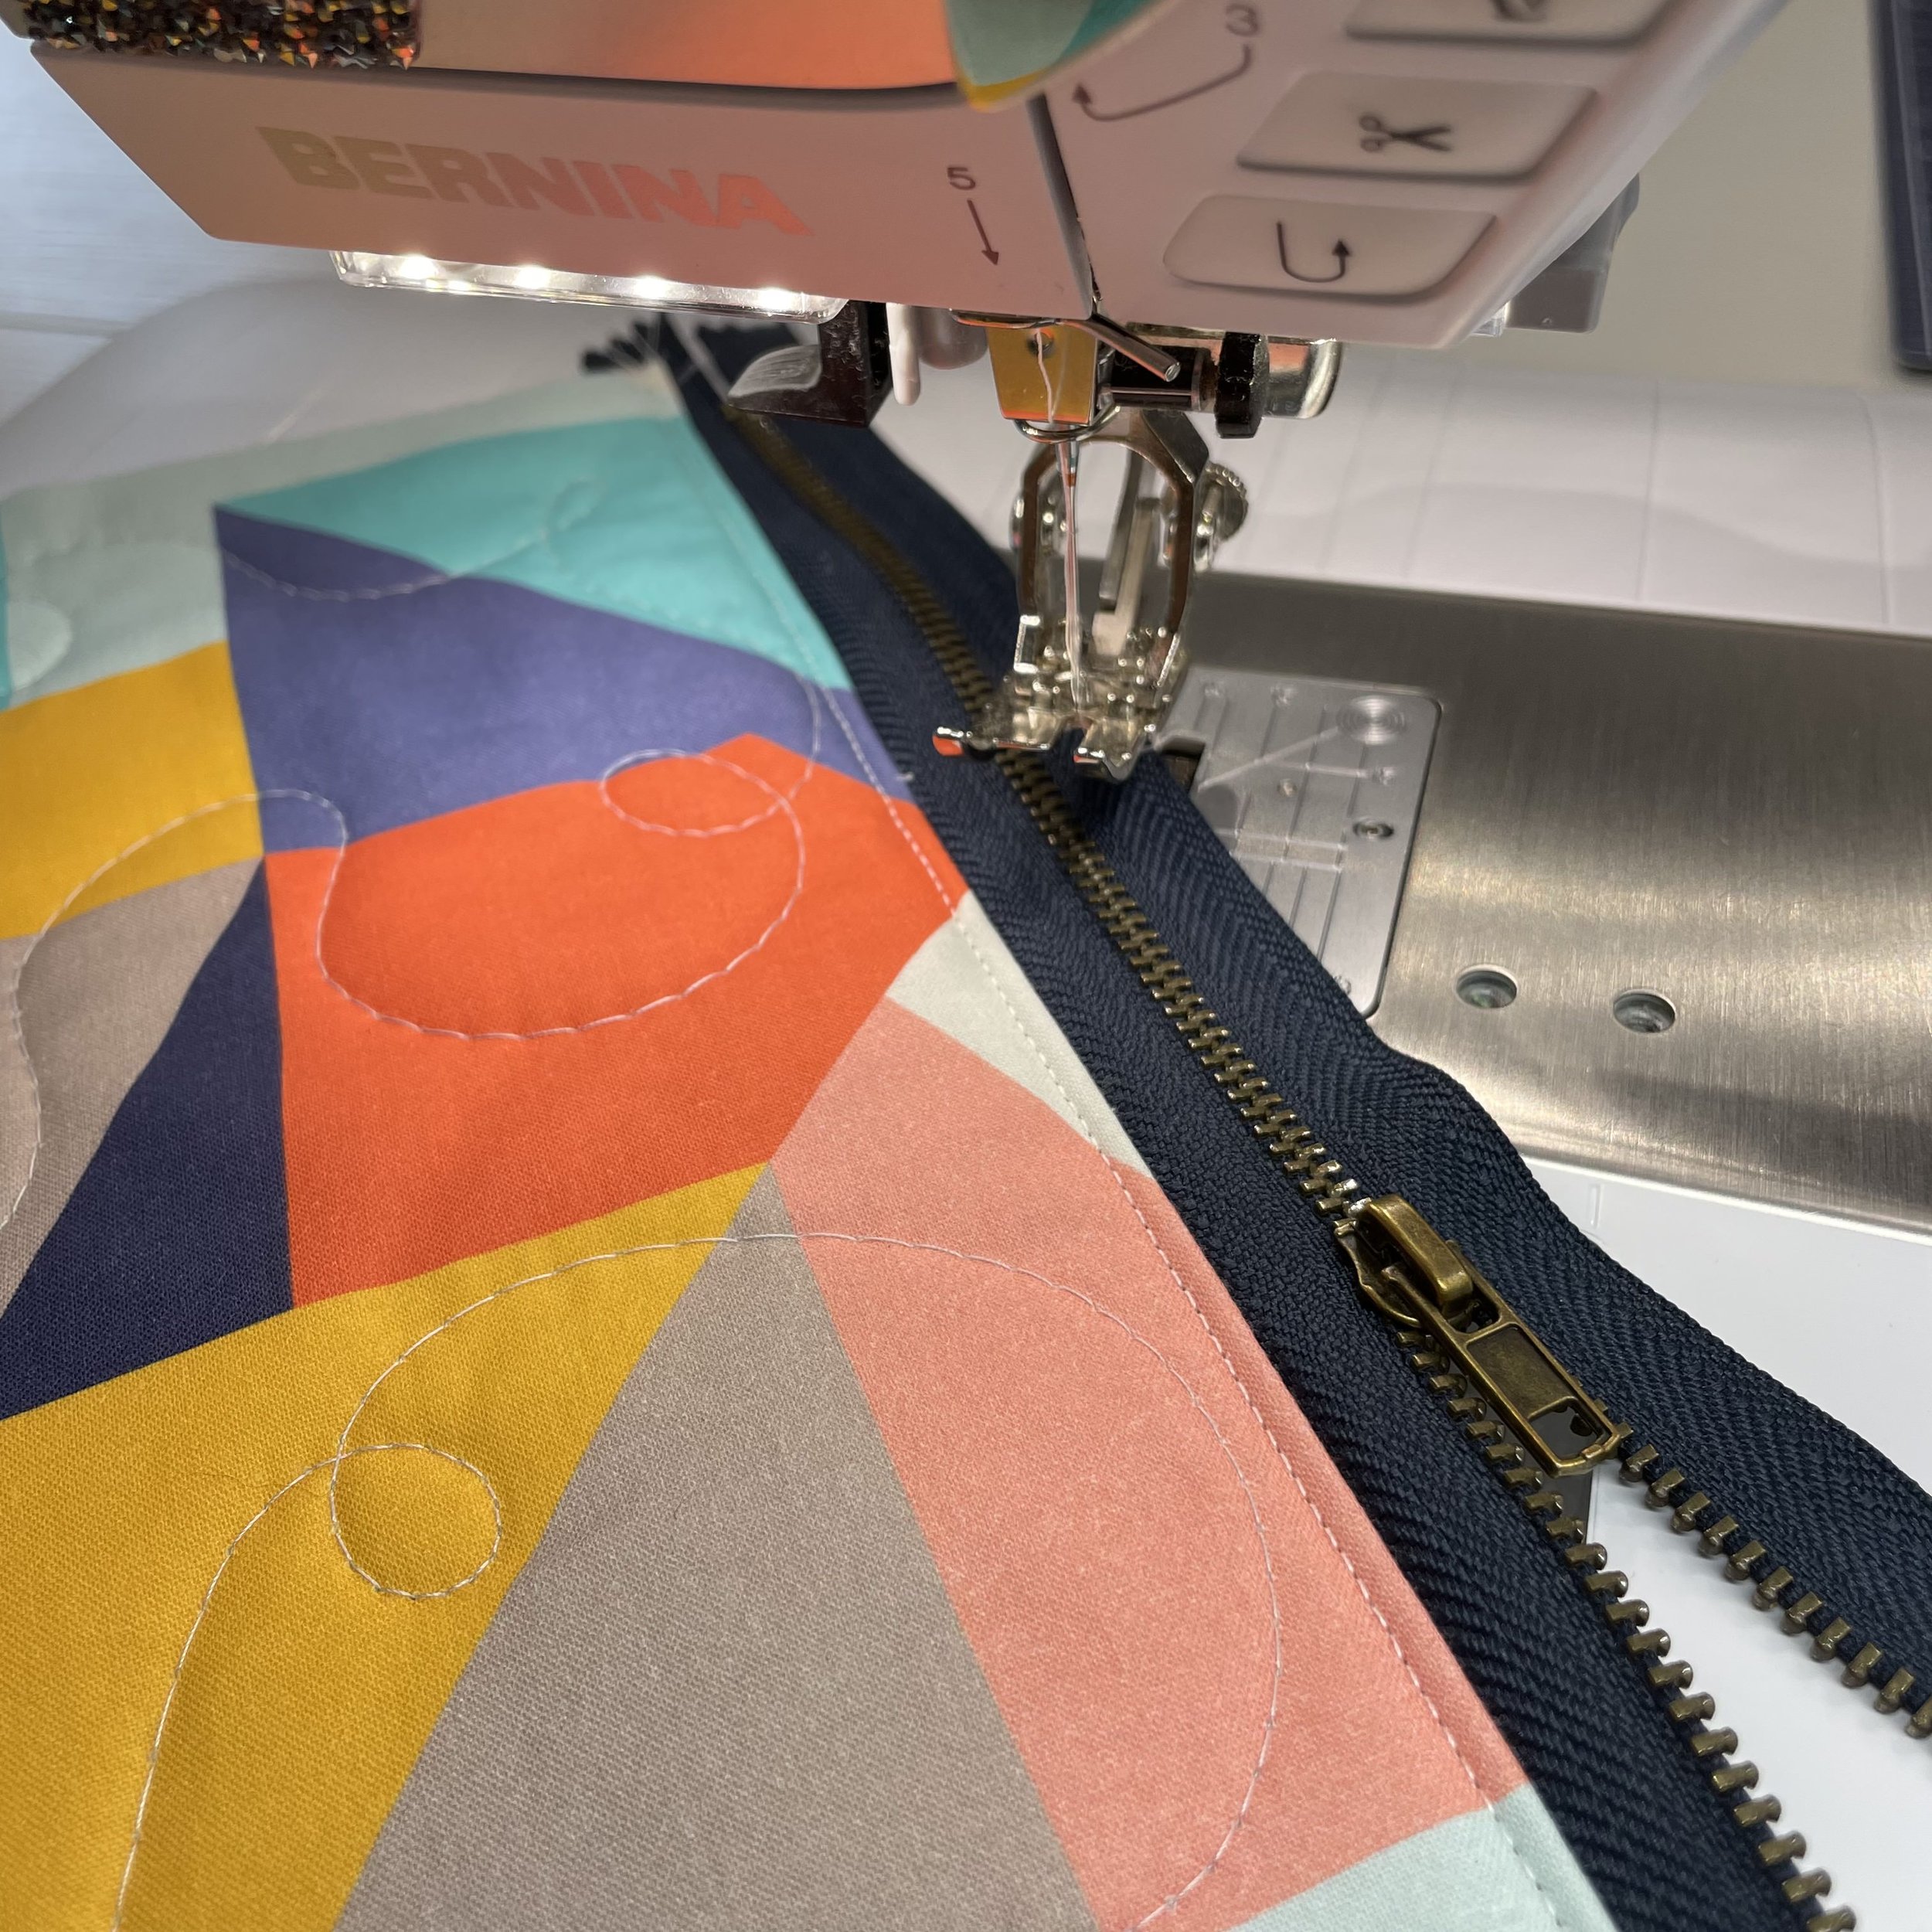
Top stitch 1/8” from zipper tape
Repeat with the two other squares on the other side of the zipper

If, like me, you are fortunate enough to have a helper underfoot, pause at this point and give them ear scritches. They’re working hard making sure it’s nearly impossible to reach your foot pedal!
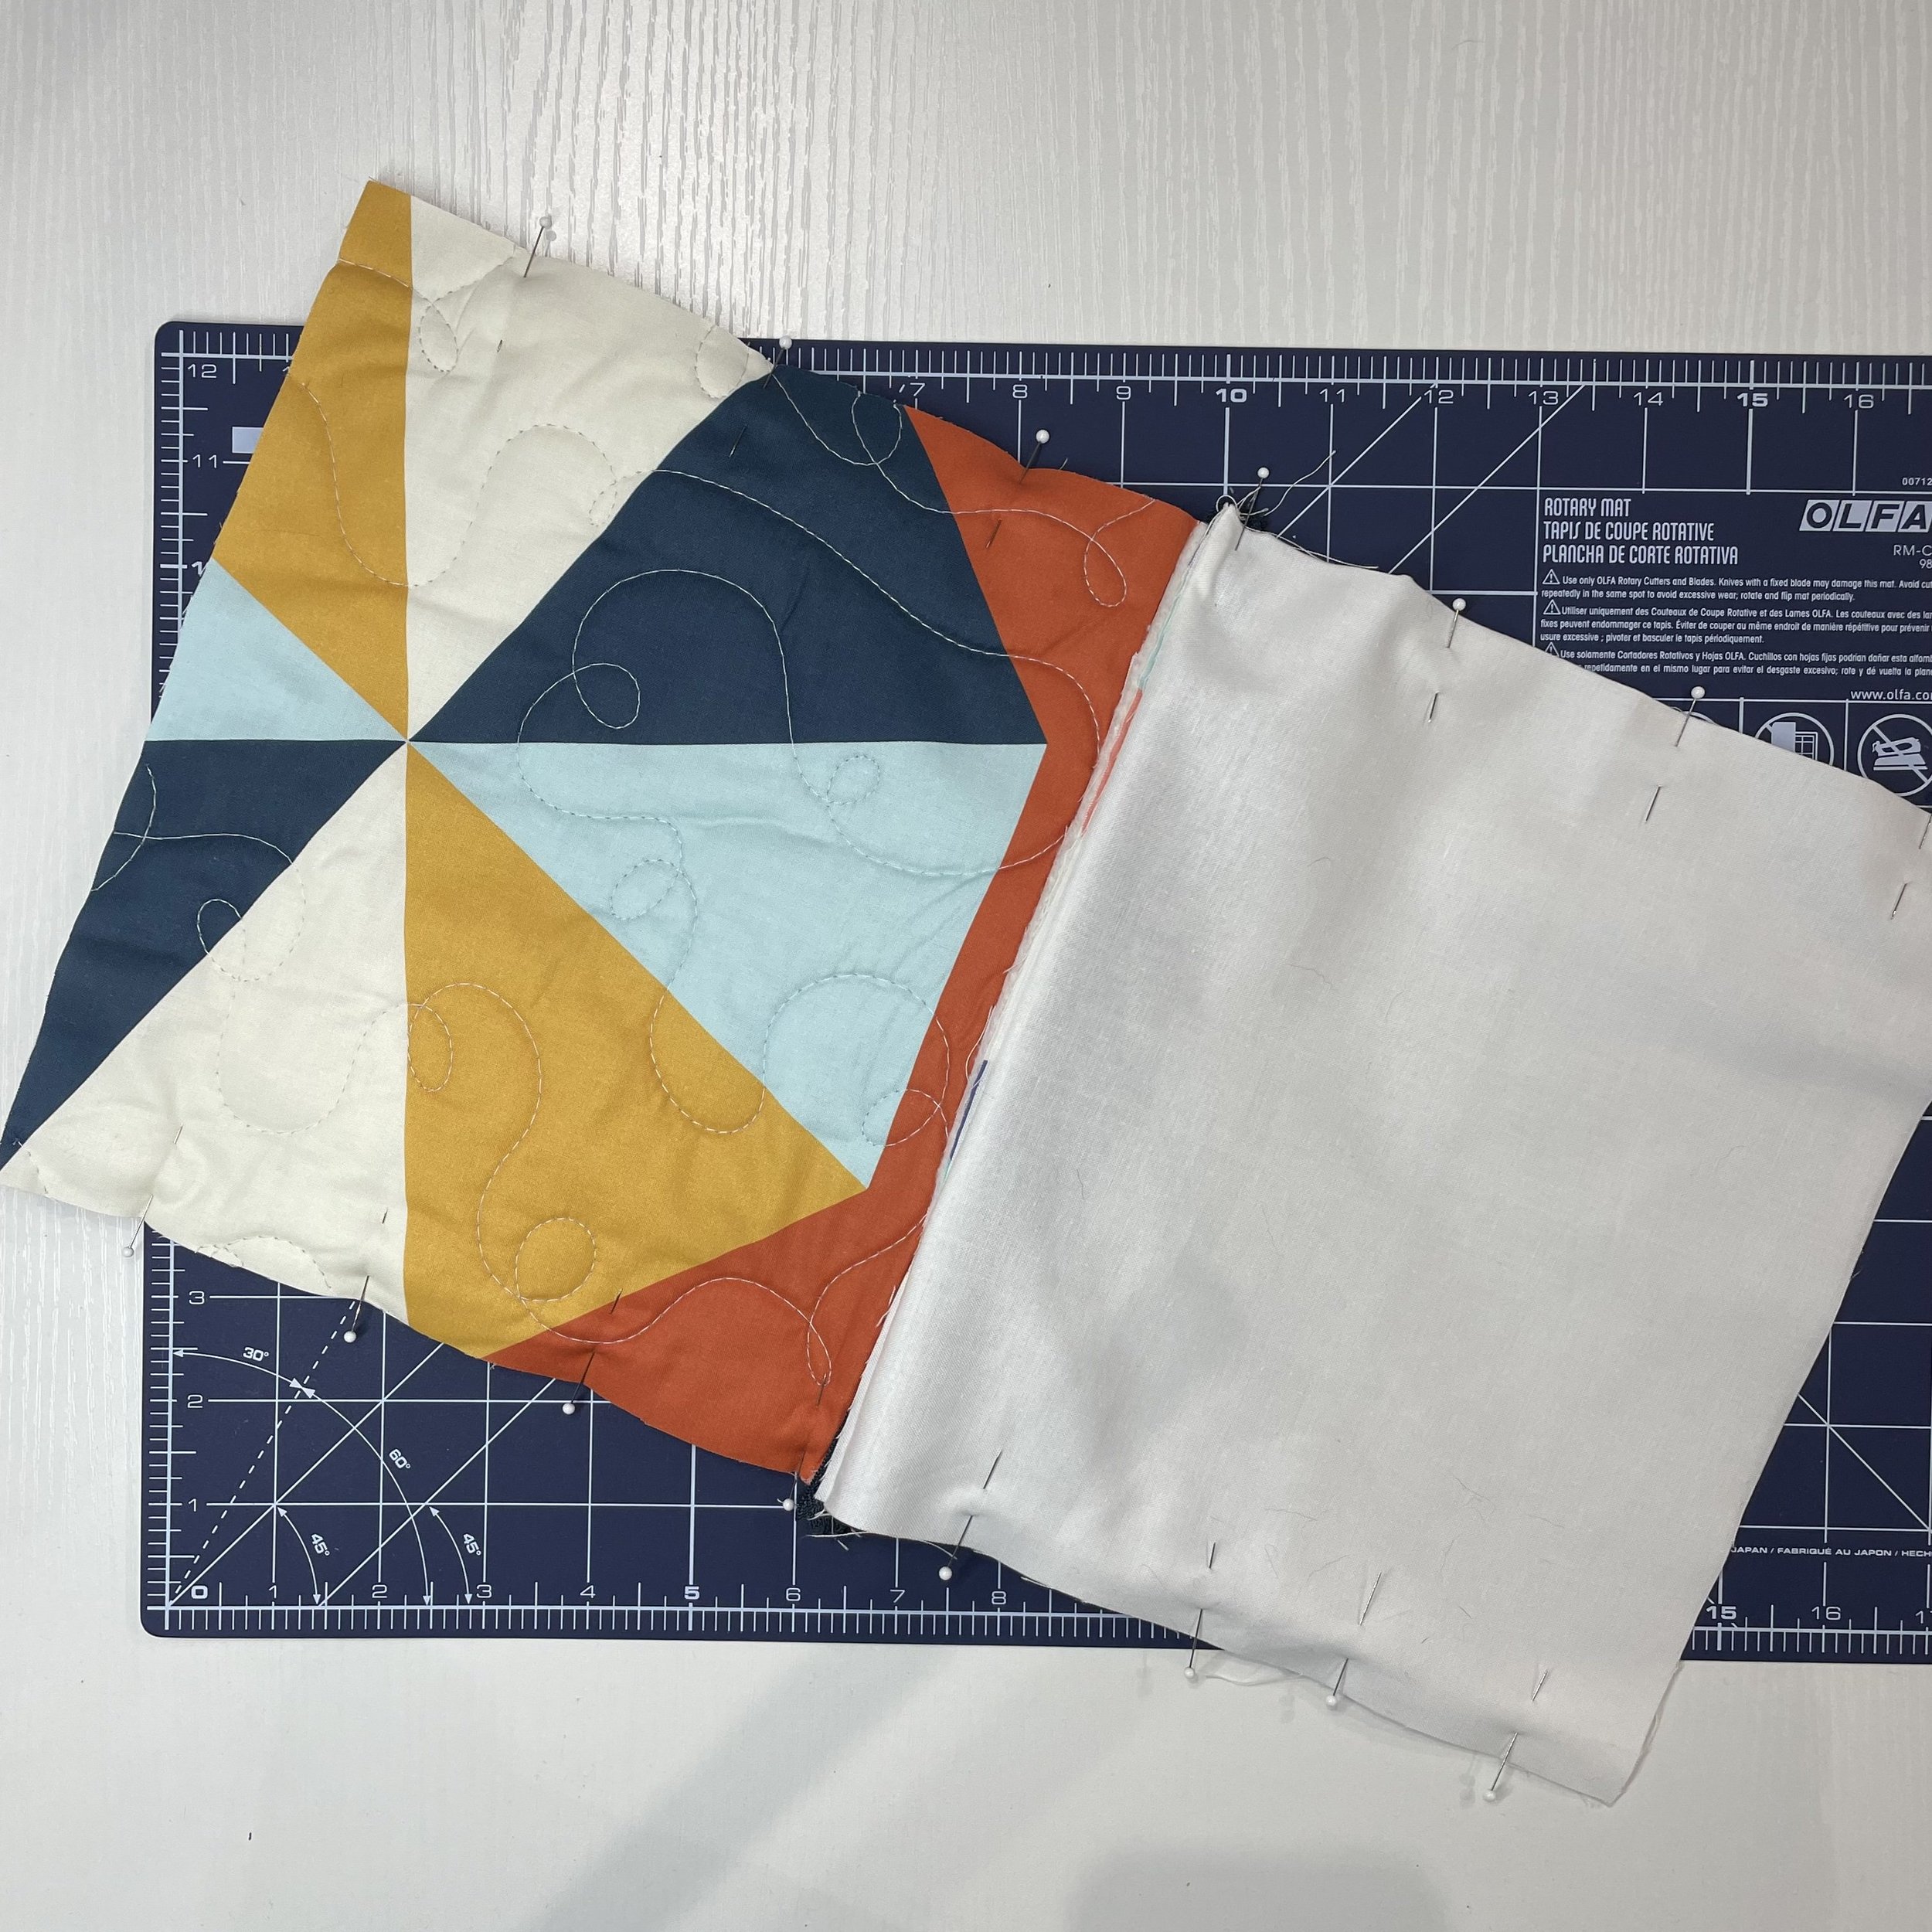

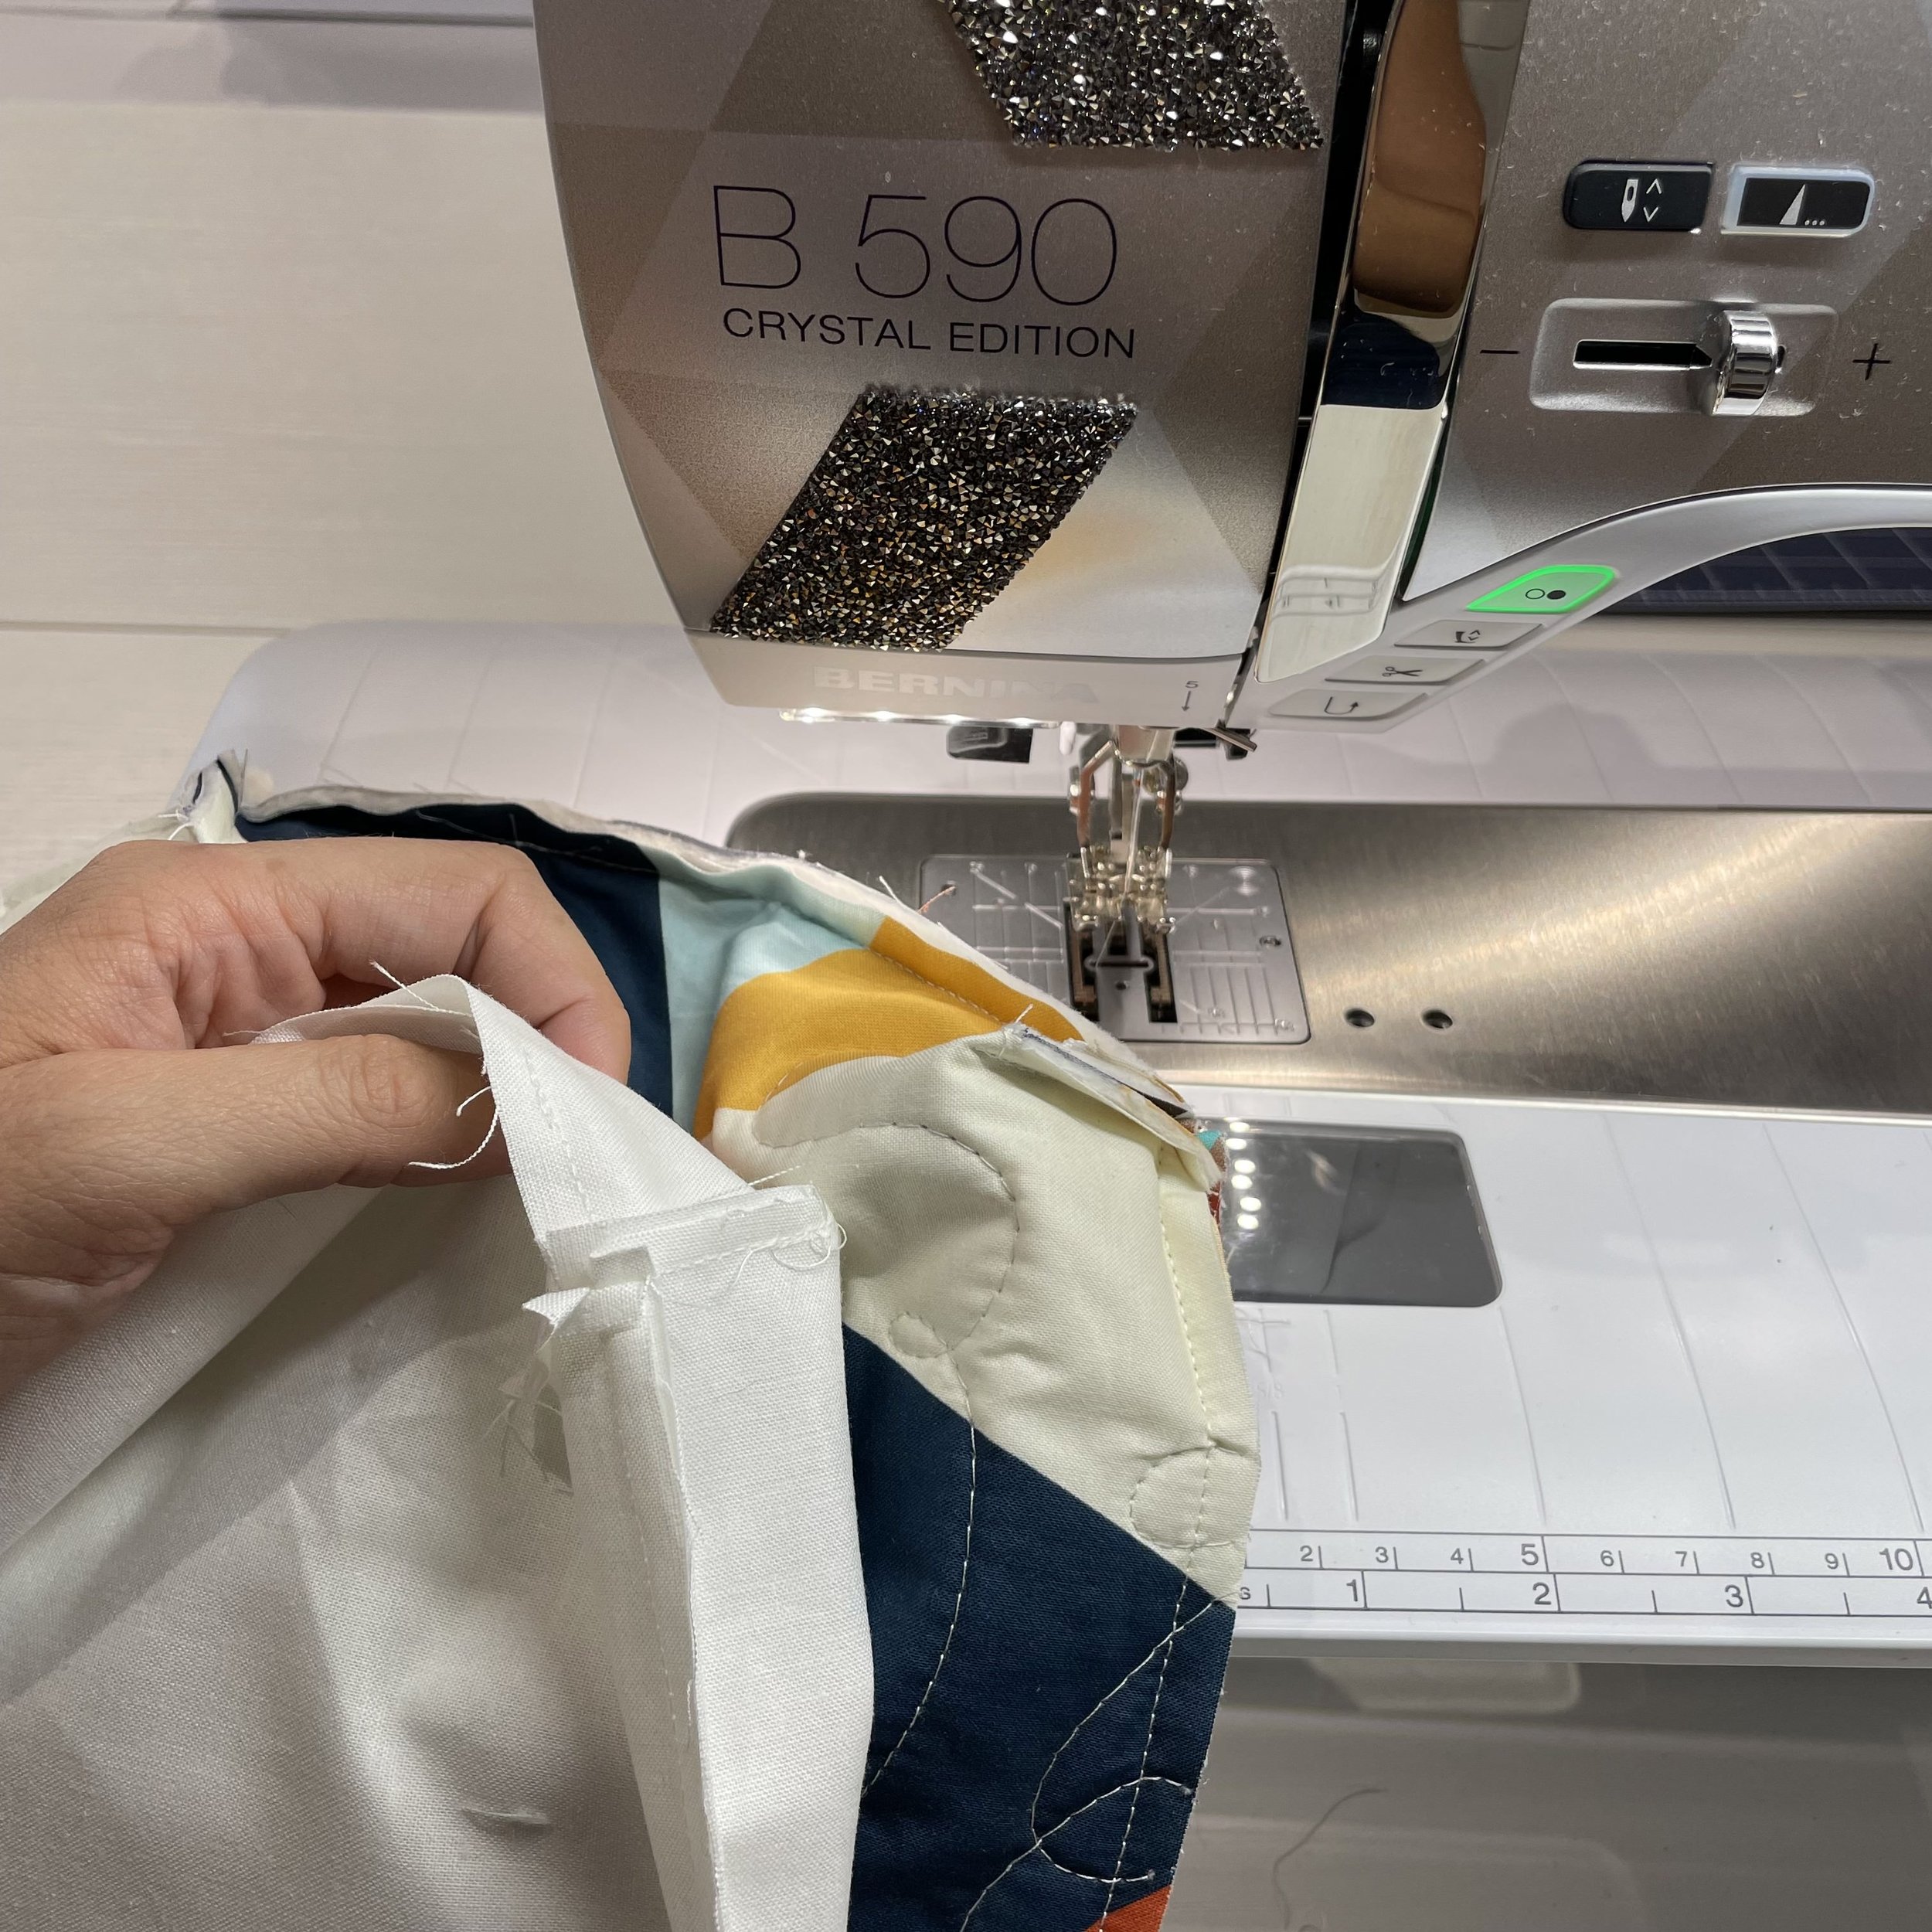
Next, folding the zipper tape toward the linings, pin the two quilted squares right sides together, and the two lining squares right sides together (As you can see, this creates one long rectangle with the zipper inside)
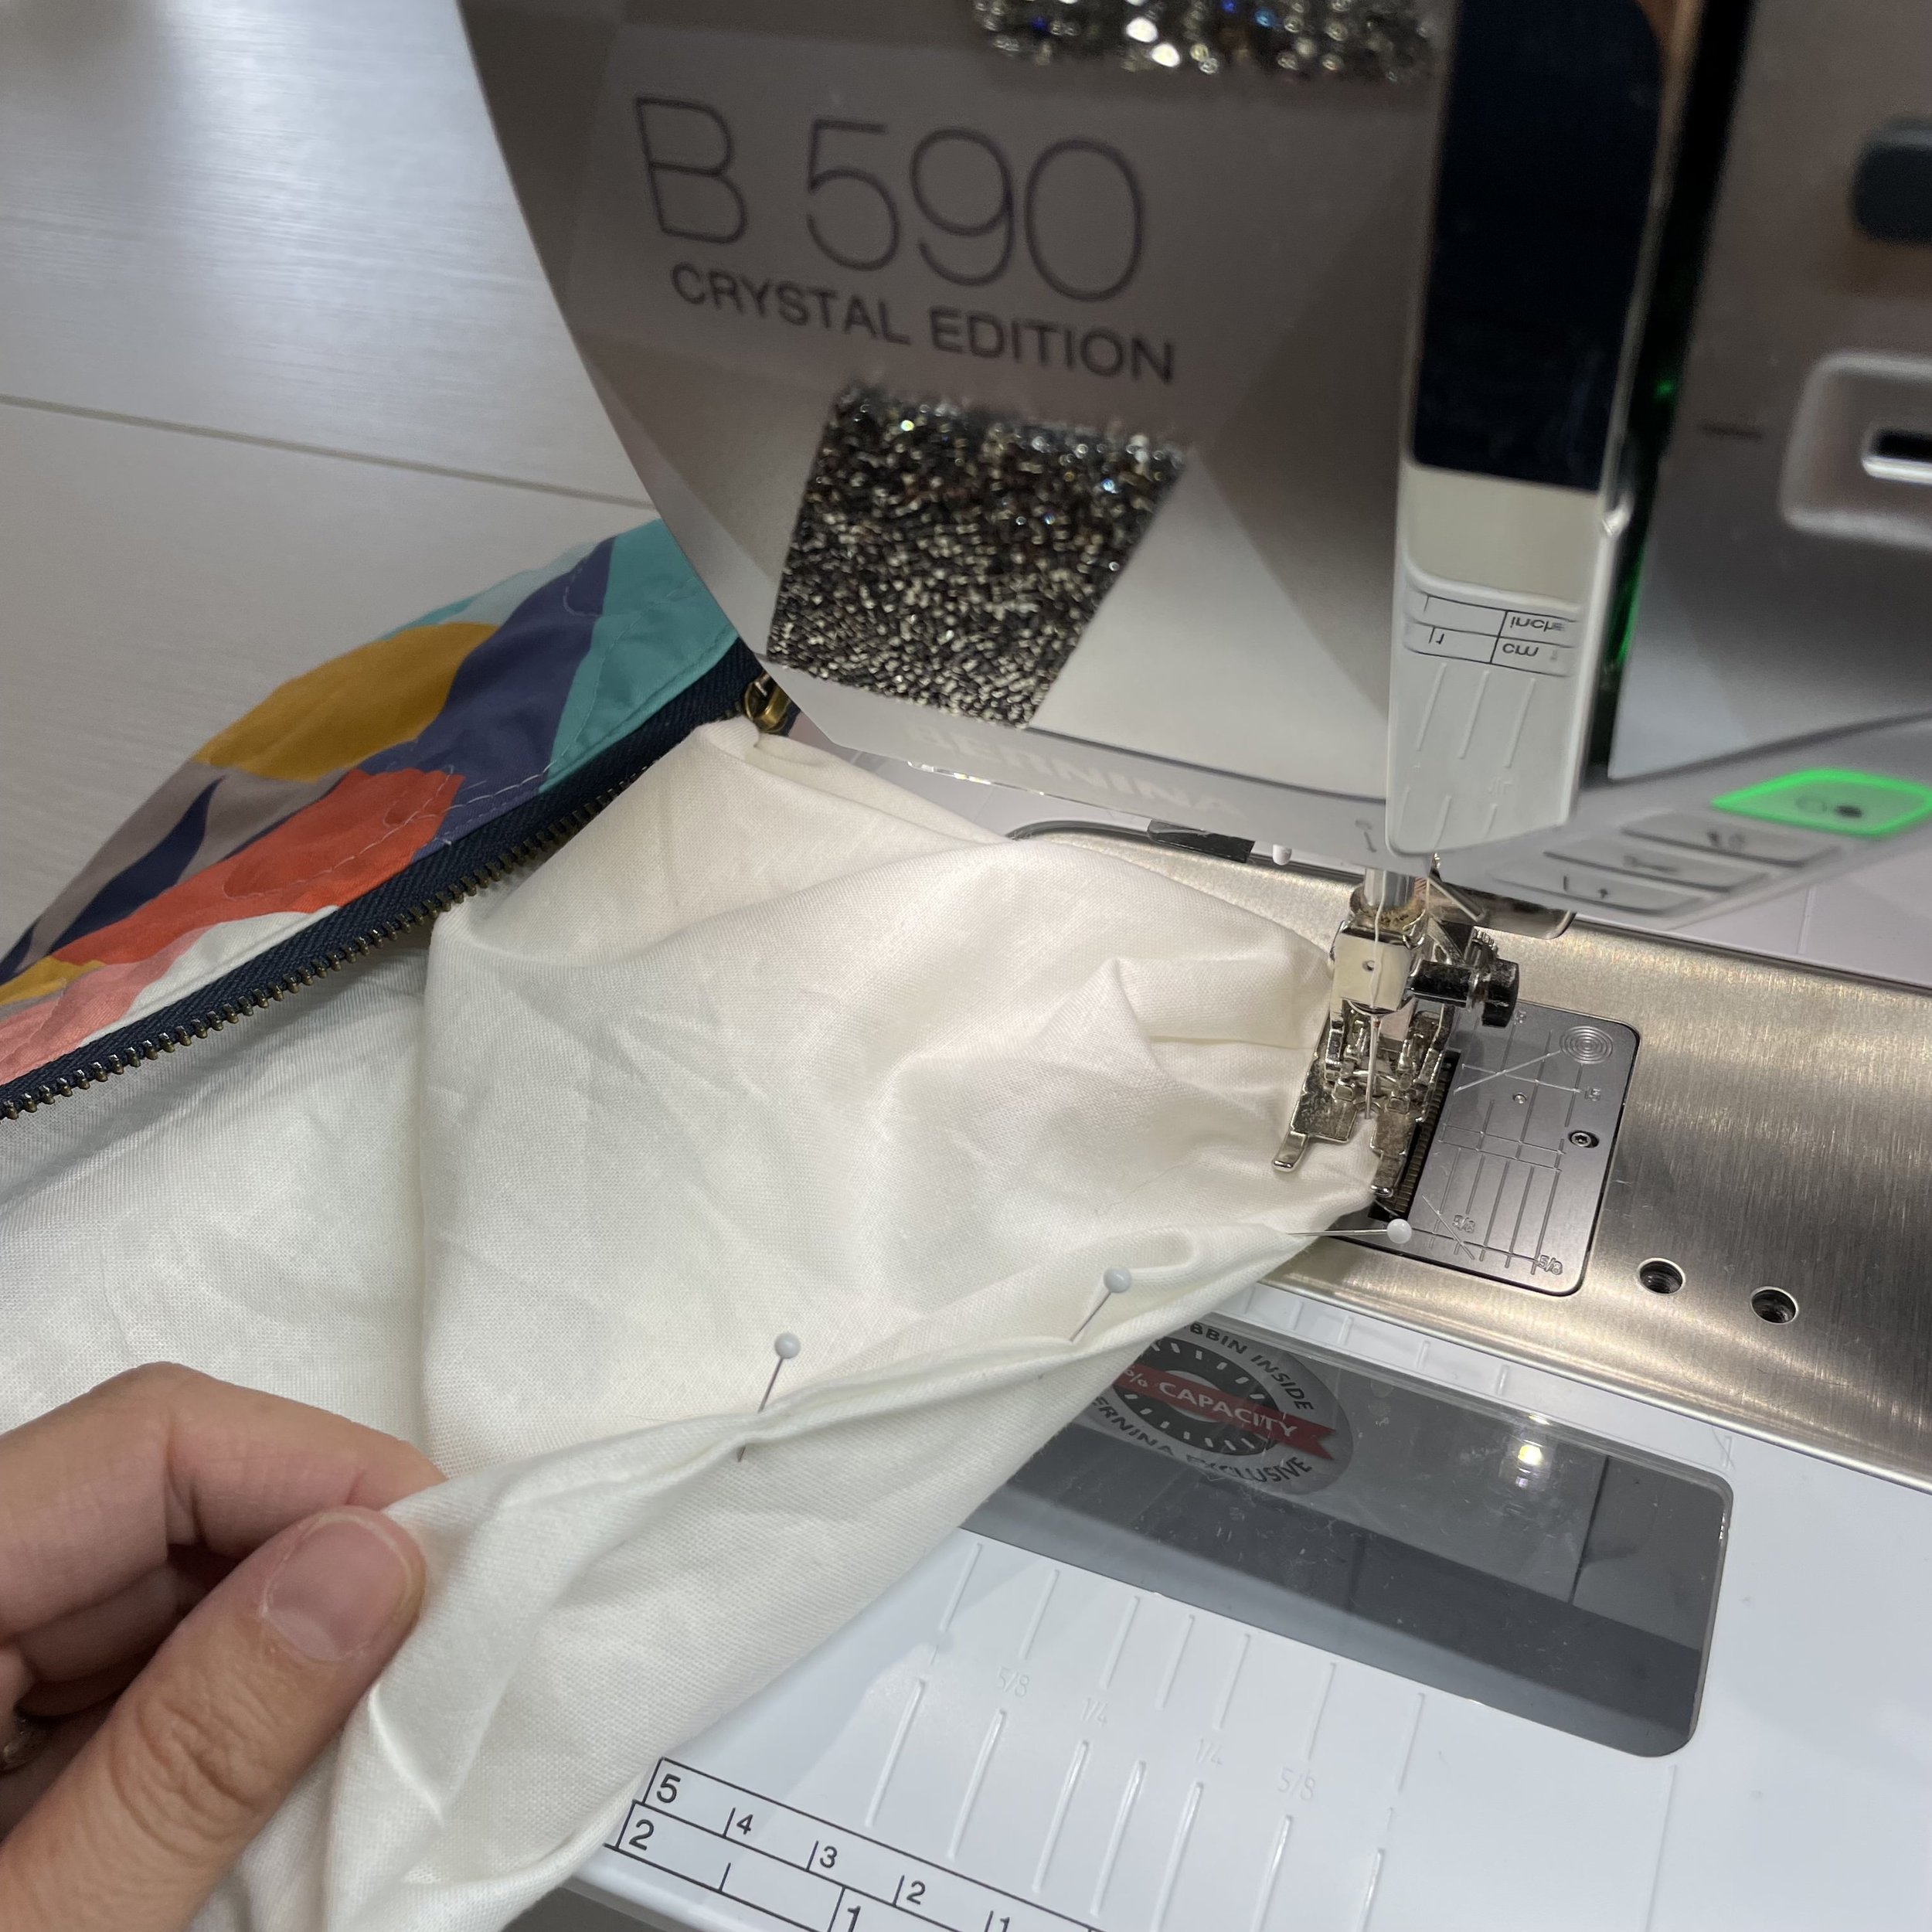
Sew 1/4” all the way around the rectangle, leaving a 3-4” gap in the bottom (short end) of the linings. For smoothest finish, press all seams open
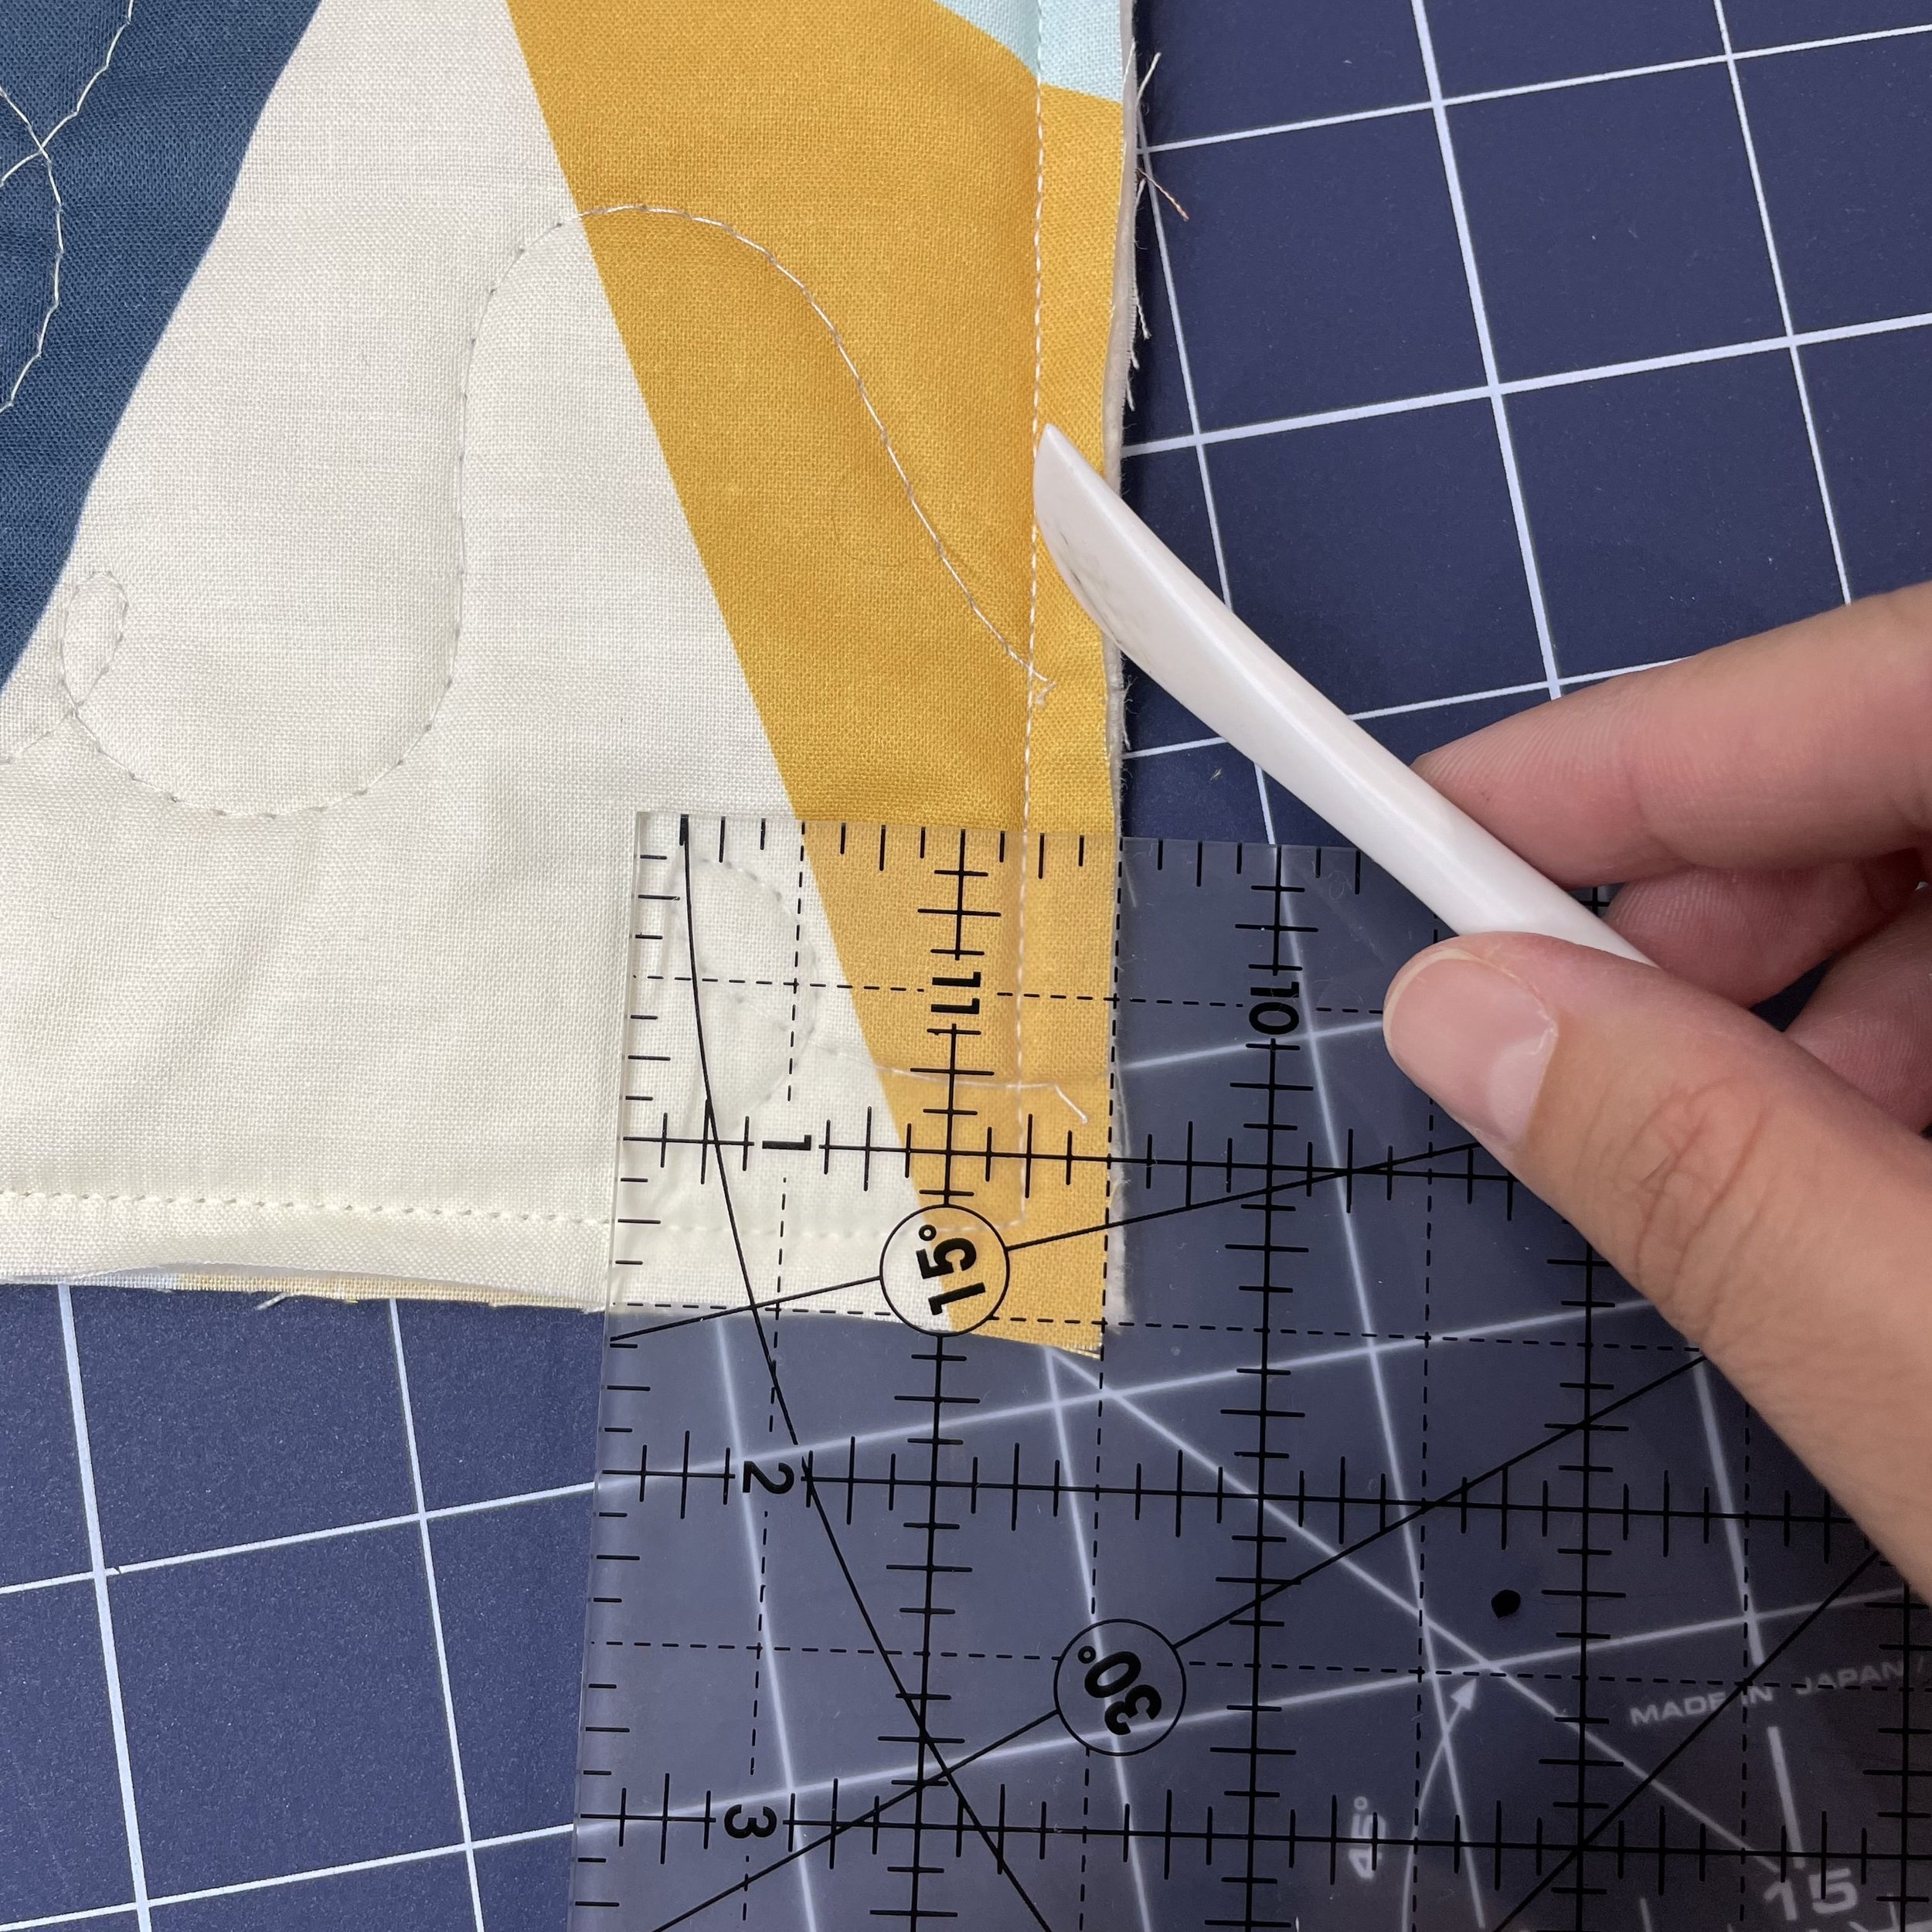
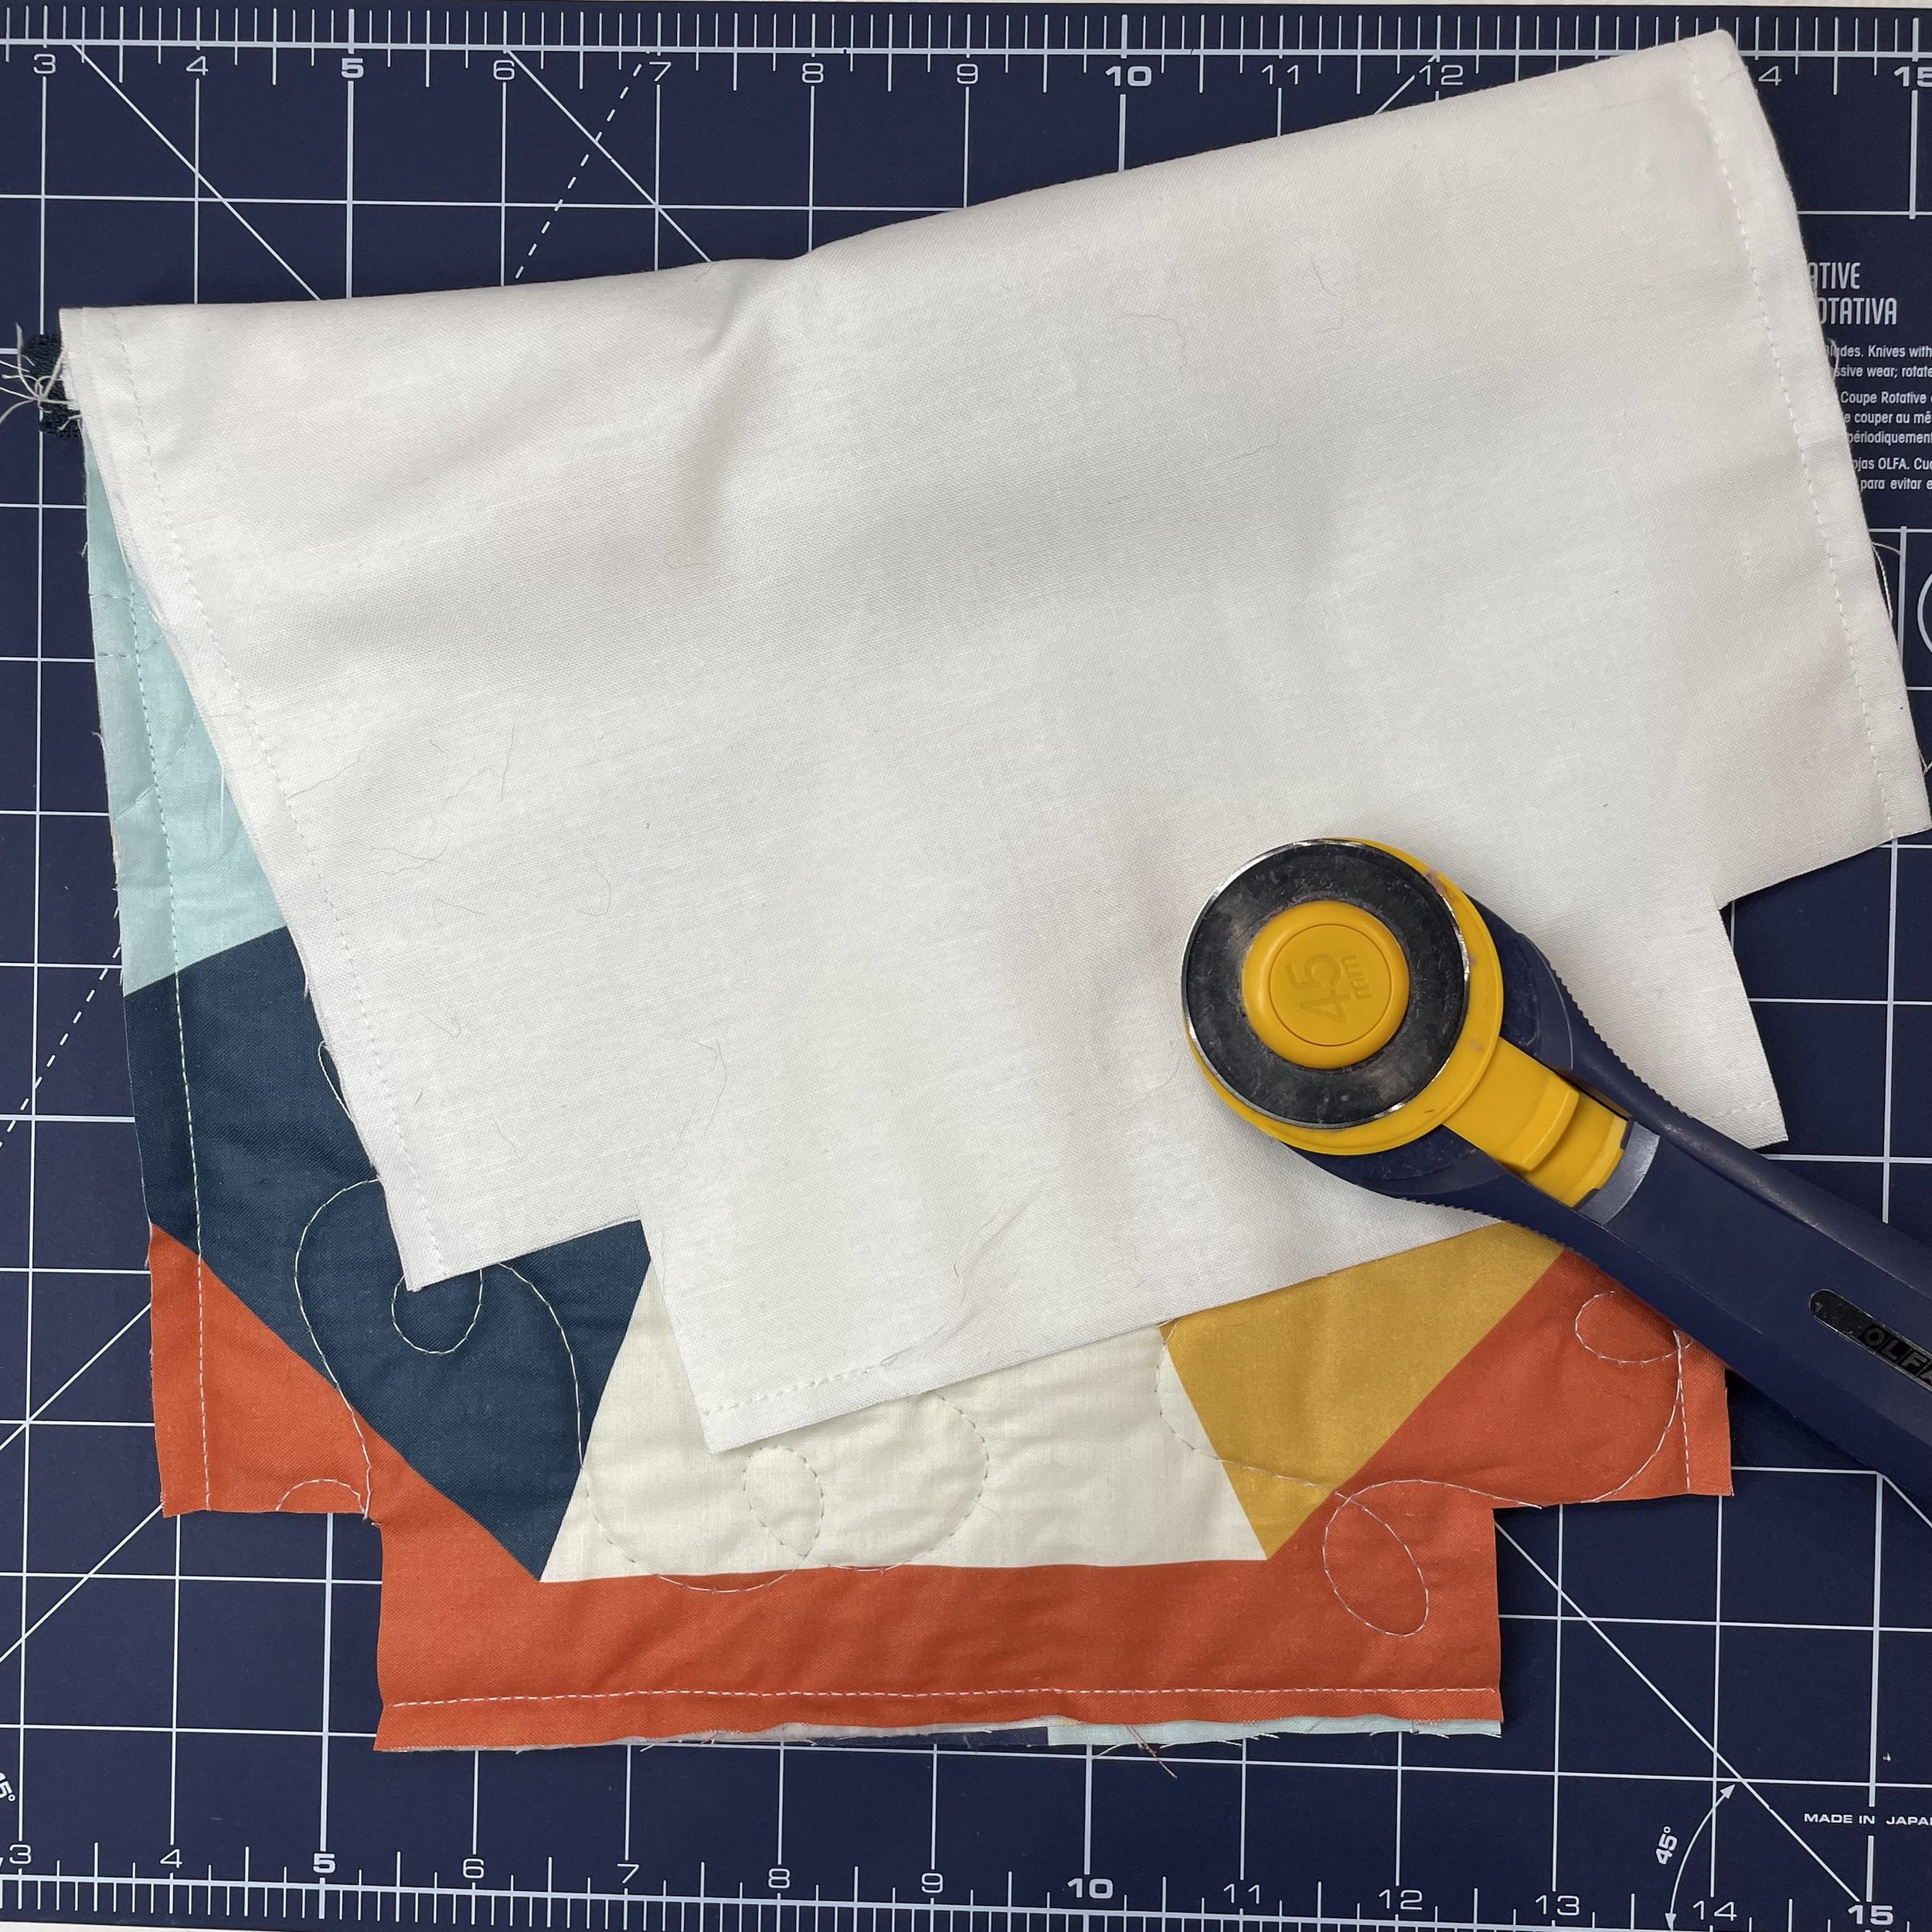
Mark & cut 1 1/2 inch squares in each corner (we’re creating the boxed corner)
At each corner, fold across each cut square so the seams “kiss” as shown. Sew 1/4 across this edge, then repeat for each corner
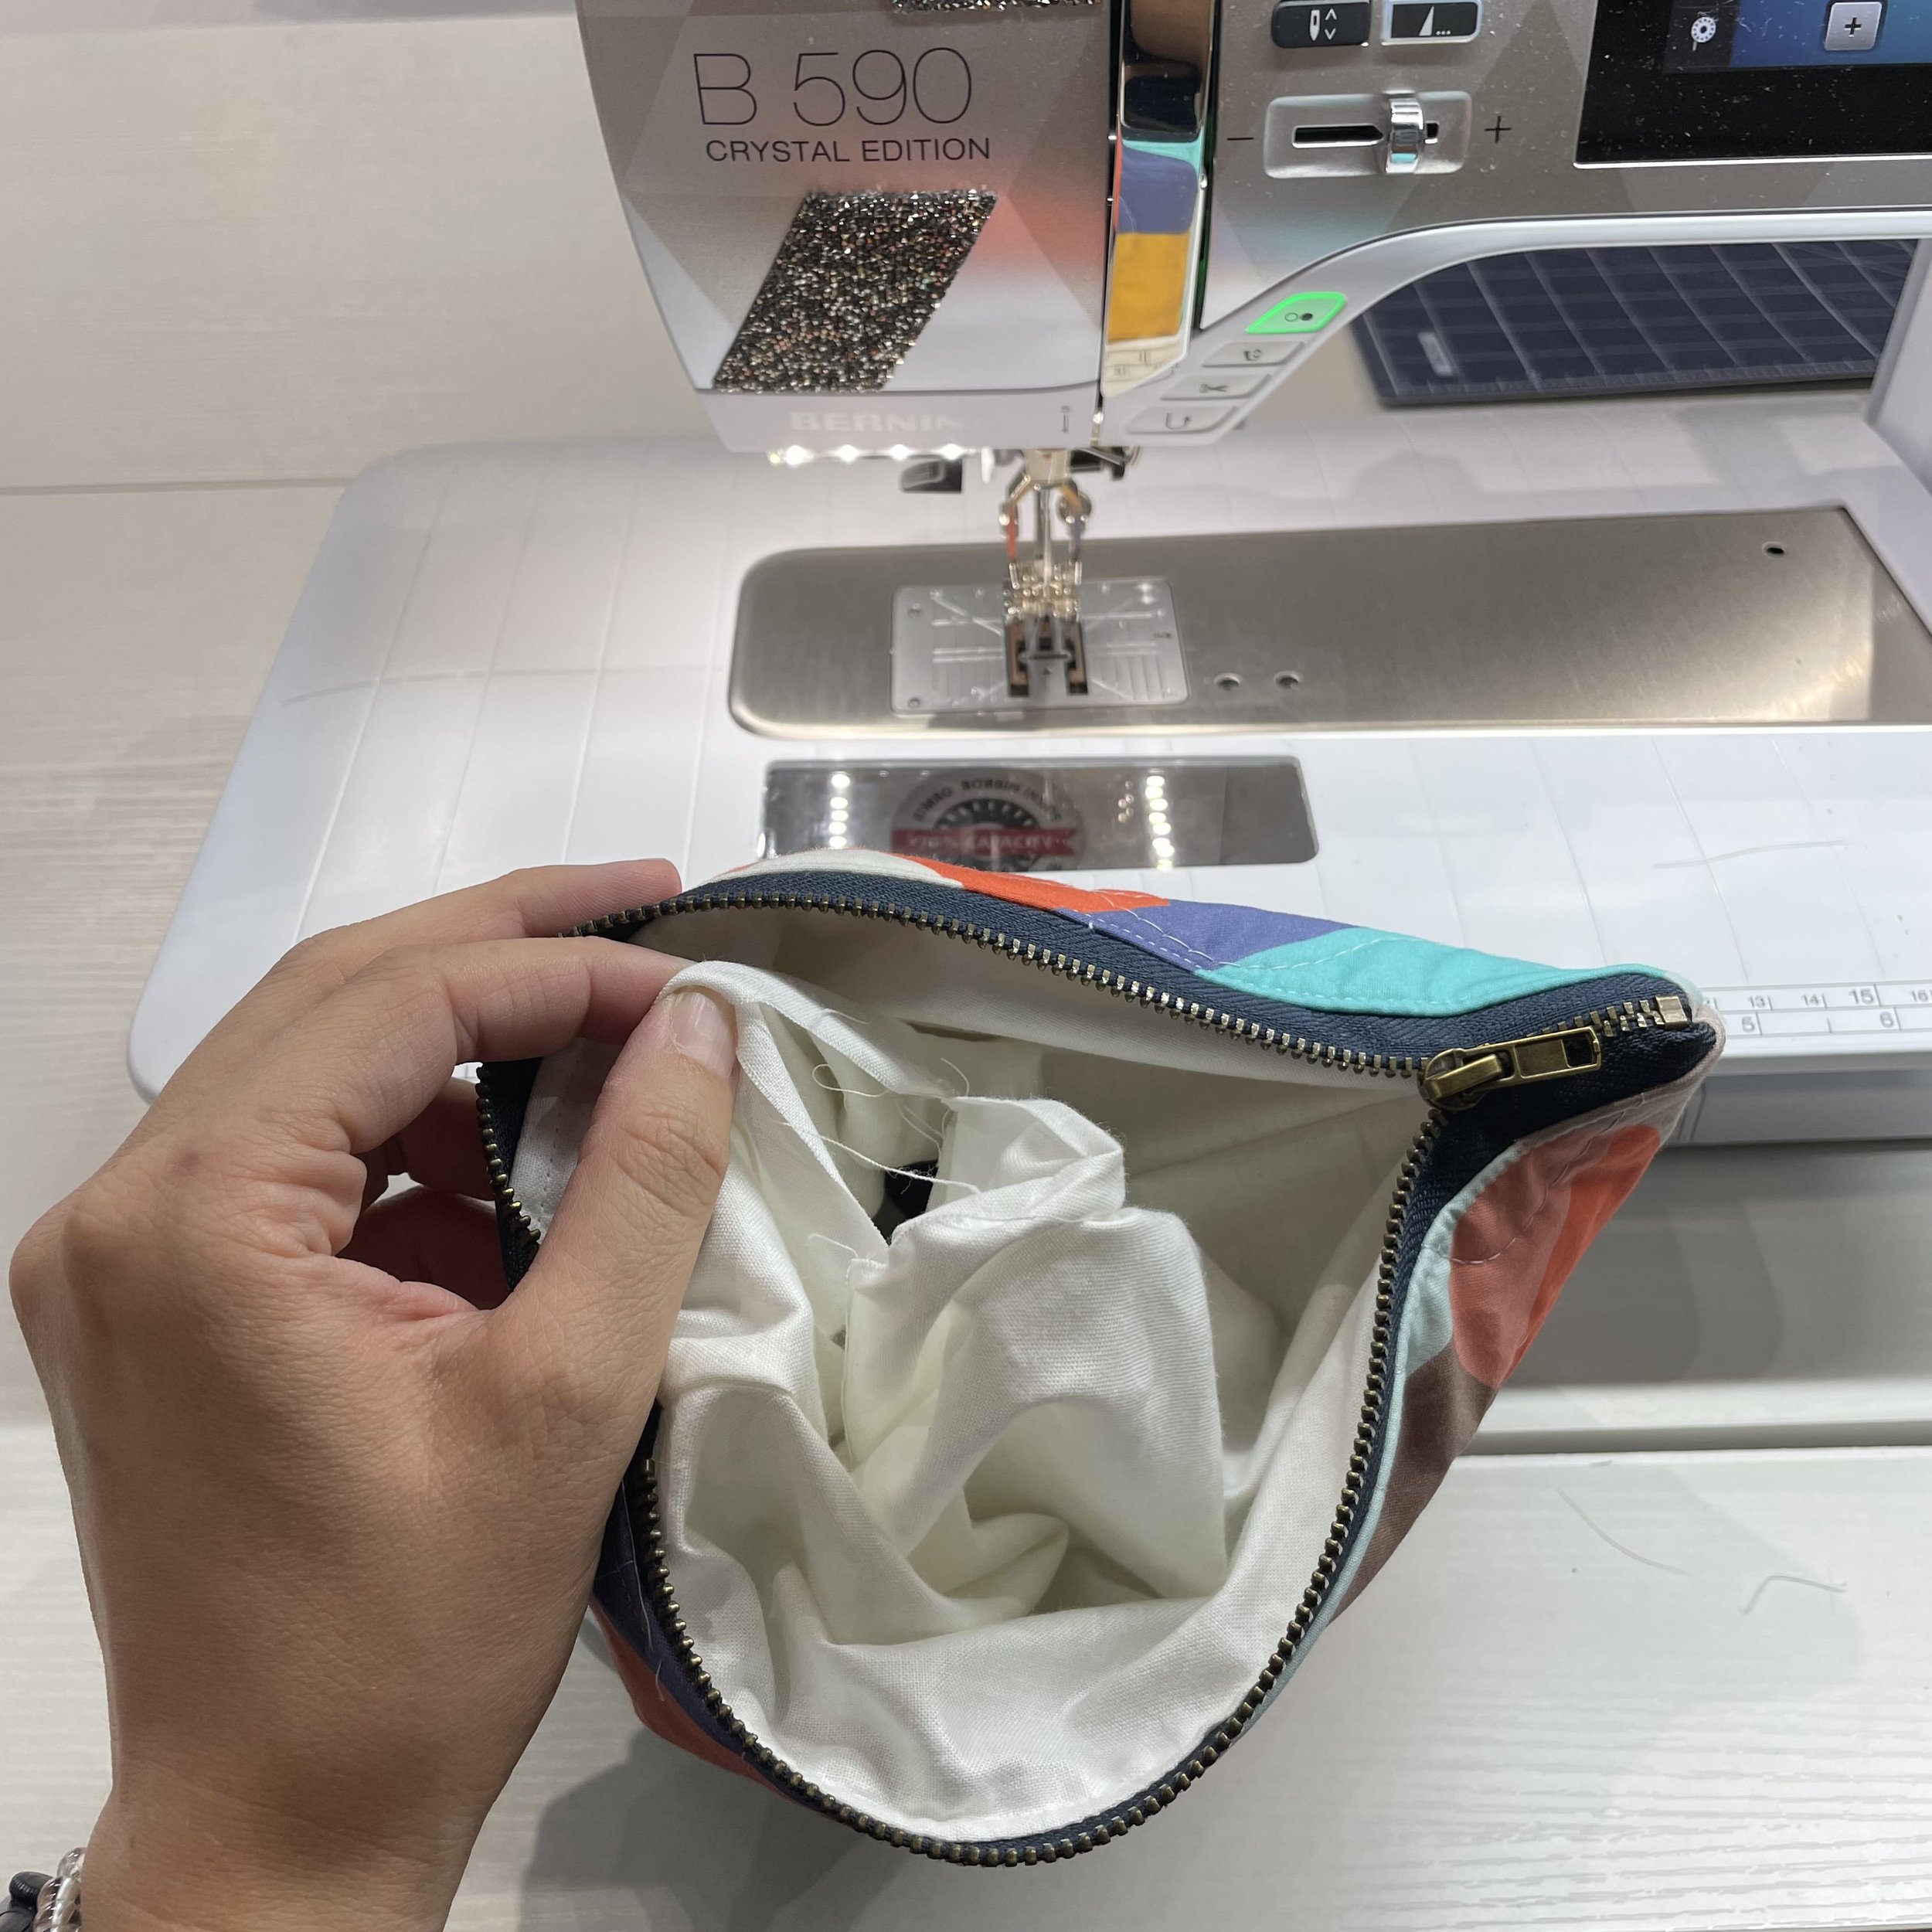
Turn entire bag through the opening at the bottom until it is completely right side out. Then, pull the lining back out, fold the raw edges of the opening into the interior, and stitch along the edge to close the gap. Tuck back into the bag, close your zipper, and VOILA!
